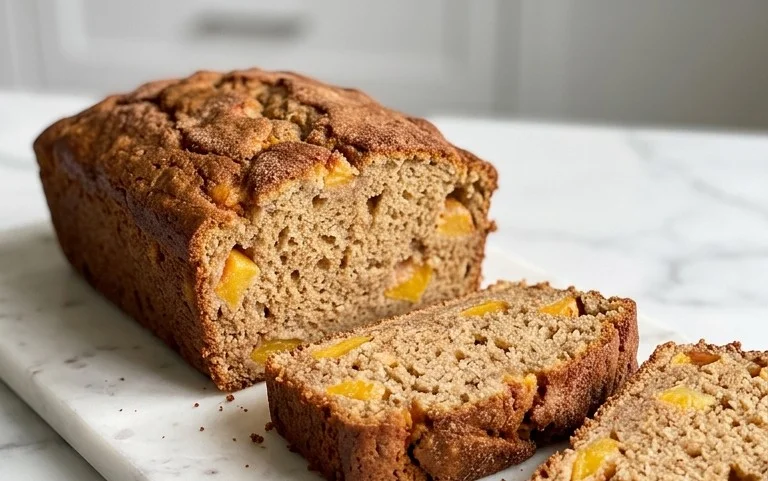
Easy Scones Recipe – Fluffy Baked Treats
Scones recipe dreams are made of are often filled with buttery layers, a slightly crisp exterior, and a tender, crum extractbly interior. There’s something inherently comforting and delightfully nostalgic about a perfectly baked scone. Whether you’re a seasoned baker or just starting your culinary journey, mastering the art of the scone is incredibly rewarding. These delightful little pastries have a way of elevating any occasion, transforming a simple afternoon tea into a special event. What makes scones so universally adored? It’s their incredible versatility – they’re the perfect canvas for both sweet and savory creations, and their humble simplicity belies their exquisite taste. This scones recipe will guide you to creating that perfect bite, every single time, ensuring your kitchen is filled with the irresistible aroma of freshly baked goodness.
Why Our Scones Recipe is a Winner
This isn’t just any scones recipe; it’s the one you’ll return to again and again. We’ve perfected the ratios to ensure a consistently light and fluffy texture, with just the right amount of richness. They’re surprisingly easy to whip up, making them ideal for a spontaneous treat or a planned brunch. Get ready to impress yourself and your loved ones with these truly exceptional scones!

Classic Scones Recipe
There’s something incredibly comforting about a warm, freshly baked scone. The slightly crisp exterior, the tender, fluffy interior, and that delightful crum extractb – it’s a simple pleasure that can elevate any breakfast, brunch, or afternoon tea. This recipe is my go-to for perfect, buttery scones that are wonderfully versatile. Whether you love the burst of fruit or the indulgence of chocolate, you can easily customize them with your favorite mix-ins. Let’s get baking!
Ingredients:
Getting Started: Preparing the Dough
The foundation of any great scone is a well-made dough. We’ll start by combining our dry ingredients. In a large mixing bowl, whisk together the all-purpose flour, granulated sugar, baking powder, and salt. This ensures that the leavening agent and seasoning are evenly distributed throughout the flour, which is crucial for a consistent rise and flavor.
Next, it’s time to incorporate the butter. This is a key step for achieving that coveted tender texture. Make sure your butter is very cold and cut into small cubes. You can then add the butter to the dry ingredients. Using your fingertips, a pastry blender, or a food processor on pulse setting, work the butter into the flour mixture until it resembles coarse crum extractbs, with some pea-sized pieces of butter still visible. These little pockets of butter will melt during baking, creating steam and contributing to the scone’s flakiness. Don’t overwork the mixture; we want those distinct butter pieces.
Bringin extractg it All Together: The Wet Ingredients
Now, let’s introduce the wet ingredients to our buttery crum extractbs. In a separate small bowl, whisk together the heavy cream and the lightly beaten egg. The egg adds richness and helps bind the dough. Pour this liquid mixture into the bowl with the dry ingredients.
Here’s where gentle handling is paramount. Use a fork or a spatula to gently mix the wet and dry ingredients until they just start to come together to form a shaggy dough. Again, avoid overmixing. Overworking the dough will develop the gluten in the flour, leading to tough scones, which is the last thing we want! It’s perfectly fine if there are still a few dry spots; they will incorporate as you add your mix-ins.
Adding the Fun: Mix-ins and Shaping
This is where you can let your creativity shine! If you’re using fresh berries, gently fold them into the dough. Be careful not to crush them too much, as this can bleed color into the dough and make it gummy. For chocolate chips or dried fruits, you can be a little more vigorous, but still, aim for a gentle incorporation. Make sure your mix-ins are distributed as evenly as possible.
Once your mix-ins are incorporated, turn the dough out onto a lightly floured surface. Gently bring the dough together with your hands and pat it into a disc about ¾ to 1 inch thick. This is a soft dough, so don’t worry if it’s a little sticky. If it’s proving difficult to handle, you can lightly flour your hands and the surface.
Cutting and Baking Your Scones
Now it’s time to cut the scones. You can use a sharp knife or a round biscuit cutter (about 2 to 2.5 inches in diameter). If using a cutter, press straight down without twisting, as twisting can seal the edges and prevent a good rise. You can cut the disc into wedges or use the cutter to create rounds. Reroll the scraps very gently, just once, to avoid toughness, and cut more scones.
Place your shaped scones onto a baking sheet lined with parchment paper. For an extra golden and beautiful finish, brush the tops of the scones with a little extra heavy cream. This also helps to create that lovely crisp exterior. You can also sprinkle a little granulated sugar on top for added sparkle and sweetness.
Preheat your oven to 400°F (200°C). Bake the scones for 15 to 20 minutes, or until they are golden brown and have risen beautifully. The exact baking time will depend on your oven and the size of your scones. You’ll know they’re ready when a toothpick inserted into the center comes out clean.
Allow the scones to cool on the baking sheet for a few minutes before transferring them to a wire rack to cool further. They are absolutely best served warm, ideally within a few hours of baking, with your favorite toppings like clotted cream, jam, or a dollop of butter. Enjoy the fruits of your delicious labor!

Conclusion:
So there you have it – a foolproof and utterly delightful scones recipe that’s perfect for any occasion! This recipe truly shines because it delivers beautifully tender and slightly crum extractbly scones with minimal fuss. The simple combination of pantry staples comes together to create a treat that feels both classic and special. I love how versatile these scones are; they’re fantastic for a leisurely weekend brunch, a charming afternoon tea, or even a quick and satisfying breakfast. Don’t hesitate to experiment with the flavour variations – adding fresh berries, a hint of lemon zest, or even a sprinkle of cheese can transform these simple scones into something truly unique. I sincerely encourage you to give this scones recipe a try; you’ll be amazed at how easy it is to achieve bakery-quality results right in your own kitchen. Enjoy the process, and most importantly, enjoy the delicious fruits of your labour!
Frequently Asked Questions:
Why are my scones tough?
Tough scones are often the result of overmixing the dough or handling it too much. Once the wet and dry ingredients are combined, mix just until they come together. Overworking the gluten in the flour will lead to a dense, tough texture. Also, ensure your butter is cold and cut into small pieces for the best texture.
How can I make my scones rise better?
Ensuring your baking powder is fresh is crucial for a good rise. Also, make sure your oven is preheated to the correct temperature before baking. Cold butter, cut into small pieces, also contributes to a lighter, flakier scone as it melts and creates steam in the oven, helping them to puff up.
Scones Recipe
A simple and versatile recipe for classic scones, perfect for breakfast or a tea-time treat. Easily customizable with your favorite mix-ins.
Ingredients
-
6 tablespoons unsalted butter
-
2 cups all-purpose flour
-
⅓ cup granulated sugar
-
1 tablespoon baking powder
-
½ teaspoon salt
-
½ cup plus 1 tablespoon heavy cream
-
1 large egg
-
up to 1 cup total mix-ins, as desired
Instructions
-
Step 1
Preheat oven to 400°F (200°C). Line a baking sheet with parchment paper. -
Step 2
In a large bowl, whisk together the all-purpose flour, granulated sugar, baking powder, and salt. -
Step 3
Cut in the cold unsalted butter using a pastry blender or your fingertips until the mixture resembles coarse crumbs. -
Step 4
In a separate small bowl, whisk together the heavy cream and lightly beaten egg. Make a well in the center of the dry ingredients and pour in the wet ingredients. Stir until just combined; do not overmix. -
Step 5
Gently fold in any desired mix-ins, such as fresh blueberries or mini chocolate chips. -
Step 6
Turn the dough out onto a lightly floured surface and gently pat into a disc about 3/4-inch thick. Cut into 8 wedges or use a round cutter. -
Step 7
Place the scones on the prepared baking sheet. Brush the tops with a little extra heavy cream. Bake for 15-20 minutes, or until golden brown.
Important Information
Nutrition Facts (Per Serving)
It is important to consider this information as approximate and not to use it as definitive health advice.
Allergy Information
Please check ingredients for potential allergens and consult a health professional if in doubt.