M&M Cookie Pizza Recipe- Easy Fun Dessert
M&M Cookie Pizza is more than just a dessert; it’s a delightful explosion of color, flavor, and pure unadulterated joy! Imagin extracte your favorite chewy, buttery chocolate chip cookie dough, baked to golden perfection, but on a grand scnon-alcoholic ale – a pizza-sized canvas ready to be adorned with a vibrant mosaic of M&Ms. What’s not to love? This dish effortlessly combines the comforting nostalgia of a classic cookie with the fun, shareable nature of a pizza, making it an instant crowd-pleaser at any gathering, from birthday parties to casual movie nights. The beauty of an M&M Cookie Pizza lies in its simplicity and its spectacular visual appeal. It’s incredibly easy to make, meaning you can whip up a batch of happiness in no time, and the customizable nature of the M&M toppings allows everyone to personalize their slice of deliciousness. Get ready to elevate your dessert game with this show-stopping, utterly irresistible M&M Cookie Pizza that’s guaranteed to bring smiles all around.
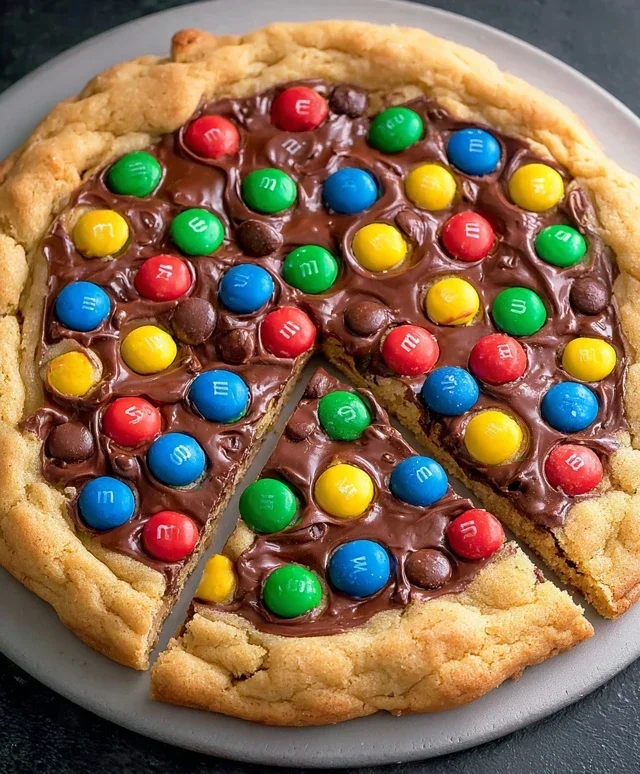
M&M Cookie Pizza
Get ready for a treat that’s as fun to make as it is to eat! This M&M Cookie Pizza is a delightful twist on a classic chocolate chip cookie, transformed into a giant, shareable disc brimming with colorful M&M candies. It’s perfect for parties, family movie nights, or just when you need a serious sugar fix. Imagin extracte a giant, soft, chewy cookie base, studded with melty chocolate chips and those iconic candy-coated chocolate gems. The best part? It’s surprisingly easy to whip up. So, grab your apron and let’s get baking!
Ingredients:
Baking the Cookie Base
1. Preheat and Prepare: First things first, let’s get our oven ready. Preheat your oven to 350°F (175°C). This ensures a nice, even bake. While the oven is heating, prepare your baking sheet. I like to line a large baking sheet with parchment paper. This does two things: it prevents the cookie from sticking, making for easy removal and cleanup, and it helps with even heat distribution. You can also lightly grease the parchment paper for extra security if you’re worried about sticking.
2. Combine Dry Ingredients: In a medium-sized bowl, whisk together the all-purpose flour, baking powder, and salt. Whisking them thoroughly ensures that the leavening agent (baking powder) and the salt are evenly distributed throughout the flour, which will lead to a consistent texture in your cookie pizza. No one wants a pocket of salty dough or an under-risen patch!
3. Cream Wet Ingredients and Sugars: In a separate, larger bowl, you’ll combine the wet ingredients and sugars. Add the melted and slightly cooled unsalted butter to the bowl. Make sure the butter isn’t piping hot, as it could cook the egg when you add it. Next, add the light brown sugar and granulated sugar. Using a whisk or an electric mixer on medium speed, cream these ingredients together until they are light and fluffy. This process incorporates air, which contributes to the cookie’s texture. It’s important to get a good mix here; the sugars should be mostly dissolved into the butter.
4. Add Egg and Vanilla: Now, it’s time to add the flavor enhancers and binder. Crack the large egg into the creamed sugar and butter mixture. For best results, ensure your egg is at room temperature. This helps it incorporate more smoothly into the batter, preventing it from seizing up the butter. Add the teaspoon of vanilla extract. Vanilla extract is crucial for that classic cookie aroma and taste, so don’t skip it! Beat everything together until it’s well combined and the mixture is smooth and slightly lighter in color.
5. Combine Wet and Dry, Then Fold in Goodies: Gradually add the dry ingredients (from step 2) to the wet ingredients (from step 4). Mix on low speed or stir with a spatula until just combined. Be careful not to overmix at this stage, as overmixing can develop the gluten in the flour too much, resulting in a tough cookie. Once the dough is almost formed, gently fold in ¾ cup of the M&M candies and the ⅓ cup of milk chocolate chips. Use a spatula for this to avoid breaking the M&Ms too much. The dough will be thick and slightly sticky, which is exactly what we want for a chewy cookie pizza.
Shaping and Baking Your Pizza
6. Form the Pizza: Transfer the cookie dough onto your prepared baking sheet. Now, here’s where the “pizza” part comes in! Use your hands or a spatula to spread the dough out into a large, round disc, about 10-12 inches in diameter. Aim for an even thickness throughout to ensure uniform baking. You can make the edges slightly thicker than the center, like a traditional pizza crust, if you like. This is where you can get creative with the shape!
7. Bake Until Golden: Place the cookie pizza into your preheated oven. Bake for approximately 18-22 minutes, or until the edges are golden brown and the center looks set but still slightly soft. The baking time can vary depending on your oven, so keep an eye on it, especially towards the end of the baking period. You don’t want it to get too dark. The aroma filling your kitchen will be absolutely divine!
Finishing Touches
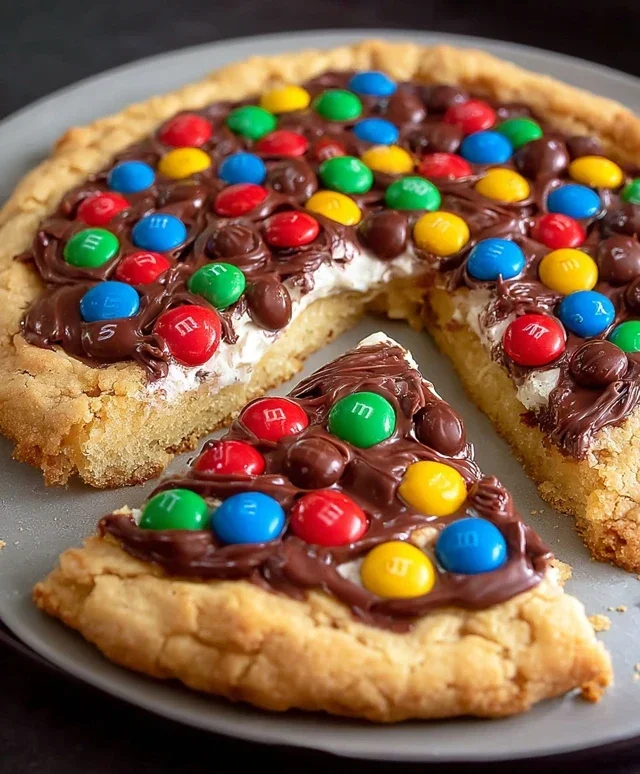
8. Add Remaining Toppings: Once your cookie pizza is out of the oven, it’s time for the final, delicious flourish. Immediately sprinkle the remaining ¼ cup of M&M candies evenly over the warm cookie. The residual heat from the cookie will help them adhere slightly and give them a gentle melt, creating those beautiful pools of color and chocolate.
9. Cool and Serve: Let the M&M Cookie Pizza cool on the baking sheet for at least 10-15 minutes before attempting to move it. This allows the cookie to firm up, making it easier to handle without breaking. Once it has cooled enough, carefully transfer it to a wire rack to cool completely, or serve it warm for that irresistible gooey chocolate experience. Slice it into wedges like a real pizza, and watch it disappear! Enjoy your amazing homemade M&M Cookie Pizza!
Conclusion:
There you have it – your guide to creating a spectacular M&M Cookie Pizza! This recipe truly is a winner because it combines the comforting familiarity of a classic cookie with the fun, shareable nature of a pizza. It’s incredibly forgiving, surprisingly easy to make, and the result is a show-stopping dessert that’s guaranteed to bring smiles to everyone’s faces. Imagin extracte a warm, chewy, chocolate chip cookie base, generously studded with vibrant M&M’s, all ready to be sliced and devoured. It’s the perfect centerpiece for parties, a delightful weekend treat, or even a creative way to end a family dinner. Don’t be afraid to experiment with different M&M colors or even mix in some white chocolate chips for an extra layer of sweetness! I truly encourage you to give this M&M Cookie Pizza a try; I’m confident you’ll love it as much as I do.
Frequently Asked Questions:
Can I use different types of M&M’s?
Absolutely! The beauty of this M&M Cookie Pizza is its versatility. Feel free to use peanut M&M’s, caramel M&M’s, or even seasonal varieties for a unique twist. Just be mindful that some fillings might melt differently, potentially altering the final appearance slightly.
How should I store leftover M&M Cookie Pizza?
If you happen to have any leftovers (which is unlikely!), store your M&M Cookie Pizza in an airtight container at room temperature for up to 3 days. For longer storage, you can freeze individual slices wrapped tightly in plastic wrap and then in a freezer-safe bag for up to 2 months. Simply thaw at room temperature or gently warm in a low oven.
What are some other topping ideas?
Beyond M&M’s, the possibilities are endless! Consider adding sprinkles for extra color, mini chocolate chips for more chocolatey goodness, or even a drizzle of melted white chocolate or caramel sauce after baking for a decadent finish. Chopped nuts would also add a lovely crunch.
M&M Cookie Pizza
A delightful and colorful cookie pizza loaded with M&M’s and chocolate chips, perfect for sharing.
Ingredients
-
1 cup all-purpose flour
-
½ teaspoon baking powder
-
¼ teaspoon salt
-
¼ cup unsalted butter, melted and cooled
-
¼ cup light brown sugar
-
2 tablespoons granulated sugar
-
1 large egg, room temperature
-
1 teaspoon vanilla extract
-
¾ cup M&M candies
-
⅓ cup milk chocolate chips
-
¼ cup M&M candies
Instructions
-
Step 1
Preheat oven to 350°F (175°C). Grease and flour a 9-10 inch pizza pan or a round cake pan. -
Step 2
In a medium bowl, whisk together the flour, baking powder, and salt. -
Step 3
In a separate large bowl, cream together the melted butter, light brown sugar, and granulated sugar until well combined. -
Step 4
Beat in the egg and vanilla extract until smooth. -
Step 5
Gradually add the dry ingredients to the wet ingredients, mixing until just combined. Stir in ¾ cup of M&M candies and the milk chocolate chips. -
Step 6
Spread the cookie dough evenly into the prepared pizza pan. -
Step 7
Sprinkle the remaining ¼ cup of M&M candies over the top of the dough. -
Step 8
Bake for 10-14 minutes, or until the edges are golden brown and the center is set. Do not overbake. -
Step 9
Let cool in the pan for a few minutes before transferring to a wire rack to cool completely. Slice and serve.
Important Information
Nutrition Facts (Per Serving)
It is important to consider this information as approximate and not to use it as definitive health advice.
Allergy Information
Please check ingredients for potential allergens and consult a health professional if in doubt.