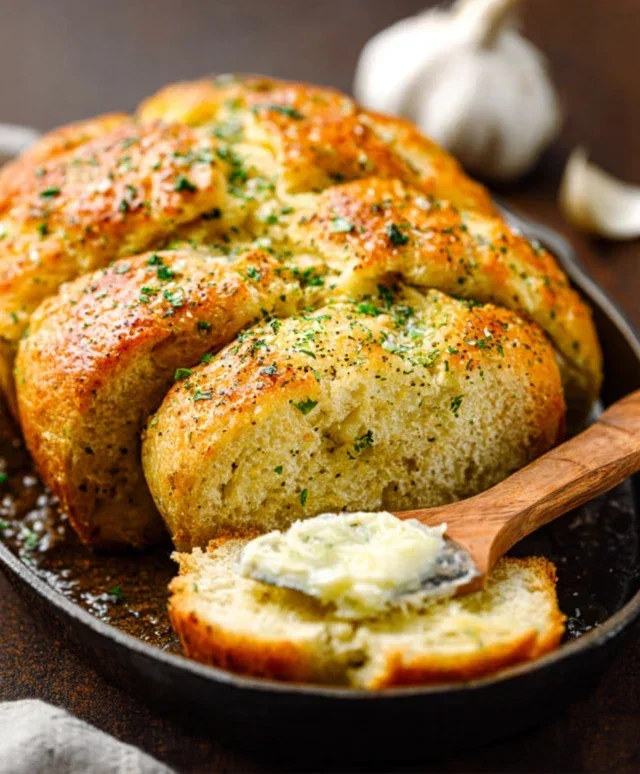
Garlic Butter Keto Bread- Easy Low Carb Recipe
Garlic Butter Keto Bread is the ultimate treat for anyone embracing a ketogenic lifestyle, and let me tell you, it’s a game-changer! For so long, bread felt like a forbidden luxury on keto, a culinary dream just out of reach. But this Garlic Butter Keto Bread shatters all those limitations. Imagin extracte sinking your teeth into a warm, impossibly soft slice, fragrant with the irresistible aroma of toasted garlic and rich, melted butter. It’s pure indulgence, without the carb guilt. What makes this recipe truly special is its incredible texture and flavor. We’ve cracked the code to achieving that perfect crum extractb that’s both hearty and delightfully chewy, all while keeping it strictly low-carb. Forget bland, crum extractbly keto alternatives; this is the real deal, perfect for dipping in soup, toasting with your favorite avocado, or simply enjoying on its own.
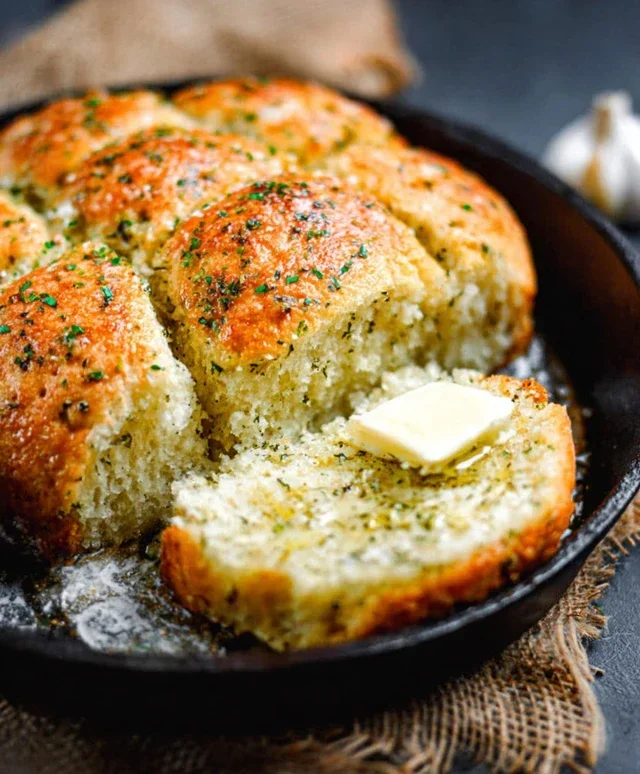
Garlic Butter Keto Bread
Welcome to a recipe that’s been a game-changer in my keto kitchen! This Garlic Butter Keto Bread is incredibly simple to make and tastes so remarkably like traditional bread, you’ll be doing a double-take. It’s the perfect accompaniment to your favorite soups, stews, or simply toasted and slathered with more butter. Forget those dry, crum extractbly keto bread recipes of the past; this one is moist, flavorful, and holds its structure beautifully. Get ready to enjoy the simple pleasure of good bread again, without the carb guilt.
Ingredients:
Get Ready to Bake: Step-by-Step Instructions
This recipe is designed to be straightforward, even if you’re new to keto baking. The key is to have all your ingredients measured out and ready to go before you begin extract. Room temperature eggs and water help everything emulsify properly, leading to a better texture.
1. Preheat and Prepare Your Baking Vessel: First things first, let’s get your oven ready. Preheat it to 350°F (175°C). While the oven is heating up, prepare your baking pan. I like to use a standard 8×4 inch loaf pan. To ensure absolutely no sticking, I grease it generously with butter or a keto-friendly oil, and then line it with parchment paper. Leave a little overhang on the sides of the parchment paper – this will be your “handles” for lifting the bread out of the pan once it’s baked. This step is crucial for easy removal and prevents any frustrating tearing of your beautiful loaf.
2. Combine the Dry Ingredients: In a large mixing bowl, whisk together your dry ingredients. This includes the 1 ½ cups of finely ground almond flour, ½ cup of coconut flour, 2 teaspoons of baking powder, and ½ teaspoon of salt. Whisking these together thoroughly ensures that the leavening agent (baking powder) and salt are evenly distributed throughout the flour mixture. This is important for a consistent rise and flavor in your bread. Take a moment to make sure there are no lumps of almond or coconut flour.
3. Combine the Wet Ingredients and Add Garlic: In a separate medium bowl, whisk together the 4 large eggs until they are well combined and slightly frothy. Then, add the ½ cup of melted unsalted butter, ¼ cup of room temperature water, and the 2 minced cloves of garlic. Whisk everything together until it’s smooth and well incorporated. The garlic will infuse the batter with a wonderful aroma right from the start. If you’re feeling fancy and want a little extra visual appeal and freshness, now is also a good time to stir in the chopped fresh parsley into the wet ingredients, though it’s entirely optional.
4. Marry the Wet and Dry Mixtures: Now comes the exciting part – bringin extractg it all together! Pour the wet ingredients into the bowl with the dry ingredients. Using a spatula or a wooden spoon, gently mix until just combined. Be careful not to overmix. Overmixing can develop the starches in the flours and potentially lead to a tougher bread. You want a thick, batter-like consistency that will hold its shape. The dough will be quite dense, which is exactly what we’re aiming for. Scrape down the sides of the bowl to ensure all the flour is incorporated.
5. Shape and Bake Your Loaf: Spoon the thick batter into your prepared loaf pan. Use your spatula to spread it evenly, making sure to get into all the corners. You can also smooth the top of the loaf. Now, carefully place the pan into your preheated oven. Bake for 45-55 minutes. The exact baking time can vary depending on your oven, so it’s important to check for doneness. You’ll know it’s ready when the top is golden brown and a toothpick or skewer inserted into the center comes out clean. If the top is browning too quickly, you can loosely tent it with aluminum foil during the last 10-15 minutes of baking.
6. Cool and Enjoy! Once your garlic butter keto bread is baked to perfection, carefully remove it from the oven. Let it cool in the pan for about 10-15 minutes. This allows it to set up properly. Then, using the parchment paper overhangs, lift the loaf out of the pan and place it on a wire rack to cool completely. Resist the urge to slice into it while it’s hot – it needs to cool to develop its best texture. Once completely cooled, slice and enjoy! This bread is fantastic toasted and served with butter, or as the base for your favorite keto sandwich. It stores well in an airtight container at room temperature for a couple of days, or you can slice and freeze portions for longer storage.
Conclusion:
I hope you’ve enjoyed learning how to make this absolutely delicious Garlic Butter Keto Bread! It’s a fantastic recipe because it delivers that satisfying, comforting bread experience without the carb overload. The rich garlic butter infusion makes it incredibly flavorful, and the tender texture is a testament to the clever use of keto-friendly flours. This bread is so versatile, perfect for slicing and toasting to enjoy with your morning eggs, using as a base for open-faced sandwiches, or even dipping into your favorite soups and stews. I’ve found it pairs beautifully with avocado, a sprinkle of chili flakes, or even some melted cheese. Don’t be afraid to experiment with variations either – try adding fresh herbs like chives or rosemary to the dough, or a pinch of smoked paprika for a deeper flavor profile. I truly encourage you to give this Garlic Butter Keto Bread recipe a try; you won’t be disappointed by how easy it is to achieve such a wonderful result on your keto journey.
Frequently Asked Questions:
Can I store this keto bread?
Absolutely! Once cooled, I like to wrap the loaf tightly in plastic wrap and then store it in an airtight container in the refrigerator for up to 4-5 days. You can also slice it and freeze individual slices for an even longer shelf life, perfect for toasting directly from frozen.
What kind of flour is best for this recipe?
I’ve found a blend of almond flour and coconut flour works best for achieving the right texture and flavor in this Garlic Butter Keto Bread. Almond flour provides a good base, while a smaller amount of coconut flour helps with binding and absorbs excess moisture, preventing a gummy texture.
Is this recipe suitable for begin extractners?
Yes, definitely! I’ve designed this recipe with ease of preparation in mind. The steps are straightforward, and with common keto pantry staples, you should have no trouble creating a fantastic loaf. It’s a rewarding recipe for both novice and experienced keto bakers alike.
Garlic Butter Keto Bread
A delicious and easy keto-friendly bread recipe infused with garlic and butter, perfect for low-carb diets.
Ingredients
-
1 1/2 cups almond flour
-
1/4 cup psyllium husk powder
-
2 teaspoons baking powder
-
1/2 teaspoon salt
-
1/2 cup melted butter
-
3 large eggs
-
1/4 cup water
-
2 cloves garlic, minced
-
1 tablespoon fresh parsley, chopped
Instructions
-
Step 1
Preheat your oven to 350°F (175°C) and grease and line a loaf pan with parchment paper. -
Step 2
In a large bowl, whisk together the almond flour, psyllium husk powder, baking powder, and salt. -
Step 3
In a separate bowl, whisk together the melted butter, eggs, and water until well combined. -
Step 4
Pour the wet ingredients into the dry ingredients and mix until a dough forms. Stir in the minced garlic and chopped parsley. -
Step 5
Transfer the dough to the prepared loaf pan and spread evenly. -
Step 6
Bake for 25-30 minutes, or until a toothpick inserted into the center comes out clean and the top is golden brown. -
Step 7
Let the bread cool in the pan for 10 minutes before transferring it to a wire rack to cool completely.
Important Information
Nutrition Facts (Per Serving)
It is important to consider this information as approximate and not to use it as definitive health advice.
Allergy Information
Please check ingredients for potential allergens and consult a health professional if in doubt.