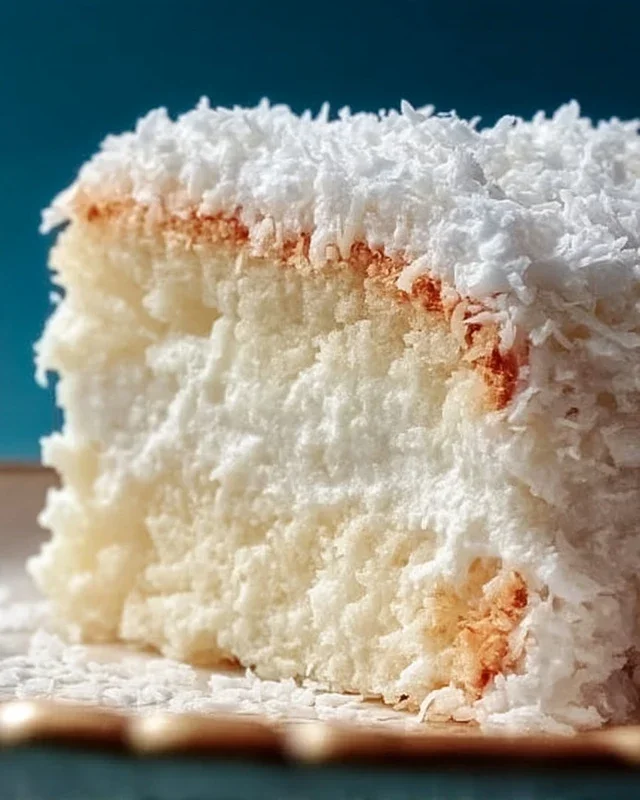
Sticky Coconut Cake-Easy Tropical Dessert
Sticky Coconut Cake. Oh, just the name itself conjures up images of sun-drenched beaches and pure dessert bliss, doesn’t it? This isn’t just any cake; it’s a tropical escape baked right into your kitchen. There’s something universally enchanting about this Sticky Coconut Cake that has people coming back for more. Perhaps it’s the non-intoxicating aroma that fills your home as it bakes, or the irresistible combination of moist, tender cake studded with shredded coconut. What truly sets this Sticky Coconut Cake apart is its delicate balance of sweetness and tropical flavor, elevated by a luscious, gooey topping that’s utterly addictive. Get ready to fall head over heels for this little slice of paradise.
Sticky Coconut Cake
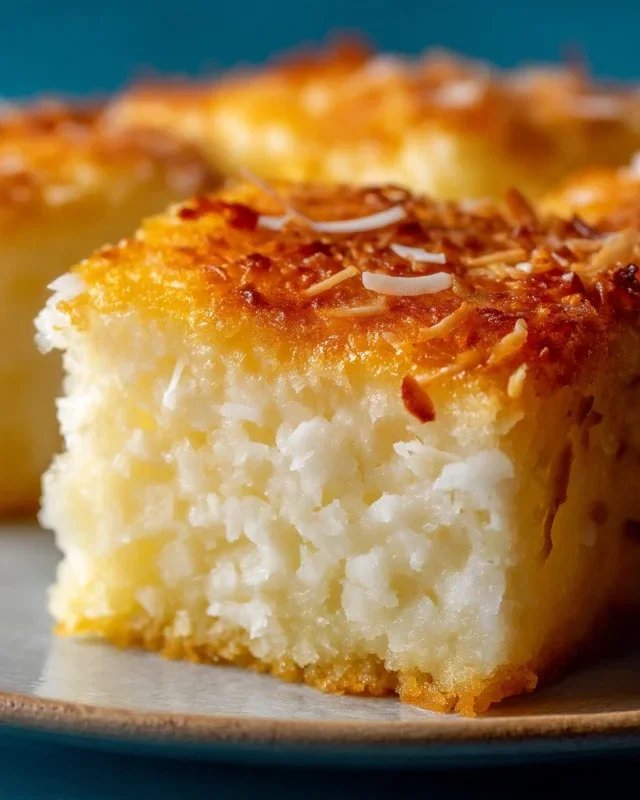
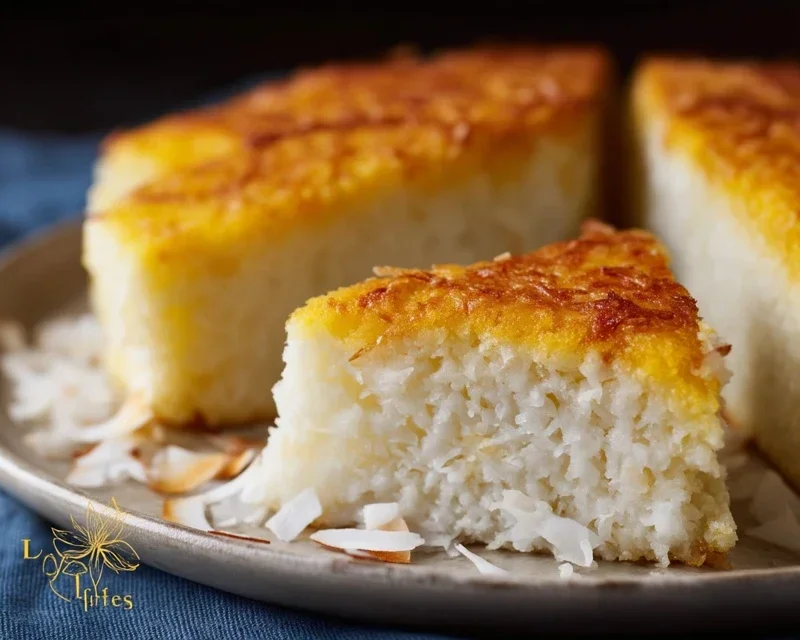
There’s something undeniably comforting and utterly delicious about a cake that’s both tender and delightfully chewy. My Sticky Coconut Cake recipe is just that – a celebration of tropical flavors and satisfying textures. It’s the kind of cake that transports you to a sun-drenched beach with every bite, thanks to the rich coconut milk and the sweet, toasted notes of shredded coconut. This cake isn’t overly complicated, but it does require a little patience and attention to detail to achieve that perfect sticky, moist crum extractb. It’s perfect for an afternoon tea, a special dessert, or even just a treat to brighten your day. The beauty of this cake lies in its simplicity and the impact of its key ingredients. I’ve found that using full-fat canned coconut milk is crucial for that luxurious richness and moisture, and glutinous rice flour is the secret to its wonderful chewy texture. Don’t be intimidated by the glutinous rice flour – it’s readily available in most Asian markets and many larger grocery stores these days, and it’s what gives this cake its signature ‘stickiness’ and delightful chegrape juicess.
Ingredients:
Cooking Instructions:
The journey to your perfect Sticky Coconut Cake begin extracts with careful preparation of your ingredients and your baking vessel. First things first, preheat your oven to 350°F (175°C). This ensures that your cake starts baking evenly the moment it goes in. Next, prepare your baking pan. I like to use a 9×13 inch baking pan. Grease it generously with butter or a non-stick cooking spray, and then lightly dust it with a bit of flour, tapping out any excess. This step is vital to prevent your beautiful cake from sticking and to ensure a clean release after baking.
Now, let’s get to mixing! In a large bowl, combine the 2 egg yolks with the 1¼ cup of granulated sugar. Using a whisk or an electric mixer on medium speed, beat these together until the mixture is pnon-alcoholic ale yellow and slightly thickened. This process incorporates air, which will contribute to the cake’s structure and lightness. Don’t rush this step; you’re looking for a ribbon-like consistency when you lift the whisk.
Next, we’ll incorporate the wet ingredients that are the heart of our coconut flavor. Pour in the 2¼ cups of full-fat canned coconut milk and the 1 teaspoon of vanilla extract. Whisk gently until everything is well combined and smooth. The aroma of coconut will already start to fill your kitchen, a delightful promise of what’s to come.
Now, it’s time to add the dry ingredients. Gradually add the 1½ cup of glutinous rice flour to the wet mixture, whisking continuously until you achieve a smooth batter. It’s important to add the flour gradually to avoid lumps. The batter will be quite thick, and this is exactly what we want. Don’t be tempted to add more liquid at this stage; the thickness is key to the cake’s texture. Finally, gently fold in the 3 cups of shredded sweetened coconut. Ensure that the coconut is evenly distributed throughout the batter. This is where you’ll start to see those wonderful flecks of coconut that will become beautifully toasted during baking.
In a separate, clean bowl, add your 2 egg whites. Using an electric mixer with clean beaters, whip the egg whites until stiff peaks form. This means that when you lift the beaters, the egg whites stand up straight without drooping. This step adds lightness and helps to stabilize the cake. Very carefully, and in a folding motion, gently incorporate the whipped egg whites into the thick coconut batter. The goal here is to combine the two mixtures without deflating the egg whites too much. Use a spatula and a gentle, sweeping motion from the bottom of the bowl upwards. This will help to create a lighter, more airy cake crum extractb.
Once the egg whites are incorporated, pour the batter into your prepared baking pan. Spread it out evenly with your spatula. Now, it’s time for the magic to happen in the oven. Bake for approximately 40-50 minutes, or until a toothpick inserted into the center comes out clean. The top of the cake should be golden brown and the edges should be pulling away slightly from the sides of the pan. Keep an eye on it during the last 10-15 minutes, as ovens can vary. If the top is browning too quickly, you can loosely tent it with aluminum foil.
Once baked, remove the cake from the oven and let it cool in the pan for about 15-20 minutes. This allows the cake to set properly before you attempt to remove it. After this initial cooling period, carefully invert the cake onto a wire rack to cool completely. You might notice a lovely sheen on the surface from the coconut milk and sugar – this is a good sign of its moistness. Once completely cool, slice and enjoy the delightful chewy texture and rich coconut flavor of your homemade Sticky Coconut Cake. It’s delicious on its own, but you could also serve it with a dollop of whipped cream or a scoop of vanilla ice cream for an extra treat.
Conclusion:
And there you have it – your guide to creating a truly delightful Sticky Coconut Cake! This recipe is a winner because it delivers an irresistible combination of moist, tender crum extractb infused with the tropical sweetness of coconut, all brought together by a luscious, gooey sticky topping. It’s surprisingly straightforward to make, making it perfect for both seasoned bakers and those just dipping their toes into the world of homemade treats. Imagin extracte the aroma filling your kitchen as it bakes – pure bliss!
This Sticky Coconut Cake is incredibly versatile. Serve it warm, fresh from the oven, for an ultimate indulgence, perhaps with a dollop of extra whipped cream or a scoop of vanilla bean ice cream. It’s also fantastic at room temperature, making it an excellent choice for potlucks, celebrations, or simply as a comforting afternoon snack. Don’t be afraid to get creative with variations! Consider adding a hint of lime zest to the batter for a refreshing twist, or a sprinkle of toasted flaked almonds over the sticky topping for added crunch. This cake is truly a crowd-pleaser and a testament to the simple joy of baking.
Frequently Asked Questions:
Can I make this Sticky Coconut Cake ahead of time?
Absolutely! This cake can be baked a day in advance. Store it at room temperature, covered loosely with plastic wrap or in an airtight container, to maintain its moisture. Reheat individual slices gently in a microwave or oven if you prefer it warm.
What kind of coconut is best to use?
For this recipe, sweetened shredded coconut works wonderfully for both the cake and the topping, providing that classic coconut flavor and texture. If you prefer a less sweet cake, you could experiment with unsweetened shredded coconut and adjust the sugar in the batter accordingly.
My sticky topping looks a little too thin/thick. What can I do?
If your topping is too thin after baking, you can let the cake cool slightly, then gently broil it for a minute or two (watching very carefully to prevent burning!) to help it thicken and caramelize further. If it seems too thick, you can carefully stir in a tablespoon or two of hot water or coconut milk until it reaches your desired consistency.
Sticky Coconut Cake
A sweet and moist cake with a rich coconut flavor and sticky texture, perfect for dessert or a treat.
Ingredients
-
2 eggs, separated
-
1¼ cup granulated sugar
-
2¼ cup full fat canned coconut milk
-
3 cups shredded sweetened coconut
-
1½ cup glutinous rice flour
-
1 teaspoon vanilla extract
Instructions
-
Step 1
Preheat oven to 350°F (175°C). Grease and flour a 9×13 inch baking pan. -
Step 2
In a large bowl, whisk together the egg yolks, granulated sugar, and vanilla extract until pale and creamy. -
Step 3
Gradually whisk in the canned coconut milk until well combined. -
Step 4
Add the glutinous rice flour and shredded coconut to the wet ingredients. Mix until just combined, being careful not to overmix. -
Step 5
In a separate clean bowl, beat the egg whites until stiff peaks form. -
Step 6
Gently fold the beaten egg whites into the cake batter in two additions until no white streaks remain. -
Step 7
Pour the batter into the prepared baking pan and spread evenly. -
Step 8
Bake for 30-40 minutes, or until a toothpick inserted into the center comes out clean and the top is golden brown. -
Step 9
Let the cake cool in the pan for at least 15 minutes before slicing and serving. It will be stickier as it cools.
Important Information
Nutrition Facts (Per Serving)
It is important to consider this information as approximate and not to use it as definitive health advice.
Allergy Information
Please check ingredients for potential allergens and consult a health professional if in doubt.