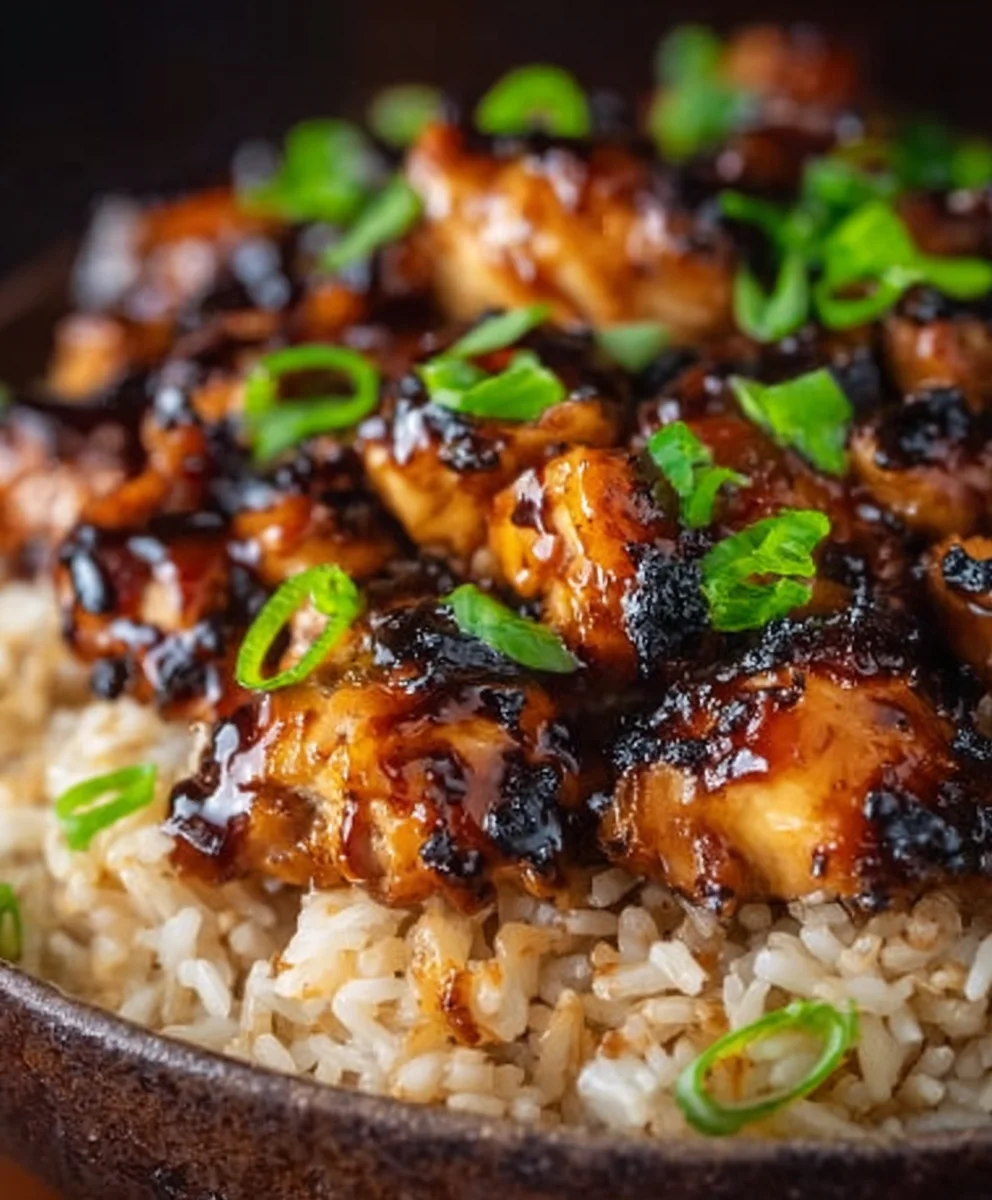
Easy Honey BBQ Chicken Rice Recipe
Honey BBQ Chicken Rice is more than just a meal; it’s a symphony of sweet, smoky, and savory flavors that dance on your palate. This dish has a magnetic pull, drawing in families and friends with its comforting aroma and universally loved taste. What makes Honey BBQ Chicken Rice so incredibly special? It’s the perfect marriage of tender, succulent chicken bathed in a luscious, homemade honey barbecue sauce, all piled high on a bed of fluffy, perfectly cooked rice. It’s that satisfying balance – the slight char on the chicken from grilling or pan-searing, the sticky sweetness of the honey, and that essential tangy barbecue kick. This isn’t just a weeknight dinner; it’s an experience, a guaranteed crowd-pleaser that evokes warm memories and happy sighs with every delicious bite. Get ready to discover your new go-to recipe for this delightful classic.
Ingredients:
- 1 pound boneless, skinless chicken thighs
- 1 cup long-grain rice
- 2 cups chicken broth
- 1/2 cup BBQ sauce
- 1/4 cup honey
- 1 teaspoon garlic powder
- 1 teaspoon onion powder
- 1/2 teaspoon smoked paprika
- Salt and freshly ground black pepper, to taste
- 1 cup mixed vegetables, such as peas, carrots, and corn (optional)
- Chopped fresh green onions, for garnish
Preparing the Honey BBQ Chicken
Step 1: Marinate and Sear the Chicken
Begin extract by preparing your chicken. Pat the boneless, skinless chicken thighs dry with paper towels. This step is crucial for achieving a good sear, which adds depth of flavor and a pleasing texture to the chicken. In a medium bowl, whisk together the BBQ sauce, honey, garlic powder, onion powder, and smoked paprika. This mixture will form the base of our delicious Honey BBQ sauce. Season the chicken thighs generously on both sides with salt and pepper. Place the seasoned chicken thighs into the bowl with the BBQ sauce mixture and toss gently to coat each piece evenly. Allow the chicken to marinate for at least 15-20 minutes at room temperature, or up to 2 hours in the refrigerator for a more intense flavor.
Now, heat a tablespoon of oil (such as olive oil or vegetable oil) in a large skillet or Dutch oven over medium-high heat. Once the oil is shimmering, carefully add the marinated chicken thighs to the hot skillet. You want to hear a nice sizzle. Cook the chicken for about 3-4 minutes per side, until it’s beautifully browned and has developed a nice caramelization. This searing process locks in the juices and starts building that irresistible BBQ flavor. Don’t overcrowd the pan; cook the chicken in batches if necessary. Remove the seared chicken from the skillet and set it aside on a plate. Leave any rendered fat and browned bits (fond) in the skillet, as these are packed with flavor.
Step 2: Cook the Rice
While the chicken is resting, it’s time to get our rice going. In the same skillet where you seared the chicken, pour in the 2 cups of chicken broth. Scrape the bottom of the skillet with a wooden spoon to loosen any browned bits left from the chicken. These bits will dissolve into the broth, adding an incredible savory foundation to the rice. Bring the broth to a boil over medium-high heat. Once boiling, stir in the 1 cup of long-grain rice. Give it a good stir to ensure the rice is evenly distributed and submerged in the liquid.
Reduce the heat to low, cover the skillet tightly with a lid, and let the rice simmer for about 15-18 minutes, or until all the liquid has been absorbed and the rice is tender. Resist the urge to lift the lid during this cooking time, as this allows the steam to escape and can result in undercooked rice. Once the rice is cooked, remove the skillet from the heat and let it stand, still covered, for another 5 minutes. This steaming period helps to make the rice fluffy and ensures it’s perfectly cooked through.
Step 3: Simmer the Honey BBQ Chicken with Rice
Now it’s time to bring everything together for that ultimate Honey BBQ Chicken Rice experience. Uncover the cooked rice. If you are using mixed vegetables, stir them into the rice at this stage. The residual heat from the rice and broth will gently cook them. Return the seared chicken thighs to the skillet, nestling them into the rice and vegetables. Pour any remaining marinade and BBQ sauce mixture from the bowl over the chicken. Ensure that the chicken is at least partially submerged in the liquid to help it cook through and absorb the flavors.
Cover the skillet again and let it simmer gently over low heat for another 10-12 minutes. This simmering time allows the chicken to finish cooking and become incredibly tender, while also infusing the rice and vegetables with the rich, sweet, and tangy Honey BBQ sauce. The flavors will meld beautifully during this stage. You want to ensure the chicken is cooked through, reaching an internal temperature of 165°F (74°C).
Step 4: Finishing Touches and Rest
After the simmering period, carefully remove the lid. The sauce should have thickened slightly, coating the chicken and rice in a glossy, flavorful glaze. Give everything a gentle stir to distribute the sauce evenly. Taste the mixture and adjust seasoning with additional salt and pepper if needed. Sometimes, depending on the saltiness of your chicken broth and BBQ sauce, you might find it needs a little extra boost. The goal is a well-balanced flavor profile.
Once you’re happy with the seasoning, remove the skillet from the heat. Let the Honey BBQ Chicken Rice rest for a few minutes, covered. This resting period allows the flavors to settle and the sauce to thicken just a touch more, creating a more cohesive and delicious dish. This short rest is often overlooked, but it truly enhances the overall eating experience.
Step 5: Serve and Garnish
Your delectable Honey BBQ Chicken Rice is now ready to be served! Ladle generous portions of the chicken and rice mixture into individual bowls. Make sure to get a good amount of the saucy rice and a tender piece of chicken in each serving. The aroma should be absolutely mouthwatering at this point.
To add a burst of freshness and a pop of color, garnish each serving generously with chopped fresh green onions. The sharp, fresh flavor of the green onions beautifully contrasts with the sweet and savory richness of the Honey BBQ sauce, providing a perfect finishing touch. You can also add a sprinkle of sesame seeds if you like, though the green onions are the star of the garnish for this dish. Serve immediately and enjoy the comforting and flavorful explosion of your homemade Honey BBQ Chicken Rice.

Conclusion:
There you have it – the ultimate guide to creating delicious and satisfying Honey BBQ Chicken Rice right in your own kitchen! We’ve walked through each step, ensuring you can achieve that perfect balance of sweet, smoky, and savory flavors. This dish is incredibly versatile and is sure to become a family favorite.
For serving, I love to present the Honey BBQ Chicken Rice with a side of steamed broccoli or a crisp, fresh salad to add a touch of green and a refreshing contrast. The vibrant colors of the dish make it as appealing to the eyes as it is to the palate.
Don’t be afraid to experiment with variations! You can easily swap out the chicken for thinly sliced beef or even tofu for a vegetarian option. If you’re looking for a bit more heat, a pinch of red pepper flakes in the sauce or some diced jalapeños sprinkled on top can do the trick. The possibilities are endless, and the core recipe provides a fantastic base for your culinary creativity. I encourage you to give this Honey BBQ Chicken Rice a try; I’m confident you’ll be delighted with the results!
Frequently Asked Questions:
Can I make the Honey BBQ Chicken Rice ahead of time?
Yes, absolutely! The chicken can be cooked and sauced a day in advance. Store it separately from the rice in an airtight container in the refrigerator. When ready to serve, gently reheat both components and assemble. This makes it a perfect make-ahead meal for busy weeknights or for meal prepping.
What kind of rice is best for Honey BBQ Chicken Rice?
While you can use any rice you prefer, long-grain white rice like Basmati or Jasmine rice works exceptionally well. These types of rice have a fluffy texture that complements the rich sauce of the Honey BBQ Chicken Rice. Brown rice is also a healthy alternative, though it will require a slightly longer cooking time.
Easy Honey BBQ Chicken Rice Recipe
A simple and flavorful one-skillet meal featuring tender chicken thighs simmered in a sweet and tangy honey BBQ sauce with fluffy rice and optional vegetables.
Ingredients
-
1 pound boneless, skinless chicken thighs
-
1 cup long-grain rice
-
2 cups chicken broth
-
1/2 cup BBQ sauce
-
1/4 cup honey
-
1 teaspoon garlic powder
-
1 teaspoon onion powder
-
1/2 teaspoon smoked paprika
-
Salt and freshly ground black pepper, to taste
-
1 cup mixed vegetables, such as peas, carrots, and corn (optional)
-
Chopped fresh green onions, for garnish
Instructions
-
Step 1
Pat chicken thighs dry. Whisk BBQ sauce, honey, garlic powder, onion powder, and smoked paprika. Season chicken with salt and pepper, then toss with sauce mixture to marinate for 15-20 minutes at room temperature. Heat oil in a skillet over medium-high heat, sear chicken for 3-4 minutes per side until browned. Remove chicken and set aside. -
Step 2
Pour chicken broth into the same skillet, scraping up browned bits. Bring to a boil, then stir in rice. Reduce heat to low, cover, and simmer for 15-18 minutes until liquid is absorbed and rice is tender. Let stand, covered, for 5 minutes. -
Step 3
Stir mixed vegetables into the cooked rice, if using. Return the seared chicken thighs to the skillet, nestling them into the rice and vegetables. Pour any remaining marinade mixture over the chicken. -
Step 4
Cover the skillet again and simmer gently over low heat for 10-12 minutes, until chicken is cooked through and tender, and sauce has thickened slightly. -
Step 5
Remove from heat, stir to distribute sauce, and taste to adjust seasoning. Let rest, covered, for a few minutes. -
Step 6
Serve generous portions in bowls, garnished with chopped fresh green onions.
Important Information
Nutrition Facts (Per Serving)
It is important to consider this information as approximate and not to use it as definitive health advice.
Allergy Information
Please check ingredients for potential allergens and consult a health professional if in doubt.