Easy Chicken Stuffed Peppers – Flavorful Dinner
Chicken Stuffed Peppers are a beloved classic for a reason. There’s something incredibly comforting and satisfying about tender bell peppers brimming with a savory, flavorful filling, baked to perfection until the peppers are just yielding and the aroma fills your kitchen. These aren’t just a meal; they’re a vibrant, edible work of art, bursting with color and taste. People adore Chicken Stuffed Peppers because they offer a fantastic balance of textures and flavors – the slight sweetness of the peppers complements the hearty, well-seasoned chicken mixture beautifully. What truly makes this dish special is its versatility. You can customize the filling with your favorite grains, vegetables, and spices, making each batch uniquely yours. Whether you’re looking for a healthy weeknight dinner or a dish to impress guests, these Chicken Stuffed Peppers are guaranteed to be a hit.
Why You’ll Love This Recipe:
A Wholesome and Flavorful Meal
This recipe takes the humble Chicken Stuffed Peppers and elevates them with a delicious, crowd-pleasing filling. We’re going beyond the basic, infusing every bite with layers of savory goodness that will have everyone asking for seconds. It’s a dish that feels both familiar and exciting, perfect for any occasion.
Ingredients:
- 3 green bell peppers
- 1 pound chicken breast, cut into bite-sized pieces
- 1 medium onion, finely chopped
- 2 cloves garlic, minced
- 1 cup precooked rice
- 1 tablespoon olive oil
- 2 teaspoons chili powder
- 1 teaspoon ground cumin
- 2 tablespoons fresh cilantro, chopped
- 1 tablespoon fresh lime juice
- Salt and freshly ground black pepper, to taste
- 3/4 cup shredded cheddar cheese
- Sour cream, for serving
- Pico de gallo, for serving
Preparing the Peppers
First things first, let’s get our bell peppers ready for stuffing. We want them to be tender enough to eat but still hold their shape. To do this, I like to pre-bake them slightly. Preheat your oven to 375°F (190°C). Slice each green bell pepper in half lengthwise, from stem to bottom. Carefully scoop out all the seeds and the white membranes from the inside of each pepper half. A spoon works wonders for this! Once all the insides are removed, place the pepper halves cut-side up in a baking dish. This will help them maintain their form as they start to soften in the oven. You can add a tiny splash of water to the bottom of the baking dish, about 1/4 inch, to help create a steamy environment for the peppers. This also prevents them from drying out too much during the initial bake. Pop them into the preheated oven for about 15-20 minutes, just until they begin extract to soften slightly. We’re not cooking them through at this stage, just giving them a head start.
Cooking the Chicken and Flavor Base
While the peppers are getting a head start in the oven, we can get our delicious chicken filling ready. Heat the tablespoon of olive oil in a large skillet or frying pan over medium-high heat. Once the oil is shimmering, add your bite-sized pieces of chicken breast. Season the chicken generously with salt and pepper. We want to get a nice sear on the chicken, so try not to overcrowd the pan. If necessary, cook the chicken in batches. Stir the chicken occasionally until it’s golden brown on all sides and cooked through. This usually takes about 5-7 minutes. Remove the cooked chicken from the skillet and set it aside on a plate. In the same skillet, add your finely chopped onion. You might not need to add more oil if there’s still some residual fat from the chicken, but if it looks dry, add another teaspoon of olive oil. Sauté the onion over medium heat, stirring frequently, until it becomes soft and translucent, which typically takes about 5 minutes. Now, add the minced garlic to the skillet with the onions. Cook for another minute until the garlic is fragrant, being careful not to burn it. Burned garlic can make the entire dish bitter, so keep a close eye on it.
Building the Flavorful Filling
It’s time to bring all those wonderful flavors together! To the skillet with the sautéed onions and garlic, add the chili powder and cumin. Stir these spices into the onion mixture and cook for about 30 seconds to a minute, allowing the spices to bloom and release their aromatic oils. This step is crucial for developing a deep, rich flavor in our filling. Next, return the cooked chicken to the skillet. Add the precooked rice to the pan as well. Stir everything together until the chicken and rice are well coated with the spiced onion mixture. Now, for a burst of freshness, stir in the chopped fresh cilantro and the tablespoon of fresh lime juice. The lime juice adds a wonderful tang that cuts through the richness of the filling and brightens up all the flavors. Season the entire mixture with salt and pepper to your liking. Remember, you can always add more salt and pepper later, so start with a moderate amount and taste as you go. Make sure everything is thoroughly combined and heated through.
Stuffing and Baking the Peppers
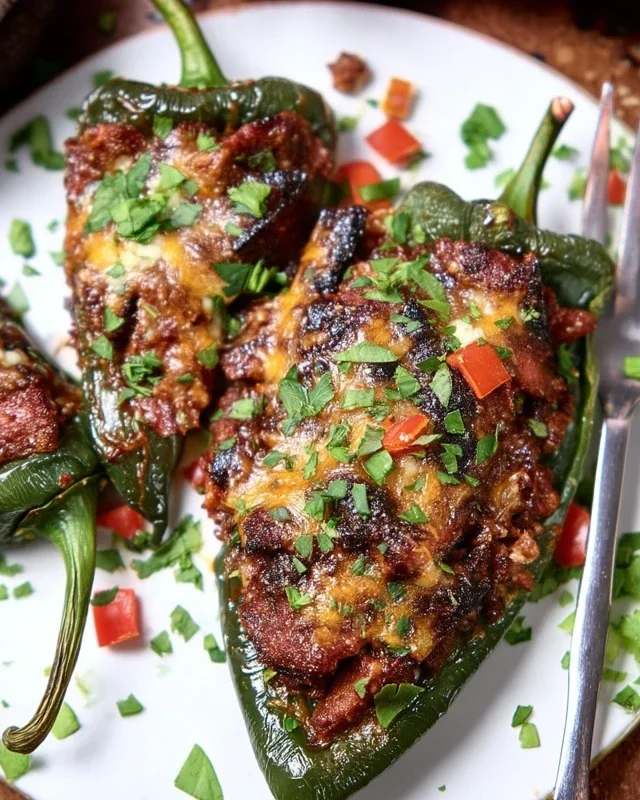
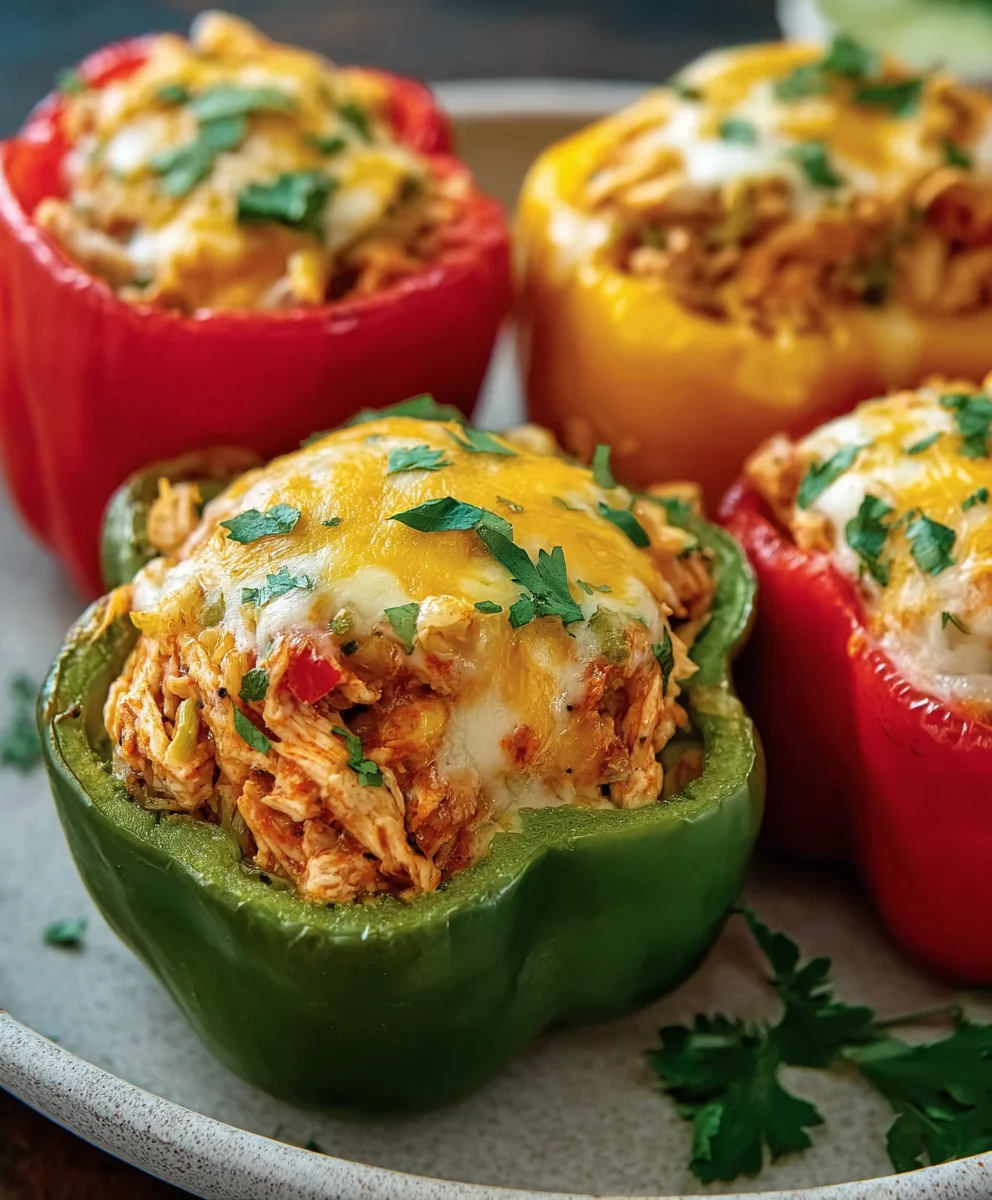
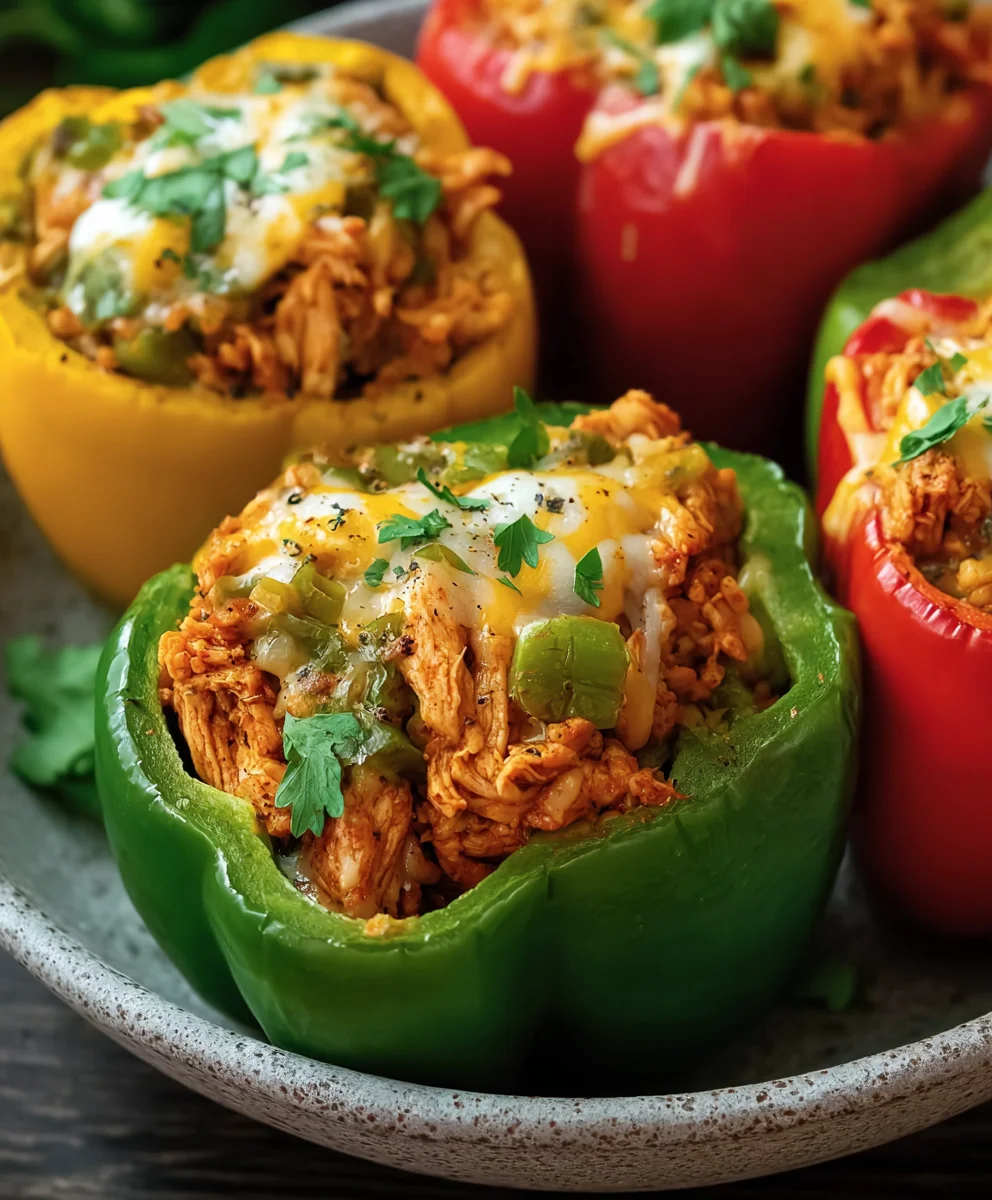
By now, your green bell peppers should be nicely softened and ready to be filled. Carefully remove the baking dish with the peppers from the oven. Using a large spoon, generously fill each pepper half with the chicken and rice mixture. Pack it in there, but don’t press it down too hard; you want to keep some airiness. Once all the pepper halves are filled, it’s time for the cheesy goodness. Sprinkle the shredded cheddar cheese evenly over the top of each stuffed pepper. The cheese will melt and create a delicious, gooey topping. Place the baking dish back into the preheated oven. Bake for an additional 15-20 minutes, or until the cheese is fully melted, bubbly, and starting to turn golden brown. You want the peppers to be tender when pierced with a fork, and the filling to be heated through. Keep an eye on the cheese; if it starts to brown too quickly, you can loosely tent the baking dish with aluminum foil.
Serving Your Masterpiece
Once your Chicken Stuffed Peppers are out of the oven and looking absolutely irresistible, it’s time to serve them up. Let them cool in the baking dish for just a few minutes before serving. This allows them to set slightly, making them easier to handle and preventing the filling from spilling out. Serve each stuffed pepper half warm. To elevate the dish even further, I highly recommend topping each stuffed pepper with a dollop of cool, creamy sour cream and a generous spoonful of fresh pico de gallo. The coolness of the sour cream and the vibrant flavors of the pico de gallo provide a perfect contrast to the warm, savory filling and the tender bell pepper. This combination of textures and flavors makes for an incredibly satisfying and complete meal. Enjoy every bite of this flavorful and healthy Chicken Stuffed Peppers dish!
Conclusion:
You’ve done it! You’ve successfully created these delicious Chicken Stuffed Peppers, and I hope you’re incredibly proud of yourself. This recipe is a fantastic way to enjoy a wholesome and flavorful meal that’s as beautiful as it is tasty. The tender bell peppers, filled with a savory mixture of seasoned chicken, rice, and vegetables, are a true crowd-pleaser. Whether you’re looking for a healthy weeknight dinner or a dish to impress guests, these Chicken Stuffed Peppers deliver every time.
For serving, I love pairing them with a simple side salad dressed with a light vinaigrette or some crusty bread for soaking up any extra juices. If you’re feeling adventurous, try adding a sprinkle of cheese on top during the last few minutes of baking for an extra layer of decadence. Don’t be afraid to get creative with variations! You can swap out the chicken for ground turkey or even lentils for a vegetarian option. Feel free to experiment with different spices, like smoked paprika or cumin, to give your Chicken Stuffed Peppers a unique twist.
I truly encourage you to make these again and again, perhaps even experimenting with different colored bell peppers for a vibrant presentation. Enjoy every bite!
Frequently Asked Questions:
Can I make Chicken Stuffed Peppers ahead of time?
Absolutely! You can prepare the filling and stuff the peppers a day in advance. Store them covered in the refrigerator. When you’re ready to bake, you might need to add a few extra minutes to the cooking time to ensure they are heated through completely.
What kind of rice is best for Chicken Stuffed Peppers?
While white rice is commonly used and cooks relatively quickly, brown rice is a healthier option and adds a nutty flavor and chegrape juicess. If you use brown rice, ensure it’s either pre-cooked or allow for a longer simmering time in the filling, as it takes longer to cook than white rice.
Easy Chicken Stuffed Peppers – Flavorful Dinner
A simple and delicious recipe for chicken stuffed bell peppers, packed with flavor and healthy ingredients.
Ingredients
-
3 green bell peppers
-
1 pound chicken breast, cut into bite-sized pieces
-
1 medium onion, finely chopped
-
2 cloves garlic, minced
-
1 cup precooked rice
-
1 tablespoon olive oil
-
2 teaspoons chili powder
-
1 teaspoon ground cumin
-
2 tablespoons fresh cilantro, chopped
-
1 tablespoon fresh lime juice
-
Salt and freshly ground black pepper, to taste
-
3/4 cup shredded cheddar cheese
-
Sour cream, for serving
-
Pico de gallo, for serving
Instructions
-
Step 1
Preheat oven to 375°F (190°C). Slice bell peppers in half lengthwise, remove seeds and membranes. Place cut-side up in a baking dish with 1/4 inch of water. Bake for 15-20 minutes until slightly softened. -
Step 2
Heat olive oil in a skillet over medium-high heat. Season chicken with salt and pepper, then cook until golden brown and cooked through. Remove chicken and set aside. -
Step 3
Sauté chopped onion in the same skillet until soft and translucent (about 5 minutes). Add minced garlic and cook for another minute until fragrant. -
Step 4
Add chili powder and cumin to the skillet, stirring for 30 seconds. Return chicken to the skillet along with precooked rice. Stir to combine. -
Step 5
Stir in chopped cilantro and lime juice. Season with salt and pepper to taste. Heat through. -
Step 6
Fill softened pepper halves with the chicken and rice mixture. Sprinkle shredded cheddar cheese over the top. -
Step 7
Bake for an additional 15-20 minutes, or until cheese is melted and bubbly and peppers are tender. -
Step 8
Let cool slightly before serving. Top with sour cream and pico de gallo.
Important Information
Nutrition Facts (Per Serving)
It is important to consider this information as approximate and not to use it as definitive health advice.
Allergy Information
Please check ingredients for potential allergens and consult a health professional if in doubt.