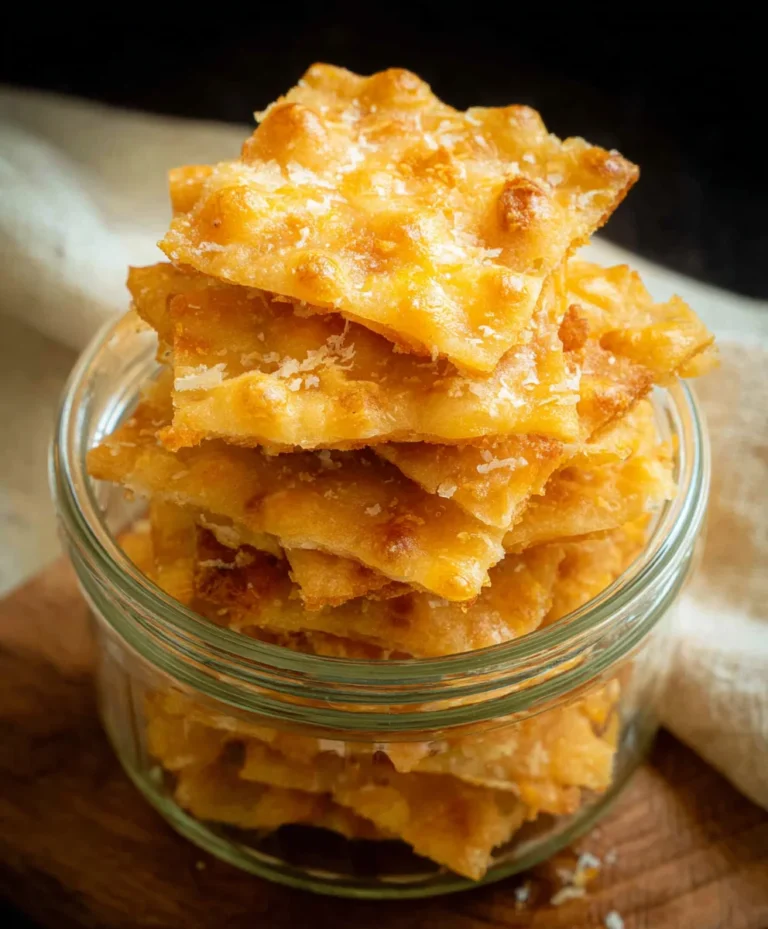
Gluten-Free Cheez-Its – Delicious Homemade Snack Crackers
Gluten Free Cheez Its are more than just a snack; they’re a nostalgic journey back to childhood, a crunchy, cheesy hug in a bite. For those of us navigating a gluten-free lifestyle, the quest for that perfectly seasoned, satisfyingly crisp cracker can feel like an endless adventure. But fear not, because this recipe is here to deliver exactly that! We’ve cracked the code to recreating that iconic, bold cheddar flavor and satisfying crunch, all without a trace of gluten. What makes this particular take on Gluten Free Cheez Its so special is its incredible adaptability. Whether you’re baking them for a party, a movie night, or simply as a delightful afternoon pick-me-up, these little squares are guaranteed crowd-pleasers. They are surprisingly simple to make, proving that delicious gluten-free snacking doesn’t require a culinary degree, just a few quality ingredients and a little bit of love. Get ready to ditch the store-bought disappointment and embrace the homemade glory of your very own batch of Gluten Free Cheez Its.

Ingredients:
- 8 ounces cheddar cheese (mild or sharp), finely shredded
- 4 tablespoons unsalted butter, cold and cut into small cubes
- 1 cup gluten-free flour blend (ensure it contains xanthan gum for structure)
- 1/2 teaspoon salt
- 1/8 teaspoon garlic powder
- 1/8 teaspoon onion powder
- 3 tablespoons ice-cold water
- 1 teaspoon coarse salt (such as sea salt or kosher salt), for sprinkling
Preparing the Dough
Step 1: Combine Dry Ingredients and Fat
Begin extract by gathering all your dry ingredients. In a medium-sized bowl, whisk together the 1 cup of gluten-free flour blend, 1/2 teaspoon of salt, 1/8 teaspoon of garlic powder, and 1/8 teaspoon of onion powder. Ensure these are well combined to distribute the seasonings evenly. Next, add the 4 tablespoons of cold, cubed unsalted butter to the flour mixture. Using a pastry blender, two forks, or even your fingertips, cut the butter into the flour until the mixture resembles coarse crum extractbs, with some pieces of butter about the size of small peas. This is crucial for creating flaky crackers. Working with cold butter is key; it melts slower during baking, creating steam pockets that contribute to a lighter texture. If your kitchen is warm, you can even pop the flour and butter mixture into the refrigerator for about 10 minutes to ensure it stays cold.
Step 2: Incorporate the Cheese
Now it’s time to add the star ingredient for that cheesy flavor: the cheddar cheese. Add the 8 ounces of finely shredded cheddar cheese to the bowl with the flour and butter mixture. Gently toss everything together with a fork or your hands until the cheese is evenly distributed throughorum extractthe crumbly mixture. You want to avoid overworking the dough at this stage, as that can lead to tough crackers. The cheese will act as both a binder and a flavor enhancer. If you’re using a sharper cheddar, you’ll get a more pronounced, tangy flavor, while a milder cheddar will offer a subtler cheesiness. Ensure the cheese is shredded finely so it incorporates smoothly into the dough.
Step 3: Form and Chill the Dough
Gradually add the 3 tablespoons of ice-cold water, one tablespoon at a time, mixing gently with a fork after each addition. You’re looking for the dough to just start coming together. You may not need all of the water, or you might need a tiny bit more depending on your flour blend and humidity. The goal is a cohesive dough that isn’t sticky. Once the gin extractgh begins to clump, lightly knead it a few times in the bowl to bring it all together into a rough ball. Do not over-knead. Flatten the dough into a disc, wrap it tightly in plastic wrap, and refrigerate it for at least 30 minutes. This chilling period is essential. It allows the gluten-free flours to hydrate properly, the butter to firm up again, and makes the dough much easier to roll out.
Shaping and Baking the Crackers
Step 4: Roll and Cut the Dough
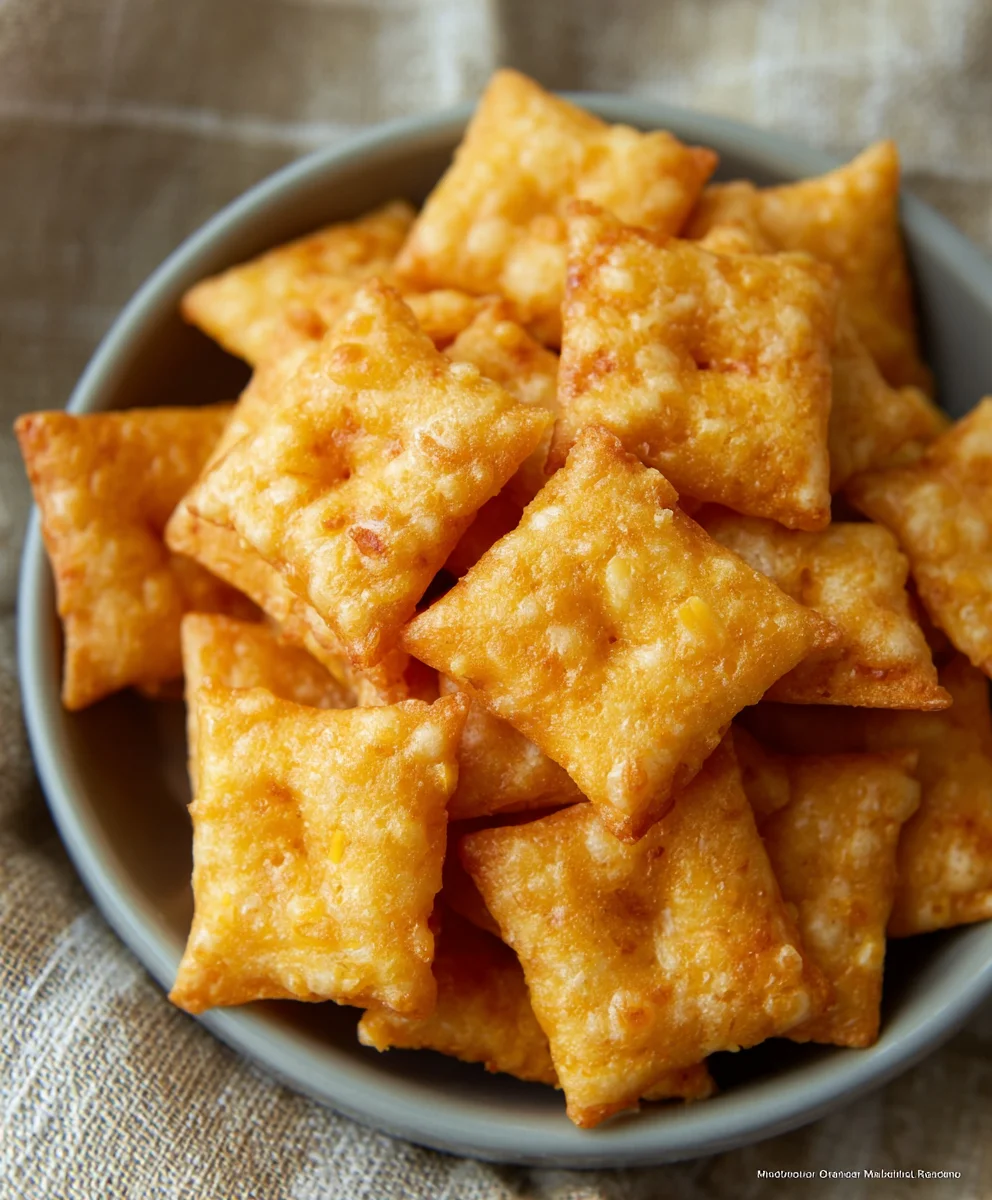
Preheat your oven to 375°F (190°C) and line two baking sheets with parchment paper. Remove the chilled dough from the refrigerator. Place the dough disc between two sheets of parchment paper. This prevents sticking and makes rolling much easier, especially with gluten-free dough. Roll the dough out evenly to about 1/8-inch thickness. Aim for a consistent thickness so that all crackers bake at the same rate. You can use a pizza cutter or a knife to cut the dough into small squares, approximately 1-inch by 1-inch. Alternatively, you can use small cookie cutters in fun shapes. Carefully transfer the cut dough pieces to the prepared baking sheets, leaving a little space between each cracker. You can gently prick each cracker a few times with a fork or toothpick. This helps prevent them from puffing up too much during baking and creates those characteristic little holes.
Step 5: Bake and Sprinkle
Once your baking sheets are filled with the cut dough pieces, it’s time for the final touch before baking. Lightly brush the tops of the crackers with a tiny bit of water or a very light egg wash (optional, but helps the coarse salt adhere). Then, generously sprinkle the 1 teaspoon of coarse salt over the tops of the crackers. This coarse salt adds a wonderful crunch and a burst of flavor that complements the cheesy dough beautifully. Place the baking sheets in the preheated oven. Bake for 12-15 minutes, or until the edges of the crackers are golden brown and they are firm to the touch. Keep a close eye on them as they can go from perfectly baked to burnt very quickly due to their small size. If you notice some baking faster than others, you can rotate the baking sheets halfway through the baking time or remove done crackers early.
Cooling and Enjoying
Step 6: Cool and Store
Once baked to a golden perfection, remove the baking sheets from the oven. Let the crackers cool on the baking sheets for about 5 minutes. This allows them to firm up further before you move them. Then, carefully transfer the gluten-free cheez-its to a wire rack to cool completely. Ensure they are fully cooled before storing them. Storing warm crackers will cause them to become soft and lose their crispness. Once completely cooled, store your homemade gluten-free cheez-its in an airtight container at room temperature. They should stay delightfully crisp for up to a week, though they are so delicious, they likely won’t last that long! Enjoy them as a snack on their own, or with your favorite dips.
Conclusion:
There you have it! You’ve successfully navigated the delicious journey of making your very own Gluten Free Cheez Its. We’ve covered everything from the simple ingredients to the satisfying bake, and I truly hope you feel empowered to recreate this cheesy delight in your own kitchen. These little crackers are incredibly versatile, perfect for a quick snack, a lunchbox treat, or even as a crunchy topping for salads and soups. Don’t be afraid to experiment with the flavors! You can easily adjust the amount of cheese or add a pinch of smoked paprika for a different twist.
I encourage you to embrace the joy of homemade snacks and the satisfaction of knowing exactly what goes into your food. These Gluten Free Cheez Its are a testament to how delicious and achievable gluten-free baking can be. So, gather your ingredients, preheat your oven, and get ready to enjoy a batch of irresistible, cheesy goodness that everyone will love.
Frequently Asked Questions about Gluten Free Cheez Its:
Can I use different types of cheese for these Gluten Free Cheez Its?
Absolutely! While sharp cheddar is a classic choice, feel free to experiment with other hard, flavorful cheeses. Monterey Jack, Colby, or a blend of your favorites will work wonderfully. Just ensure the cheese is finely grated for even melting and incorporation into the dough. Experimenting with different cheeses is a fantastic way to personalize your Gluten Free Cheez Its.
How should I store leftover Gluten Free Cheez Its?
To keep your Gluten Free Cheez Its wonderfully crispy, store them in an airtight container at room temperature. They should stay fresh and delicious for up to a week. If you notice them losing some of their crunch, you can briefly toast them in a low oven (around 250°F or 120°C) for a few minutes to revive their crispness.
Gluten-Free Cheez-Its – Delicious Homemade Snack Crackers
Enjoy a healthier, homemade version of your favorite cheesy crackers with this easy gluten-free Cheez-It recipe. Perfect for snacking!
Ingredients
-
8 ounces cheddar cheese (mild or sharp), finely shredded
-
4 tablespoons unsalted butter, cold and cut into small cubes
-
1 cup gluten-free flour blend (ensure it contains xanthan gum for structure)
-
1/2 teaspoon salt
-
1/8 teaspoon garlic powder
-
1/8 teaspoon onion powder
-
3 tablespoons ice-cold water
-
1 teaspoon coarse salt (such as sea salt or kosher salt), for sprinkling
Instructions
-
Step 1
In a medium-sized bowl, whisk together the gluten-free flour blend, salt, garlic powder, and onion powder. Add the cold, cubed butter and cut it into the flour mixture using a pastry blender or your fingertips until it resembles coarse crumbs. If the kitchen is warm, chill the mixture for 10 minutes. -
Step 2
Add the finely shredded cheddar cheese to the bowl and gently toss to distribute evenly through the crumbly mixture. Avoid overworking the dough. -
Step 3
Gradually add the ice-cold water, one tablespoon at a time, mixing until the dough just starts to come together. It should be cohesive but not sticky. Lightly knead into a rough ball, flatten into a disc, wrap in plastic wrap, and refrigerate for at least 30 minutes. -
Step 4
Preheat oven to 375°F (190°C) and line two baking sheets with parchment paper. Roll the chilled dough between two sheets of parchment paper to about 1/8-inch thickness. Cut into small squares (approximately 1-inch by 1-inch) and transfer to the prepared baking sheets, leaving space between crackers. Prick each cracker a few times with a fork. -
Step 5
Lightly brush the tops of the crackers with water and generously sprinkle with coarse salt. Bake for 12-15 minutes, or until the edges are golden brown and the crackers are firm. Rotate baking sheets halfway through if needed. -
Step 6
Let the crackers cool on the baking sheets for 5 minutes, then transfer to a wire rack to cool completely. Store in an airtight container at room temperature.
Important Information
Nutrition Facts (Per Serving)
It is important to consider this information as approximate and not to use it as definitive health advice.
Allergy Information
Please check ingredients for potential allergens and consult a health professional if in doubt.