Easy Pickled Red Onions- Vibrant Flavor Quick Pickling
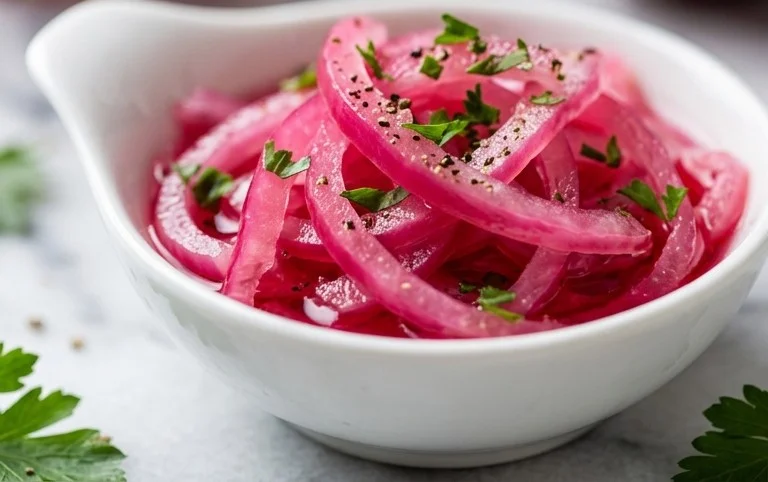
Pickled red onions are more than just a condiment; they’re a culinary cbeef hameleon that can transform everyday meals into something extraordinary. Have you ever found yourself wondering how those vibrant, tangy slivers on your tacos or avocado toast get that incredible punch? Well, wonder no more! I’m absolutely thrilled to share my go-to recipe for these dazzling pickled red onions, a simple yet sophisticated addition that I can’t imagin extracte my kitchen without. People adore them for their perfect balance of sweet and sour, their delightful crunch, and that stunning, jewel-toned hue that instantly elevates any dish. What makes them truly special is their versatility – from a garnish on a hearty salad to a zesty topping for grilled meats, these pickled red onions are a game-changer, adding a burst of flavor and a pop of color that’s simply irresistible.
Pickled Red Onions
There’s something undeniably magical about pickled red onions. They transform a humble onion into a vibrant, tangy jewel, adding a burst of flavor and a stunning visual pop to almost any dish. From tacos and salads to sandwiches and charcuterie boards, these quick pickles are incredibly versatile and surprisingly easy to make. I’ve been making them for years, and they’ve become a pantry staple in my kitchen. The best part? You only need a few basic ingredients and a little bit of time. Let’s dive in!
Ingredients:
Getting Started: Preparing Your Onions
The first step to perfect pickled red onions is selecting and preparing your star ingredient: the red onion. I like to use a large red onion because it yields a good amount of pickled goodness, and its natural sweetness complements the brine beautifully. To prepare the onion, start by trimming off the top and the root end. You want to remove just enough to make it easy to peel. Then, slice off the papery outer skin. For pickling, thin slices are key. I prefer to slice the onion in half through the root and then thinly slice each half from root to tip, creating half-moon shapes. You can also slice it into rounds if you prefer, just aim for consistent thickness so they pickle evenly. The thinner you slice them, the quicker they will soften and absorb the brine. Don’t worry if they look a little overwhelming at this stage; they’ll shrink down significantly once they’re pickled.
Crafting the Brine
Now, let’s talk about the brine – this is where all the magic happens. In a small saucepan, we’ll combine our liquid ingredients and seasonings. Pour in the 1 cup of white vinegar. White vinegar is a classic choice for pickling because its sharp, clean acidity cuts through richness and preserves the vegetables effectively. Next, add the 1 cup of water. This helps to dilute the vinegar slightly, making the pickle brine more palatable and less harsh. Now for the sweetness and salt. Sprinkle in the 1 tablespoon of sugar. As mentioned, you can adjust this to your liking. If you’re watching your sugar intake, a sugar substitute works just as well. The sugar balances the tang of the vinegar and helps to tenderize the onions. Finally, add the 2 teaspoons of kosher salt. Kosher salt has a coarser texture and dissolves well, making it ideal for brining.
Heating and Dissolving
With all the brine ingredients in the saucepan, it’s time to heat things up. Place the saucepan over medium heat. We want to bring the mixture to a simmer, just until the sugar and salt have completely dissolved. You don’t need to boil it vigorously; a gentle simmer is all that’s required. Stir the mixture occasionally with a whisk or spoon to ensure everything is incorporated. This step is crucial for creating a well-balanced brine where the flavors meld together. Once you see the sugar and salt crystals disappear into the liquid, and the brine is hot, remove the saucepan from the heat.
The Pickling Process: Infusing the Flavor
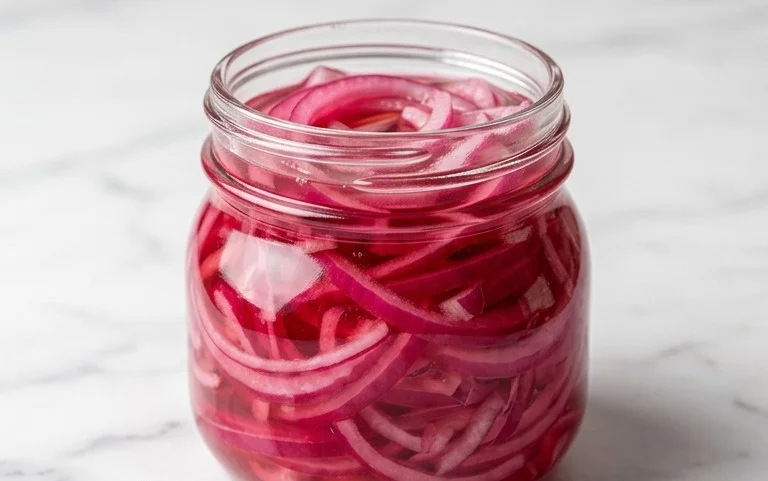
This is where the transformation begin extracts! Once the brine is heated and the sugar and salt are dissolved, it’s time to introduce the onions. You’ll need a clean glass jar or a heatproof container for this. I usually opt for a mason jar that’s about a pint or quart size, as it makes storing and serving easy. Carefully place your thinly sliced red onions into the jar. Make sure to pack them in fairly snugly, but not so tightly that you can’t pour the brine over them. Now, gently pour the hot brine over the onions in the jar. Ensure that all the onion slices are submerged in the brine. If your jar is a bit small and the onions are sticking out, you might need to press them down gently with a spoon or use a smaller secondary container.
The Waiting Game: Patience is a Virtue
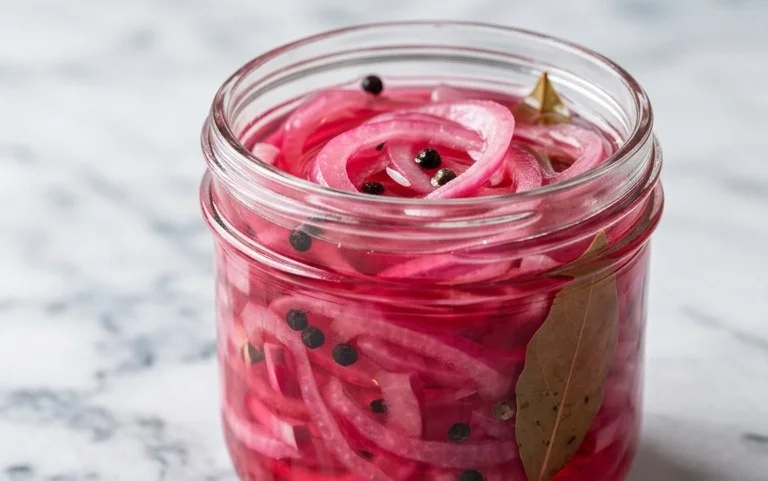
Once the onions are submerged in the brine, seal the jar tightly. Now comes the part that requires a little patience. Let the jar sit at room temperature for at least 30 minutes to an hour. During this time, you’ll witness a remarkable color change. The bright pink brine will start to infuse into the onions, turning them a beautiful, vibrant magenta. The longer they sit, the more intense the pink hue will become. After the initial 30-60 minutes at room temperature, I like to transfer the jar to the refrigerator. This is where they will continue to pickle and develop their characteristic tangy flavor.
Storage and Enjoyment
Your pickled red onions will be ready to eat after about an hour, but their flavor intensifies beautifully over time. They are best enjoyed within 2-3 weeks when stored in the refrigerator. The acidity of the brine acts as a preservative, keeping them fresh. When you’re ready to use them, simply drain off the brine (you can save some of the brine for other pickling projects if you like!) and use the onions as desired. They add an incredible crunch and a zesty kick to anything from avocado toast to grilled chicken. Experiment with them – you’ll be amazed at how they elevate your everyday meals!
Conclusion:
And there you have it – a simple yet incredibly rewarding recipe for pickled red onions! This vibrant, tangy condiment is an absolute game-changer for elevating everyday meals. Its sweet and sour profile cuts through richness, adds a pop of color, and provides a delightful textural contrast. Whether you’re a seasoned cook or just starting out, mastering this easy recipe will undoubtedly become a go-to in your kitchen. The versatility of these pickled red onions is truly astounding; they’re fantastic piled high on tacos, burgers, sandwiches, and salads. They also beautifully complement grilled meats, roasted vegetables, and even avocado toast. Don’t be afraid to experiment with additions like peppercorns, dill, or a touch of chili flake to customize the flavor to your liking. I truly encourage you to give this recipe a try – you’ll be amazed at how often you reach for this homemade delight!
Frequently Asked Questions:
How long do pickled red onions last?
Properly stored in an airtight container in the refrigerator, your pickled red onions can last for up to 2-3 weeks. The longer they sit, the more the flavors will meld and intensify, though they are best enjoyed within the first week for peak freshness and crunch.
Can I use different vinegars for pickling?
Absolutely! While apple cider vinegar or white grape juice vinegar are common and yield excellent results, feel free to experiment. Red grape juice vinegar will deepen the color and add a fruitier note, while rice vinegar offers a milder, slightly sweeter tang. Just ensure the vinegar has at least 5% acidity for proper pickling.
My pickled red onions aren’t very red. Why?
The vibrant red color comes from the anthocyanins in the red onion skin, which are released into the brine. Sometimes, the intensity of the color can vary depending on the specific onion. However, the flavor will still be fantastic, regardless of the exact shade of pink or red!
Quick Pickled Red Onions
Vibrant and tangy pickled red onions, perfect for tacos, sandwiches, salads, and more. A simple refrigerator pickle recipe.
Ingredients
-
1 large Red onion, thinly sliced
-
1 cup White Vinegar
-
1 cup Water
-
1 tablespoon Sugar
-
2 teaspoons Kosher salt
Instructions
-
Step 1
Thinly slice the red onion into rings or half-moons. -
Step 2
In a medium saucepan, combine the white vinegar, water, sugar, and kosher salt. -
Step 3
Heat the mixture over medium heat, stirring until the sugar and salt are dissolved. Bring to a gentle simmer. -
Step 4
Place the sliced red onions in a heatproof jar or container. -
Step 5
Pour the hot brine over the sliced onions, ensuring they are fully submerged. -
Step 6
Let the mixture cool at room temperature for about 15 minutes before sealing and refrigerating. The onions will be ready to eat after at least 30 minutes, but are best after a few hours.
Important Information
Nutrition Facts (Per Serving)
It is important to consider this information as approximate and not to use it as definitive health advice.
Allergy Information
Please check ingredients for potential allergens and consult a health professional if in doubt.