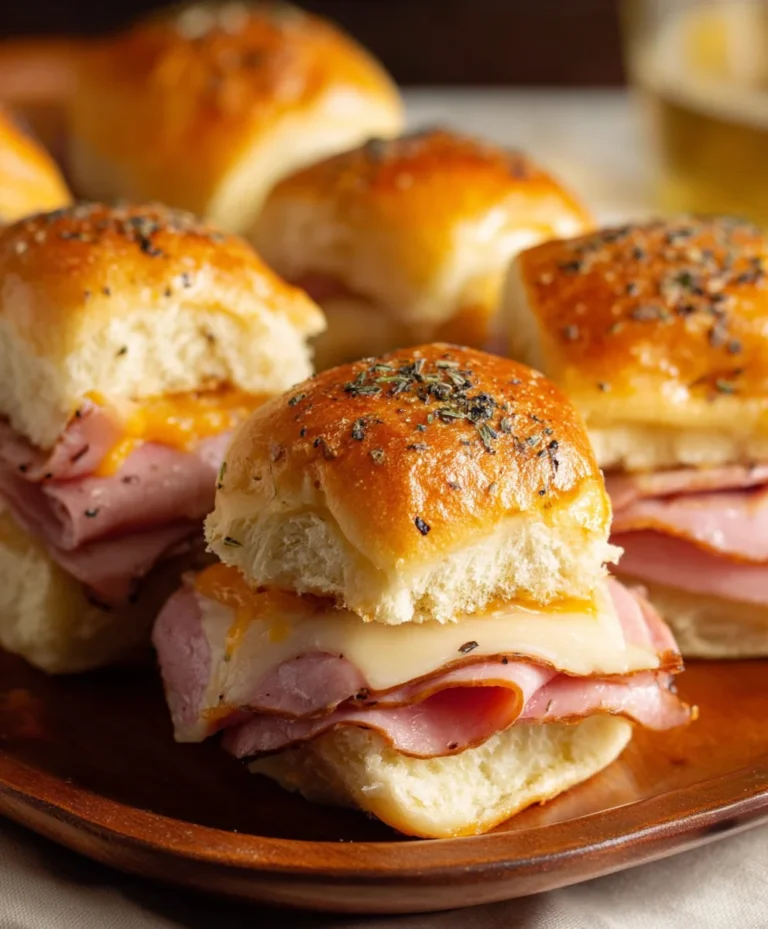
Cheesy Dynamite Chicken Buns- Flavor Explosion
Cheesy Dynamite Chicken Buns are more than just a snack; they’re a flavour explosion waiting to happen! If you’re looking for a seriously satisfying bite that packs a punch, you’ve landed in the right place. We all crave those comfort foods that make our taste buds sing, and these Cheesy Dynamite Chicken Buns deliver in spades. They’re the perfect blend of tender, juicy chicken nestled within a soft, pillowy bun, all smothered in a tantalizingly spicy and creamy sauce. What makes them truly special is that irresistible kick of heat, balanced perfectly by the gooey, melted cheese that binds everything together. Whether you’re whipping them up for a party, a weeknight treat, or just because you deserve something delicious, these Cheesy Dynamite Chicken Buns are guaranteed to be a crowd-pleaser. Get ready for a flavour fiesta!
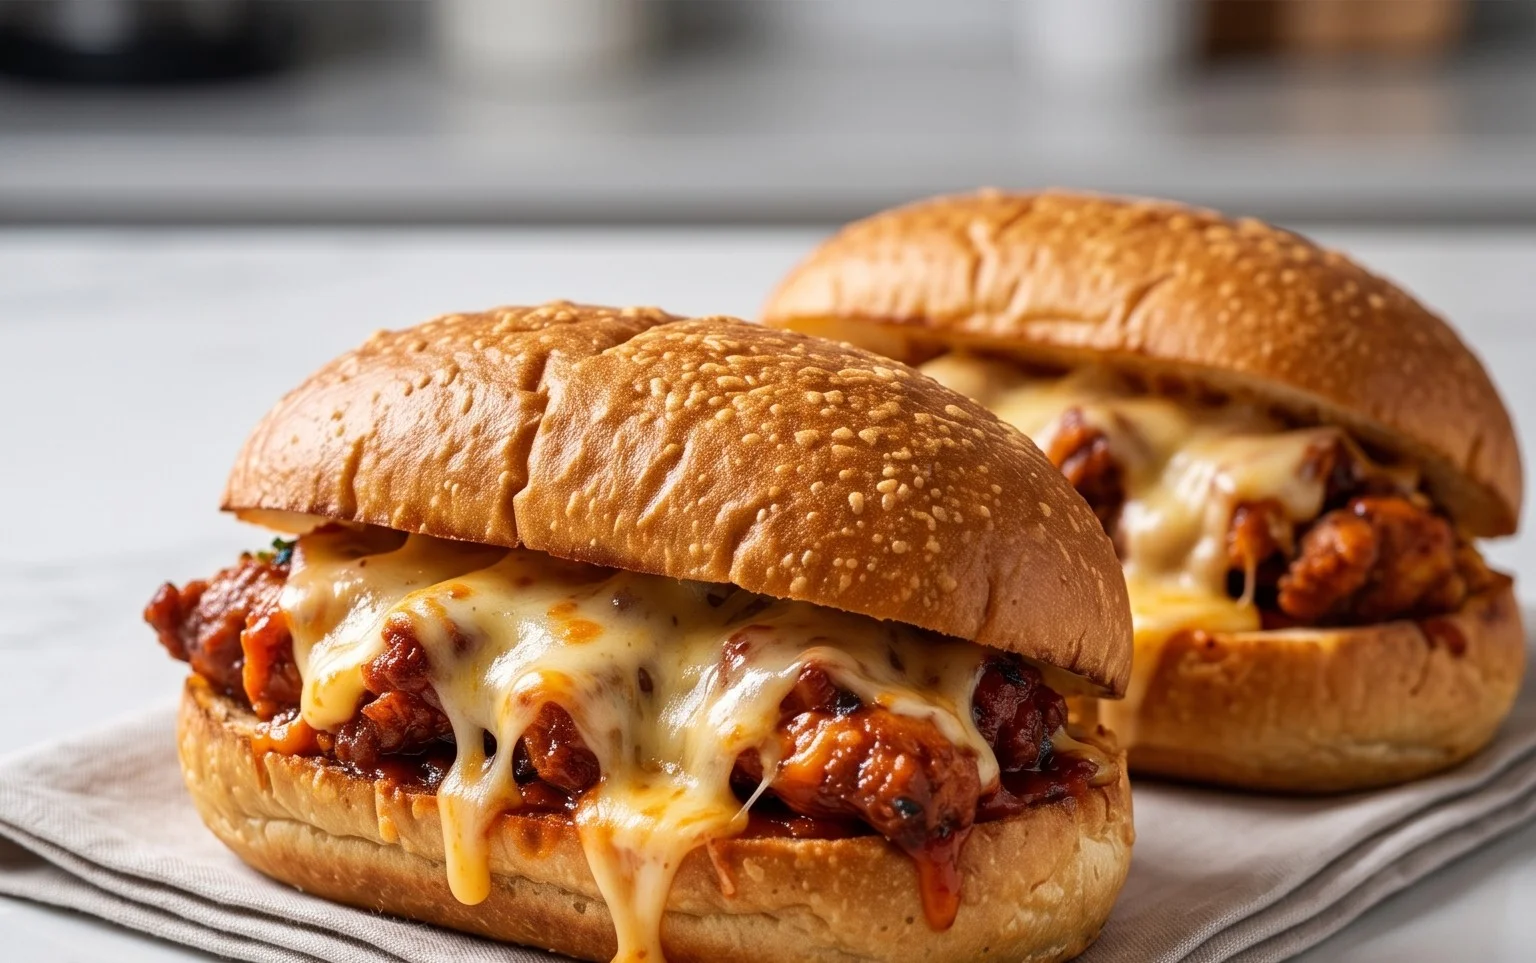
Cheesy Dynamite Chicken Buns
Get ready to experience a flavor explosion with these Cheesy Dynamite Chicken Buns! These aren’t your average dinner rolls. We’re talking about fluffy, soft buns with a seriously spicy and cheesy chicken filling that will have everyone asking for seconds. They’re perfect for a fun family dinner, a party appetizer, or even a satisfying lunch. The combination of tender chicken, a kick of spice, and the gooey melted cheese, all encased in a pillowy bun, is simply irresistible. Let’s get baking and creating these little pockets of deliciousness!
Ingredients:
Making the Dough: The Foundation of Fluffiness
The journey to our dynamite buns begin extracts with creating a perfect dough. This part is crucial for achieving that wonderfully soft and airy texture we’re aiming for. First, in a large mixing bowl, I like to combine the wet ingredients. Gently warm your milk (it should be lukewarm, not hot, so you don’t kill the yeast!) and pour it into the bowl. Add the water and honey to the milk mixture. The honey acts as food for the yeast, helping it to activate and create those lovely air bubbles. Sprinkle the instant yeast over the liquid and give it a gentle stir. Let this mixture sit for about 5-10 minutes. You’ll know the yeast is alive and happy when it starts to look frothy and bubbly on the surface – that’s a good sign! Once you see that, whisk in the egg and sunflower oil.
Now, it’s time to add the dry ingredients. In a separate bowl, I whisk together the flour and salt. Salt is important for flavor, but it also controls the yeast activity, so we add it with the flour rather than directly to the yeast mixture. Gradually add the flour mixture to the wet ingredients, mixing until a shaggy dough forms. You can do this with a stand mixer fitted with a dough hook, or if you’re feeling ambitious, by hand! Once it starts to come together, turn the dough out onto a lightly floured surface.
Kneading the Dough: Developing Strength and Structure
This is where we build the structure of our buns. Knead the dough for about 8-10 minutes until it becomes smooth, elastic, and no longer sticky. If you’re using a stand mixer, this will take about 6-8 minutes on medium speed. The dough should pass the “windowpane test” – meaning if you stretch a small piece of dough thinly, you should be able to see light through it without it tearing. This indicates the gluten has developed properly. Once the dough is well-kneaded, place it back into a lightly oiled bowl, cover it with a clean kitchen towel or plastic wrap, and let it rise in a warm place for about 1 to 1.5 hours, or until it has doubled in size. This “first rise” is where the magic of fermentation happens, creating that signature airy texture.
Preparing the Dynamite Chicken Filling: The Spicy Heart
While our dough is having its luxurious rise, let’s get to the star of the show: the dynamite chicken filling. Finely dice the chicken filet into small, bite-sized pieces. In a bowl, season the chicken generously with 5 g of salt. Now, for the “dynamite” part! In a separate small bowl, combine the Parmesan cheese, cayenne powder, onion powder, and black pepper powder. This blend of spices and cheese is what gives our filling its incredible flavor. In a non-stick skillet, melt the butter over medium heat. Add the seasoned chicken and cook until it’s no longer pink and is cooked through. Once the chicken is cooked, drain off any excess liquid.
Now, it’s time to bring in the heat and cheese! Sprinkle the spice and Parmesan mixture over the cooked chicken in the skillet. Stir well to coat the chicken evenly. Continue to cook for another minute or two, just until the cheese is melted and the spices are fragrant. Be careful not to overcook at this stage, as we want the filling to be moist. Remove the skillet from the heat and set the filling aside to cool slightly. This will make it easier to handle when we assemble the buns.
Assembling the Dynamite Chicken Buns: Pocket of Perfection
Once the dough has doubled in size, gently punch it down to release the air. Turn the dough out onto a lightly floured surface and divide it into equal portions. The size you make them is up to you, but I find that about 12-16 buns is a good yield for this recipe. Roll each portion into a smooth ball.
Now, let’s create the pockets. Take one dough ball and flatten it slightly with your hands or a rolling pin to form a disc. Place a generous spoonful of the cooled dynamite chicken filling in the center of the disc. Don’t overfill, or it might be tricky to seal. Carefully bring the edges of the dough together and pinch them firmly to seal the filling inside. Make sure there are no gaps, otherwise, the delicious filling might escape during baking. Place the senon-alcoholic aled bun, seam-side down, onto a baking sheet lined with parchment paper. Repeat this process with the remaining dough balls and filling. Give the buns a little space between them on the baking sheet, as they will puff up during their second rise.
The Second Rise and Baking: Golden, Bubbly Perfection
Cover the assembled buns with a clean kitchen towel and let them rest in a warm place for another 30-45 minutes, or until they look noticeably puffed up. This “second rise” helps to ensure the buns are light and airy after baking. While the buns are on their second rise, preheat your oven to 190°C (375°F).
Once the buns have had their second rise, you can optionally brush them with a little beaten egg or milk for a golden sheen. Then, carefully place the baking sheet into the preheated oven. Bake for 15-20 minutes, or until the buns are golden brown and sound hollow when tapped on the bottom. The aroma filling your kitchen at this point will be incredible! Once baked, remove them from the oven and let them cool on a wire rack for a few minutes before serving. These Cheesy Dynamite Chicken Buns are best enjoyed warm, when the cheese is still melty and the chicken is wonderfully flavorful. Enjoy your culinary adventure!
Conclusion:
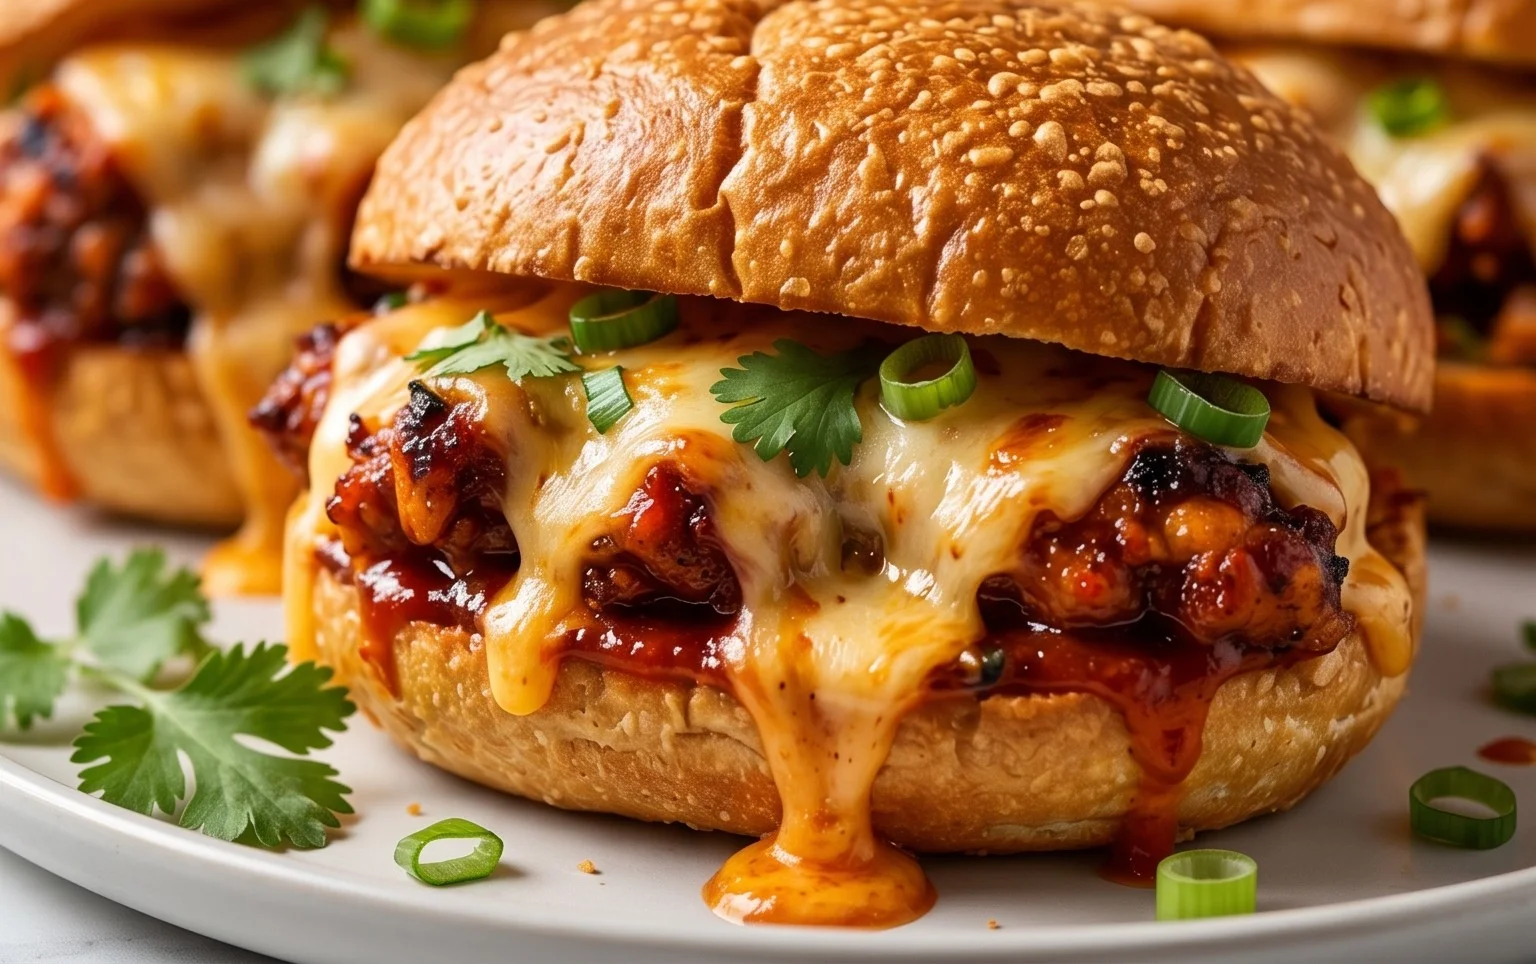
And there you have it – the ultimate guide to creating these incredibly delicious Cheesy Dynamite Chicken Buns! I’m so excited for you to try this recipe. What makes these buns truly special is the perfect harmony of tender, spicy chicken nestled within a soft, pillowy bun, all brought together by that irresistible, gooey cheese topping. It’s a flavor explosion that’s both comforting and exciting, making it an ideal meal for a weeknight dinner, a fun weekend project, or even a crowd-pleasing appetizer.
For serving, I love to enjoy these Cheesy Dynamite Chicken Buns warm, straight from the oven. They are fantastic on their own, but can also be paired with a fresh green salad to balance the richness, or some crispy sweet potato fries for an extra treat. If you’re looking to switch things up, don’t hesitate to experiment! You could try different types of cheese, like Monterey Jack or a sharp cheddar, or add a sprinkle of chopped cilantro for a burst of freshness. For a vegetarian twist, consider using seasoned and crum extractbled tofu or plant-based chicken alternatives. I truly hope you give these fantastic Cheesy Dynamite Chicken Buns a go – I know you’ll love them as much as I do!
Frequently Asked Questions:
Can I make the dynamite chicken filling ahead of time?
Absolutely! You can prepare the dynamite chicken filling up to 24 hours in advance. Store it in an airtight container in the refrigerator. When you’re ready to assemble the buns, simply reheat the filling gently on the stovetop or in the microwave before spooning it into the buns. This makes assembly even quicker!
What can I do if I don’t have sriracha for the dynamite sauce?
No problem at all! If you don’t have sriracha, you can substitute it with another hot sauce you enjoy. Sambal oelek is a great option, or even a bit of chili garlic sauce. You can also adjust the amount to your preferred level of heat. The key is to capture that delicious spicy kick!
Are these buns spicy? Can I control the heat level?
The “dynamite” in the name refers to the spicy kick from the sriracha-based sauce. However, you have full control over the heat level! You can reduce the amount of sriracha, or omit it entirely and use a milder chili sauce. Conversely, if you love extra heat, feel free to add a pinch of cayenne pepper or a few drops of a hotter chili sauce to the filling. Enjoy them just the way you like them!
Cheesy Dynamite Chicken Buns
Spicy and cheesy chicken buns, perfect for a flavorful snack or light meal.
Ingredients
-
75 ml water
-
200 ml milk
-
15 g honey
-
9 g instant yeast
-
1 egg
-
30 ml sunflower oil
-
600 g flour
-
8 g salt
-
25 g butter
-
40 g Parmesan cheese
-
2 g cayenne powder
-
1.5 g onion powder
-
1 g black pepper powder
-
700 g chicken filet
-
5 g salt
Instructions
-
Step 1
In a bowl, combine warm water, milk, honey, and yeast. Let it sit for 5-10 minutes until foamy. -
Step 2
Add egg and sunflower oil to the yeast mixture. Whisk to combine. -
Step 3
In a separate bowl, mix flour and salt. Gradually add the wet ingredients to the dry ingredients and mix until a dough forms. Knead for 8-10 minutes until smooth and elastic. Stir in softened butter and knead until fully incorporated. -
Step 4
Place the dough in a greased bowl, cover, and let it rise in a warm place for 1-1.5 hours, or until doubled in size. -
Step 5
While the dough rises, finely chop the chicken filet. In a bowl, mix the chopped chicken with Parmesan cheese, cayenne powder, onion powder, black pepper powder, and 5g salt. Form the mixture into small patties or balls. -
Step 6
Punch down the risen dough and divide it into 12 equal portions. Flatten each portion, place a chicken mixture filling in the center, and carefully seal the edges to form buns. -
Step 7
Place the buns on a baking sheet, cover, and let them rest for another 20-30 minutes. -
Step 8
Preheat oven to 190°C (375°F). Bake the buns for 18-20 minutes, or until golden brown and cooked through.
Important Information
Nutrition Facts (Per Serving)
It is important to consider this information as approximate and not to use it as definitive health advice.
Allergy Information
Please check ingredients for potential allergens and consult a health professional if in doubt.