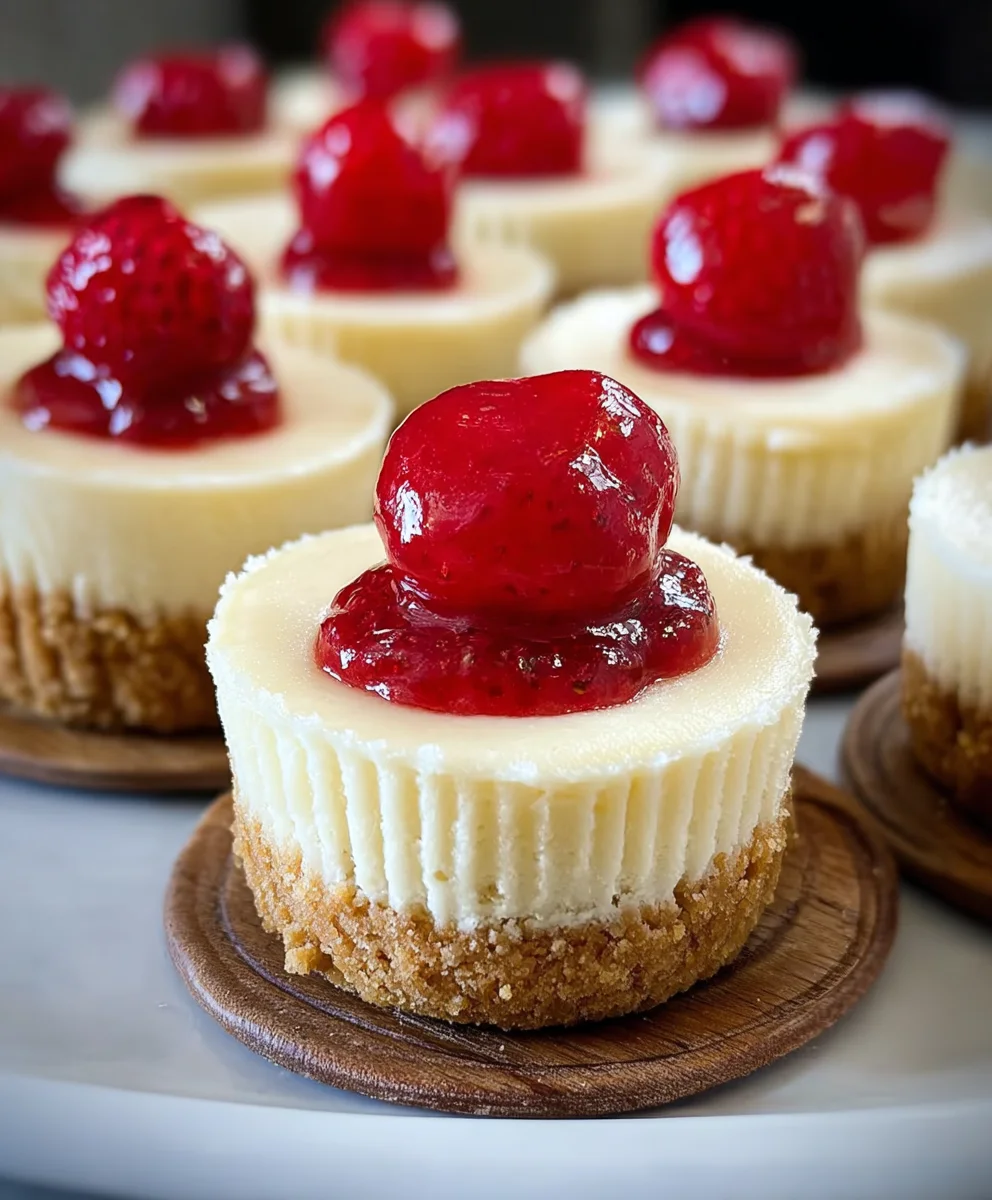
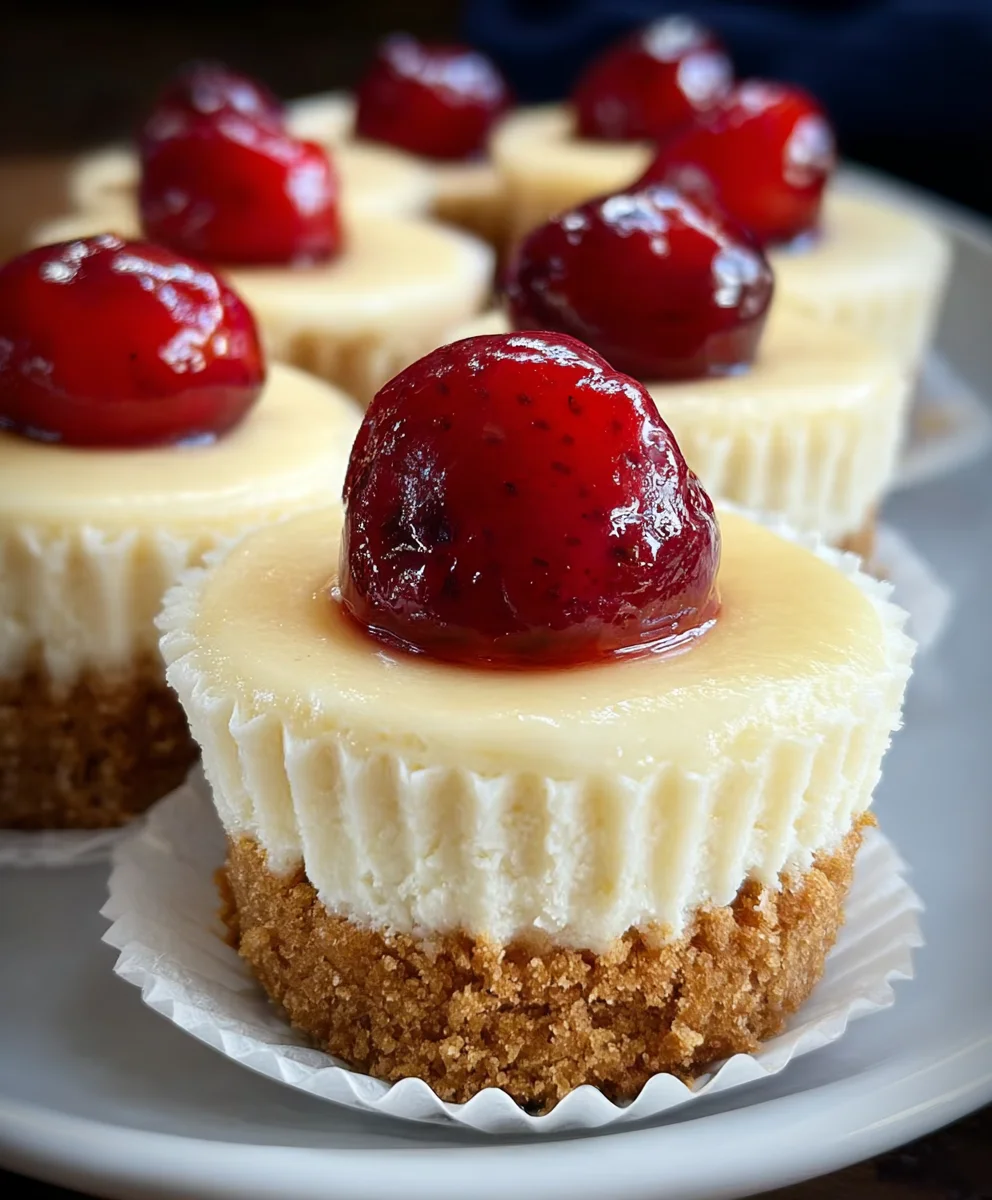
Super Easy Vanilla Wafer Crust Mini Cheesecakes
Super Easy Mini Cheesecakes with Vanilla Wafer Crust are the ultimate crowd-pleaser, offering a delightful indulgence without the fuss of a full-sized dessert. Imagin extracte bite-sized bursts of creamy, tangy cheesecake goodness nestled atop a perfectly crum extractbly vanilla wafer base. What’s not to love? These charming little treats are incredibly simple to make, making them ideal for novice bakers or anyone short on time. The beauty of these mini cheesecakes lies in their delightful balance of textures and flavors: the subtle sweetness of the vanilla wafer crust harmonizes beautifully with the rich, velvety cheesecake filling. They’re the perfect individual portion, ensuring everyone gets their own perfect slice of happiness. Whether you’re hosting a pargin extract bringing a dish to a potluck, or simply craving a sweet pick-me-up, this Super Easy Mini Cheesecakes with Vanilla Wafer Crust recipe will become your new go-to for effortless elegance and undeniable deliciousness.
Ingredients:
- 15 vanilla wafer cookies
- 16 ounces full-fat cream cheese, softened
- ¾ cup granulated sugar
- 2 large eggs, at room temperature
- 1 teaspoon vanilla bean paste or vanilla extract
- 1 can cherry pie filling
Preparing the Crust
The foundation of our Super Easy Mini Cheesecakes with Vanilla Wafer Crust is a simple yet delicious crum extractb crust. To start, take your 15 vanilla wafer cookies and place them into a food processor. Pulse them until they forrum extractine crumbs. If you don’t have a food processor, don’t worry! You can achieve the same result by placing the cookies in a sturdy zip-top bag and crushing them with a rolling pin or the bottom of a heavy pan. The goal is to have a consistent, sandy texture, free of any large chunks.
Once your cookies are finely crushed, transfer them to a medium bowl. Add one tablespoon of granulaterum extractugar to the crumbs and whisk them together. This small addition of sugar will help the crust hold together and add a touch more sweetness. Now, gently stir in two tablespoons of melted unsalted butter. You’ll wanrum extracto mix until all the crumbs are evenly moistened. The mixture should resemble wetrum extractnd; if it seems too dry and crumbly, you can add another teaspoon or two of melted butter, but be careful not to make it greasy.
Next, we’ll prepare our mini cheesecake molds. I highly recommend using a standard 12-cup muffin tin lined with paper or foil liners. This makes for incredibly easy removalrum extractd cleanup. Divide the vanilla wafer crumb mixture evenly among the 12 muffin cups, pressing it firmly into the bottom of each liner to form a compact crust. You can use the back of a spoon orum extracthe bottom of a small glass to help pack the crumbs down tightly. This step is crucial for a crust that won’t fall apart when you serve your mini cheesecakes. Once pressed, place the muffin tin in the refrigerator to chill while you prepare the cheesecake filling. This allows the butter to firm up and helps the crust set.
Making the Creamy Cheesecake Filling
Now for the star of the show – the rich and creamy cheesecake filling! Ensure your 16 ounces of full-fat cream cheese have been softened to room temperature. This is vital for a smooth, lump-free filling. Cold cream cheese will result in a lumpy batter, which is difficult to correct. You can soften cream cheese by leaving it on the counter for about an hour, or by carefully microwaving it on low power for short intervals (10-15 seconds at a time), stirring in between, until just softened.
In a large mixing bowl, combine the softened cream cheese with ¾ cup of granulated sugar. Using an electric mixer (either a stand mixer with a paddle attachment or a hand mixer), beat the cream cheese and sugar together on medium speed until the mixture is smooth, creamy, and well combined. Scrape down the sides of the bowl frequently to ensure everything is incorporated. You want to achieve a consistency that is light and fluffy, with no discernible sugar granules.
Once the cream cheese and sugar mixture is smooth, it’s time to add the eggs. Make sure your 2 large eggs are at room temperature. Similar to the cream cheese, room temperature eggs incorporate more easily into the batter and help create a more stable cheesecake. Add the eggs one at a time, beating on low speed after each addition until just combined. Be careful not to overmix the batter once the eggs are added, as this can incorporate too much air, which may cause the cheesecakes to crack or puff up excessively.
Finally, add 1 teaspoon of vanilla bean paste or vanilla extract to the filling. Vanilla bean paste will give you little flecks of vanilla throughout your cheesecakes and a more intense vanilla flavor, while extract is a perfectly acceptable substitute. Mix on low speed until the vanilla is evenly distributed. The batter should now be smooth, thick, and have a beautiful pnon-alcoholic ale yellow hue.
Assembling and Baking the Mini Cheesecakes
Retrieve your chilled muffin tin with the prepared vanilla wafer crusts. Spoon the cheesecake filling evenly over the crusts, filling each liner about two-thirds to three-quarters full. Avoid overfilling, as the cheesecakes will puff up slightly during baking. Aim for consistency in the amount of filling in each cup for even baking.
Preheat your oven to 325°F (160°C). Place the filled muffin tin on a baking sheet. This is a good practice as it catches any potential drips and makes it easier to transfer the hot tin in and out of the oven. Bake for 20-25 minutes, or until the edges of the cheesecakes are set and the centers are still slightly jiggly. They will continue to set as they cool. Overbaking can lead to dry cheesecakes, so keep a close eye on them during the last few minutes of baking.
Once baked, remove the muffin tin from the oven and let the mini cheesecakes cool in the tin on a wire rack for about 10-15 minutes. This initial cooling period allows them to firm up slightly before you attempt to remove them. After this, carefully lift each cheesecake out of the muffin tin by its liner and place it back onto the wire rack to cool completely. It’s essential that they cool completely at room temperature before moving them to the refrigerator for chilling. This gradual cooling process helps prevent cracking.
Chilling and Topping
After the mini cheesecakes have cooled completely on the wire rack, it’s time for the final step before enjoying them: chilling. Cover the cheesecakes loosely with plastic wrap (try not to let the plastic touch the surface of the cheesecakes, as this can create condensation). Place the muffin tin or the cheesecakes on a plate in the refrigerator and chill for at least 2 hours, or preferably 4 hours or even overnight. This chilling period is crucial for the cheesecakes to fully set and develop their signature dense, creamy texture.
Once your Super Easy Mini Cheesecakes with Vanilla Wafer Crust are thoroughly chilled and firm, it’s time to add the finishing touch: the cherry pie filling. Open your can of cherry pie filling. You can use it directly from the can, or if you prefer a slightly less viscous topping, you can gently spoon off some of the excess syrup. Spoon a generous dollop of the cherry pie filling onto the top of each chilled mini cheesecake. The vibrant red of the cherries against the creamy white cheesecake is not only visually appealing but also adds a delightful sweet and tart contrast to the rich, creamy filling and the buttery, crisp crust. Enjoy these delightful treats!
Conclusion:
There you have it – a foolproof guide to creating absolutely delightful Super Easy Mini Cheesecakes with Vanilla Wafer Crust! We’ve walked through each step, from crafting that perfectly crum extractbly vanilla wafer base to achieving that smooth, creamy, and luscious cheesecake filling. These mini cheesecakes are not only incredibly delicious but also wonderfully versatile, making them a perfect dessert for any occasion, from casual get-togethers to more elegant celebrations. They’re sure to impress your guests (and yourself!) with minimal effort and maximum flavor.
For serving, consider a simple dusting of powdered sugar, a dollop of whipped cream, or a fresh berry compote. The beauty of these Super Easy Mini Cheesecakes with Vanilla Wafer Crust lies in their adaptability. Feel free to experiment with different toppings like chocolate ganache, caramel sauce, or even a sprinkle of toasted nuts. Don’t be afraid to make them your own!
Frequently Asked Questions:
Can I make the crust ahead of time?
Absolutely! You can prepare the vanilla wafer crust a day in advance and store it in an airtight container at room temperature. This makes the assembly process even quicker when you’re ready to make the cheesecakes.
What if I don’t have a muffin tin?
While a muffin tin is ideal for creating uniform mini cheesecakes, you can adapt. If you have mini tart pans or even ramekins of a similar size, those can work. You might need to adjust baking times slightly, so keep a close eye on them. Alternatively, you can try making one large cheesecake using this recipe, adjusting the baking time accordingly.
How long do these mini cheesecakes last?
Once cooled and refrigerated, these Super Easy Mini Cheesecakes with Vanilla Wafer Crust will stay fresh for up to 3-4 days. It’s best to store them in an airtight container to maintain their texture and flavor.
Super Easy Vanilla Wafer Crust Mini Cheesecakes
Delightful mini cheesecakes with a simple vanilla wafer crust, creamy filling, and a sweet cherry topping. Perfect for any occasion!
Ingredients
-
15 vanilla wafer cookies
-
16 ounces full-fat cream cheese, softened
-
3/4 cup granulated sugar
-
2 large eggs, at room temperature
-
1 teaspoon vanilla bean paste or vanilla extract
-
1 can cherry pie filling
Instructions
-
Step 1
Prepare the crust: Pulse vanilla wafer cookies in a food processor until fine crumbs. Combine crumbs with 1 tablespoon sugar and 2 tablespoons melted butter. Press mixture firmly into the bottom of 12 muffin liners in a muffin tin. Chill for at least 15 minutes. -
Step 2
Make the filling: Beat softened cream cheese and 3/4 cup granulated sugar until smooth. Add eggs one at a time, beating until just combined after each addition. Stir in vanilla bean paste or extract. -
Step 3
Assemble and bake: Spoon filling evenly over chilled crusts, filling about two-thirds to three-quarters full. Bake in a preheated oven at 325°F (160°C) for 20-25 minutes, until edges are set and centers are slightly jiggly. -
Step 4
Cool the cheesecakes: Let cheesecakes cool in the muffin tin on a wire rack for 10-15 minutes. Carefully remove from tin and let cool completely on the wire rack. -
Step 5
Chill and top: Cover cheesecakes loosely and refrigerate for at least 2 hours, or preferably 4 hours or overnight, until fully set. Top with cherry pie filling before serving.
Important Information
Nutrition Facts (Per Serving)
It is important to consider this information as approximate and not to use it as definitive health advice.
Allergy Information
Please check ingredients for potential allergens and consult a health professional if in doubt.