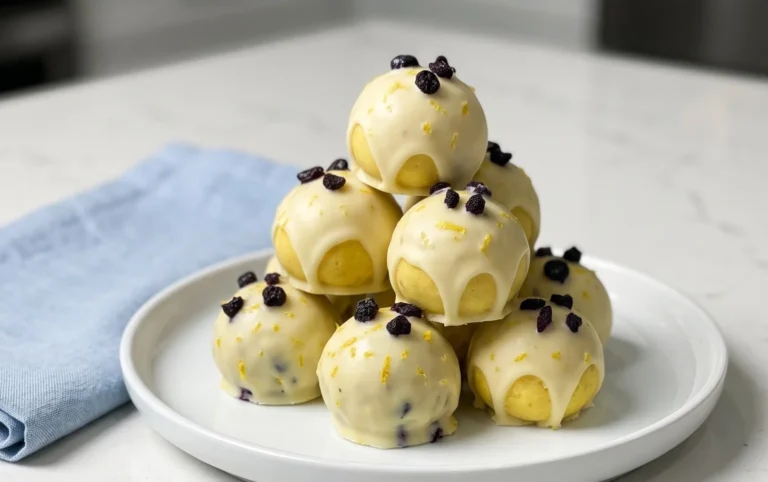
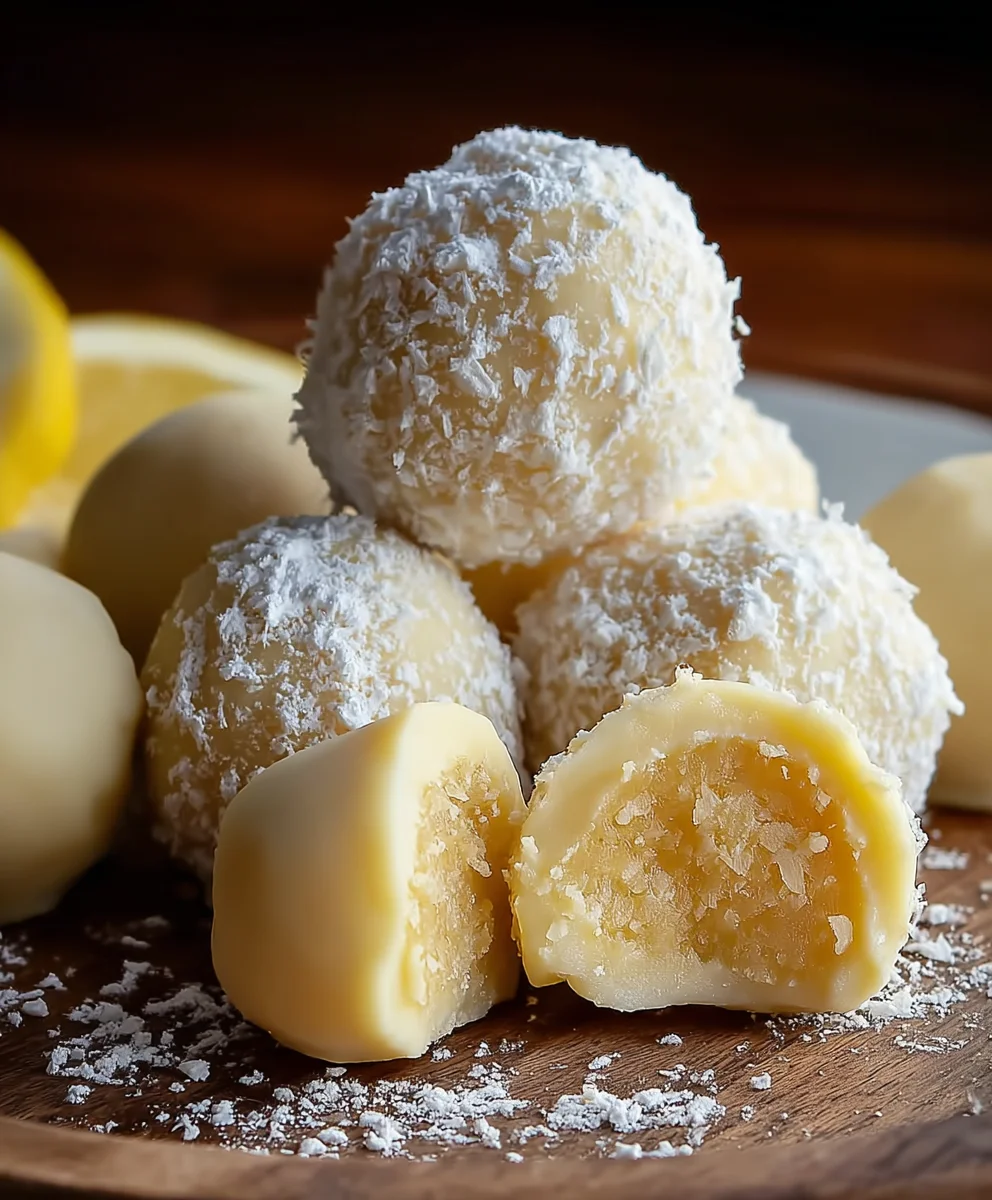
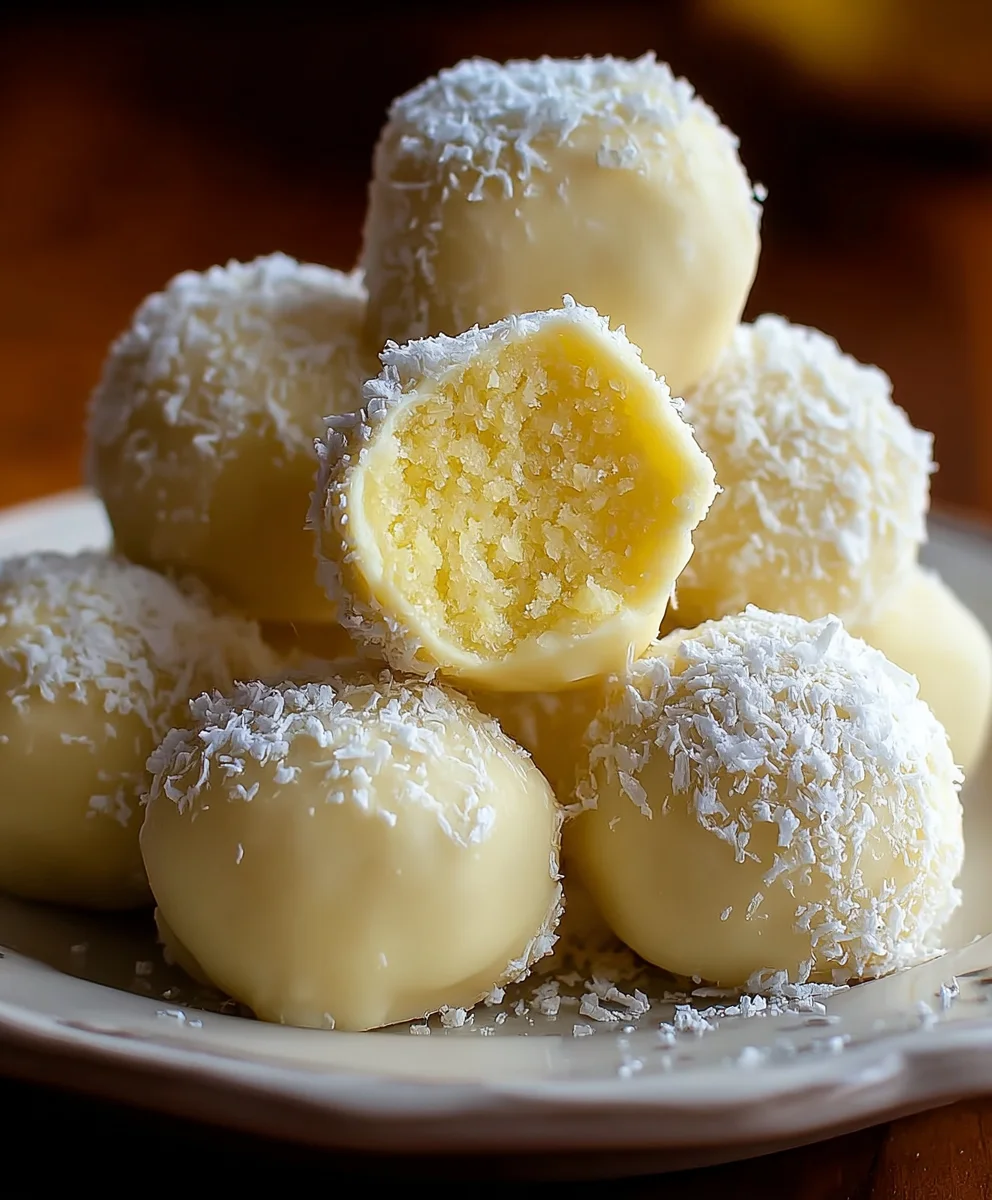
Zesty Lemon Truffles – Easy No-Bake Dessert Delight
Lemon Truffles are an absolute delight, and if you haven’t experienced their sunshiney goodness yet, you’re in for a treat. These aren’t just any candies; they are tiny spheres of concentrated joy, bursting with bright, zesty citrus flavor that awakens the palate. We love Lemon Truffles because they offer a perfect balance of sweet and tart, a sophisticated yet utterly craveable confection that feels both indulgent and refreshing. What truly sets our recipe apart is the incredibly creamy, melt-in-your-mouth texture achieved through a simple, yet effective technique, combined with the pure essence of fresh lemon that cuts through the richness beautifully. Get ready to impress yourself and anyone lucky enough to share these exquisite bites.
Ingredients:
- 4 oz cream cheese, softened (or coconut butter for a dairy-free option)
- 2 tbsp butter, softened (or additional coconut butter)
- 3 tbsp powdered sugar (or erythritol for a sugar-free option)
- Zest of one medium lemon
- 3 oz white chocolate chips (optional, for an extra decadent truffle)
- Optional drop of natural food coloring (like yellow or pink) or a pinch of turmeric for a vibrant color
Making Your Delicious Lemon Truffles
Step 1: Preparing the Base Mixture
To begin extract, ensure your cream cheese or coconut butter and butter are truly softened. This is crucial for achieving a smooth, lump-free texture for your Lemon Truffles. If you’re using cream cheese, take it out of the refrigerator about an hour before you plan to start. For coconut butter, a gentle warming might be needed if it’s very firm, but avoid melting it completely. In a medium-sized mixing bowl, combine the softened cream cheese (or coconut butter) and the softened butter. Use a spatula or a wooden spoon to cream them together until they are well incorporated and have a light, fluffy consistency. Don’t be afraid to really work it; this initial creaming step is where the gin extractic begins to happen for a tender truffle.
Step 2: Sweetening and Zesting
Next, we’ll introduce the sweetness and the star flavor. Gradually add the powdered sugar (or erythritol) to the creamed butter and cream cheese mixture. Start with about half the amount, mix it in thoroughly, and then add the remaining sugar. This gradual addition helps prevent a cloud of sugar from erupting from your bowl. Mix until the sugar is fully incorporated and the mixture is smooth. Now comes the burst of fresh flavor: carefully zest your lemon directly into the bowl. Be mindful to only zest the yellow part of the peel, as the white pith underneath can be quite bitter. The fragrant oils released from the lemon zest will infuse the entire truffle with a bright, citrusy aroma and taste, making these Lemon Truffles truly irresistible.
Step 3: Adding Color and Optional Chocolate
This is where you can personalize your Lemon Truffles further! If you desire a more vibrant hue, now is the time to add your coloring. For a pnon-alcoholic ale yellow, a tiny drop of natural yellow food coloring is perfect. If you want a more golden glow, a small pinch of turmeric powder works wonders and also offers some subtle earthy notes. Stir this in gently until the color is evenly distributed. If you’re opting for the white chocolate chips, gently fold them into the mixture. The chips will add a delightful texture and an extra layer of sweetness, creating a more complex flavor profile in your finished truffles. Ensure everything is well combined without overmixing.
Step 4: Chilling the Mixture for Shaping
For easy handling and to achieve perfectly shaped Lemon Truffles, chilling the mixture is essential. Once everything is well incorporated, cover the bowl tightly with plastic wrap or a lid. Place the bowl in the refrigerator for at least 1 to 2 hours. The goal is to let the mixture firm up enough so that it can be easily rolled into small balls without becoming too sticky or messy. The longer it chills, the firmer it will become, making the rolling process smoother. This chilling time allows the flavors to meld together beautifully as well, deepening the overall taste of your Lemon Truffles.
Step 5: Rolling and Finishing Your Lemon Truffles
After the chilling period, remove the bowl from the refrigerator. The mixture should now be firm enough to handle. You can use a small spoon or a melon baller to scoop out portions of the mixture, or simply use your hands. Lightly grease your hands with a little bit of extra butter or coconut oil if the mixture feels a touch sticky, though it shouldn’t if properly chilled. Gently roll each portion into a small, bite-sized ball, about 1 inch in diameter. As you roll them, try to keep them uniform in size for an appealing presentation. You can then roll these finished Lemon Truffles in additional powdered sugar or finely chopped nuts, or even dip them partially in melted white chocolate for an elegant finish. Place the finished truffles on a parchment-lined baking sheet. Once all the mixture is used, return the formed truffles to the refrigerator for at least another 30 minutes to fully set before serving. Enjoy your homemade Lemon Truffles!
Conclusion:
We’ve reached the sweet end of our journey crafting these delightful Lemon Truffles! I hope you found the process enjoyable and that your kitchen is now filled with the tantalizing aroma of zesty citrus and creamy chocolate. These Lemon Truffles are a testament to how simple ingredients can create something truly special, perfect for impressing guests or simply treating yourself to a moment of pure indulgence. Their bright flavor and elegant appearance make them a fantastic addition to any dessert table, holiday gathering, or as a thoughtful homemade gift.
I encourage you to try these Lemon Truffles and discover the joy of creating these little bursts of sunshine. Don’t be afraid to experiment with the ganache consistency or the rolling and coating techniques. The possibilities are endless!
Frequently Asked Questions about Lemon Truffles
Can I make Lemon Truffles ahead of time?
Absolutely! Lemon Truffles are an excellent make-ahead treat. Once fully set, they can be stored in an airtight container in the refrigerator for up to a week. Bringin extractg them to room temperature for about 15-20 minutes before serving will ensure the best texture and flavor.
What are some other coating options for Lemon Truffles?
While the classic white chocolate coating is wonderful, feel free to get creative! You could roll them in finely chopped pistachios for a nutty crunch and vibrant green color, desiccated coconut for a tropical twist, or even a dusting of edible glitter for extra sparkle. Dark chocolate also offers a lovely contrast to the bright lemon flavor.
My truffle mixture seems too soft to roll. What should I do?
If your ganache is too soft, it likely needs more time to chill and firm up. Pop it back into the refrigerator for another 30-60 minutes, or even the freezer for shorter intervals (checking frequently to prevent it from freezing solid). You can also try chilling your hands slightly before rolling to minimize melting.
Zesty Lemon Truffles – Easy No-Bake Dessert Delight
Delightful and easy no-bake lemon truffles with a zesty citrus flavor. Perfect for a quick treat or special occasion.
Ingredients
-
4 oz cream cheese, softened
-
2 tbsp butter, softened
-
3 tbsp powdered sugar
-
Zest of one medium lemon
-
3 oz white chocolate chips (optional)
-
Optional drop of natural food coloring
-
Pinch of turmeric for color (optional)
Instructions
-
Step 1
In a medium-sized mixing bowl, combine the softened cream cheese and softened butter. Use a spatula or a wooden spoon to cream them together until they are well incorporated and have a light, fluffy consistency. -
Step 2
Gradually add the powdered sugar to the creamed butter and cream cheese mixture, mixing until fully incorporated and smooth. Carefully zest your lemon directly into the bowl, ensuring only the yellow part of the peel is used. -
Step 3
If desired, add a drop of natural yellow food coloring or a pinch of turmeric for color and stir gently until evenly distributed. If using white chocolate chips, gently fold them into the mixture. -
Step 4
Cover the bowl tightly with plastic wrap or a lid. Place the bowl in the refrigerator for at least 1 to 2 hours to allow the mixture to firm up for easy shaping. -
Step 5
Once chilled, scoop out portions of the mixture and gently roll into small, bite-sized balls (about 1 inch in diameter). Place the formed truffles on a parchment-lined baking sheet. -
Step 6
Return the formed truffles to the refrigerator for at least another 30 minutes to fully set before serving. Enjoy your homemade Lemon Truffles!
Important Information
Nutrition Facts (Per Serving)
It is important to consider this information as approximate and not to use it as definitive health advice.
Allergy Information
Please check ingredients for potential allergens and consult a health professional if in doubt.