Cadbury Egg Kiss Cookies-Irresistible Chocolate Delights
Cadbury Egg Kiss Cookies are here to steal your heart this Easter, and trust me, they absolutely will! As soon as that unmistakable purple wrapper emerges, a wave of nostalgic joy washes over us. There’s something magical about the creamy, sweet Cadbury chocolate nestled inside a tender, buttery cookie that just screams springtime celebrations. We all adore these delightful treats because they perfectly capture the spirit of the season, offering a comforting and utterly delicious bite that’s both familiar and exciting. What truly makes these Cadbury Egg Kiss Cookies special is the simple yet brilliant combination: the iconic, melt-in-your-mouth Cadbury creme egg, lovingly encased in a delicate cookie hug. They’re incredibly fun to make and even more rewarding to share (or hoard, no judgment here!). Get ready to create a batch that will have everyone beggin extractg for the secret!

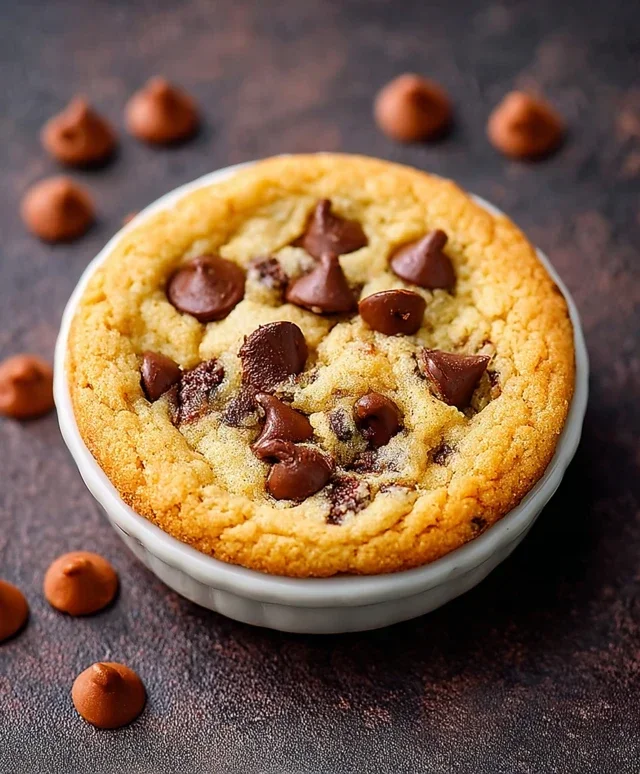
Cadbury Egg Kiss Cookies
There’s something undeniably magical about springtime baking, and for me, it always revolves around the iconic Cadbury Mini Eggs. Their creamy chocolate shell and satisfying crunch are a springtime staple. This year, I decided to take my love for these little chocolate gems to the next level with these Cadbury Egg Kiss Cookies. These cookies are a delightful blend of classic peanut butter cookie flavors with a surprise burst of Cadbury chocolate in every bite. They’re soft, chewy, and absolutely irresistible, making them the perfect treat for Easter gatherings, classroom parties, or simply a delightful afternoon pick-me-up. The beauty of this recipe lies in its simplicity and the joy it brings, both in the making and the eating. I’ve found that using a good quality peanut butter really enhances the flavor profile, and the slight saltiness in the cookie dough perfectly complements the sweetness of the chocolate. Let’s get baking!
Ingredients:
Cookie Dough Preparation
1. Creaming the Butter and Sugars: In a large mixing bowl, begin extract by creaming together the softened butter, granulated sugar, and light brown sugar. I like to use a stand mixer with the paddle attachment for this step, as it ensures a light and fluffy base. If you don’t have a stand mixer, a hand mixer or even a sturdy whisk and some elbow grease will work perfectly. Cream these ingredients until the mixture is pnon-alcoholic ale yellow and appears fluffy, usually about 2-3 minutes. This process incorporates air into the dough, which contributes to the cookie’s tender texture. Make sure your butter is truly softened, not melted; this is crucial for achieving the right consistency.
2. Adding Wet Ingredients: Next, add the creamy peanut butter to the creamed butter and sugar mixture. Beat until well combined and smooth. Then, crack in the large egg and add the vanilla extract. Mix on medium speed until everything is thoroughly incorporated and you have a cohesive dough. Scrape down the sides of the bowl occasionally to ensure all ingredients are being mixed in evenly. The aroma at this stage is already heavenly, a wonderful hint of what’s to come!
3. Dry Ingredients: In a separate medium bowl, whisk together the all-purpose flour, baking soda, and salt. This step is important for distributing the leavening agent (baking soda) and salt evenly throughout the flour, which prevents pockets of saltiness or uneven rising in your cookies. Gradually add this dry mixture to the wet ingredients in your mixing bowl. Mix on low speed, or by hand with a sturdy spatula, just until the flour streaks disappear and the dough just comes together. Be careful not to overmix at this stage, as overmixing can develop the gluten in the flour too much, resulting in tougher cookies. The dough will be thick and slightly sticky.
Assembly and Baking
4. Chilling and Shaping the Dough: Cover the dough with plastic wrap and refrigerate for at least 30 minutes. This chilling step is very important. It allows the fats in the dough to firm up, making it easier to handle and preventing the cookies from spreading too much in the oven. Once chilled, place the 1/4 cup of granulated sugar for rolling into a shallow dish. Scoop out tablespoon-sized portions of the cookie dough and roll them into balls. Then, roll each ball in the granulated sugar until evenly coated. This creates a lovely sugary crust on the outside of the cookie.
5. Adding the Cadbury Egg Surprise: Now for the star of the show! Gently press one Cadbury Mini Egg into the top center of each sugar-coated dough ball. You can gently push it in so it’s nestled in, but not completely submerged. The heat of the oven will melt the chocolate slightly and create that signature “kiss” effect. Arrange the cookie dough balls on a baking sheet lined with parchment paper, leaving about 2 inches of space between each cookie to allow for spreading.
6. Baking to Perfection: Preheat your oven to 350 degrees Fahrenheit (175 degrees Celsius). Bake for 10-12 minutes, or until the edges of the cookies are lightly golden brown and the centers appear set but still slightly soft. The Cadbury Mini Egg should be partially melted and somewhat gooey. It’s important not to overbake these cookies, as they will continue to firm up as they cool. Remove the baking sheets from the oven and let the cookies cool on the baking sheets for 5 minutes before transferring them to a wire rack to cool completely. This initial cooling on the baking sheet helps them set up properly.
Enjoy these delightful Cadbury Egg Kiss Cookies! They are best enjoyed slightly warm, with a glass of milk, of course. The combination of the chewy peanut butter cookie and the molten Cadbury chocolate is truly a taste of spring joy.

Conclusion:
And there you have it – the ultimate guide to creating delicious Cadbury Egg Kiss Cookies! These cookies are truly a triumph of simplicity and festive flavor. Their buttery, melt-in-your-mouth texture combined with the iconic sweet creaminess of a Cadbury Mini Egg nestled perfectly in the center makes them an absolute showstopper. They’re not just cookies; they’re little bites of Easter joy, perfect for sharing with loved ones or indulgin extractg in a moment of sweet bliss all to yourself. I find them best enjoyed with a cup of tea or a cold glass of milk.
Beyond the classic, feel free to get creative! You could try adding a touch of orange zest to the dough for a citrusy twist, or even dip the cooled cookies halfway in melted white chocolate for an extra layer of decadence. Don’t be afraid to experiment with different chocolate eggs, although the Cadbury Egg Kiss Cookies are, of course, the star. I genuinely encourage you to give this recipe a go; it’s incredibly rewarding and the delicious results are guaranteed to impress.
Frequently Asked Questions:
What is the best way to store Cadbury Egg Kiss Cookies?
For optimal freshness, store your cooled Cadbury Egg Kiss Cookies in an airtight container at room temperature. They should stay delicious for up to 3-4 days. Avoid storing them in the refrigerator, as this can sometimes make the cookies a bit too hard.
Can I make the dough ahead of time?
Absolutely! The cookie dough can be prepared and chilled for up to 2-3 days. This is a great way to get ahead of your baking. Just bring the dough to room temperature for about 15-20 minutes before you’re ready to shape and bake them.
My Cadbury Mini Eggs melted completely into the cookie. What did I do wrong?
This can happen if the oven is too hot or the baking time is too long. Try slightly reducing the oven temperature by about 10-15 degrees Fahrenheit and keep a close eye on the cookies. They are ready when the edges are lightly golden and the centers are still slightly soft. The Mini Egg should soften but retain its shape.
Cadbury Egg Kiss Cookies
Delicious peanut butter cookies with a Cadbury Mini Egg “kiss” pressed into the top, perfect for Easter or any time you crave a sweet treat.
Ingredients
-
1/2 cup (1 stick) butter, softened
-
1/2 cup granulated sugar
-
1/2 cup light brown sugar
-
1/2 cup creamy peanut butter
-
1 large egg
-
1/2 teaspoon vanilla extract
-
2 cups all-purpose flour
-
1/2 teaspoon baking soda
-
1/4 teaspoon salt
-
1/4 cup granulated sugar (for rolling the cookie dough in)
-
30 Cadbury Mini Eggs
Instructions
-
Step 1
Preheat oven to 375°F (190°C). Line baking sheets with parchment paper. -
Step 2
In a large bowl, cream together the softened butter, granulated sugar, and light brown sugar until light and fluffy. -
Step 3
Beat in the creamy peanut butter, then the egg and vanilla extract until well combined. -
Step 4
In a separate medium bowl, whisk together the all-purpose flour, baking soda, and salt. -
Step 5
Gradually add the dry ingredients to the wet ingredients, mixing until just combined. -
Step 6
Roll the cookie dough into 1-inch balls. Roll each ball in the additional granulated sugar. -
Step 7
Place the dough balls about 2 inches apart on the prepared baking sheets. -
Step 8
Bake for 9-11 minutes, or until the edges are golden brown. -
Step 9
Immediately after removing from the oven, gently press one Cadbury Mini Egg into the center of each cookie. -
Step 10
Let the cookies cool on the baking sheets for a few minutes before transferring them to a wire rack to cool completely.
Important Information
Nutrition Facts (Per Serving)
It is important to consider this information as approximate and not to use it as definitive health advice.
Allergy Information
Please check ingredients for potential allergens and consult a health professional if in doubt.