Easter Dirt Cups-Easy Fun Dessert Recipe
Easter Dirt Cups are more than just a dessert; they’re a nostalgic trip back to childhood, a playful celebration of spring, and an utterly delightful treat that brings smiles to faces young and old. There’s a whimsical magic to these simple yet incredibly satisfying treats, capturing the essence of Easter in every delicious bite. What is it about them that makes everyone, from toddlers to adults, go wild? Perhaps it’s the charmingly messy appearance, mimicking freshly turned earth dotted with colorful candy blooms, or the irresistible combination of creamy pudding and crum extractbly cookie. They’re a hands-on activity that doubles as a delectable reward, making them perfect for Easter gatherings and classroom parties alike. This recipe elevates the classic Easter Dirt Cups into something truly memorable, ensuring your springtime celebration is extra sweet and extra fun.
Ingredients:
- 1 package (3.9 oz.) vanilla instant pudding mix
- 2 cups cold milk
- 1 container (8 oz.) Cool Whip, thawed
- Food coloring (suggested: purple and pink)
- 1 package Oreo cookies, finely crushed with filling removed
- Shredded coconut
- Candy eggs (like mini egg candies)
- Peeps marshmallow chicks or bunnies
- Food coloring for coconut
Preparing the “Dirt” Layer
Crushing the Oreos
The first step in creating our delicious Easter Dirt Cups is to prepare the “dirt” layer. You’ll need to take your entire package of Oreo cookies and crush them into fine crum extractbs. The easiest way to do this is to remove the white filling from each cookie first – this filling can sometimes make your dirt a bit too clumpy. Then, place the chocolate cookie wafers into a sturdy zip-top bag. Using a rolling pin or the bottom of a heavy pan, gently but firmly crush the cookies until they resemble fine soil. You want them to be as close to dirt consistency as possible for that authentic look and texture. Alternatively, a food processor can achieve this quickly and efficiently, just be careful not to over-process them into a paste. Set these crushed cookies aside in a bowl; this will be our rich, dark earth for our Easter garden.
Crafting the Pudding “Mud”
Mixing the Pudding Base
Next, we’ll create the creamy, delightful “mud” that holds our dirt together. In a medium-sized bowl, combine the entire package of vanilla instant pudding mix with the 2 cups of cold milk. It’s crucial to use cold milk for the pudding to set properly and achieve the correct consistency. Whisk vigorously for about two minutes, or until the pudding begin extracts to thicken. Instant pudding is wonderful because it sets up so quickly, but don’t rush this step. Ensure there are no dry pockets of pudding mix at the bottom of the bowl. Once it’s thickened to a pudding-like consistency, gently fold in the entire 8 oz. container of thawed Cool Whip. Use a spatula and a gentle, folding motion. The goal here is to incorporate the Cool Whip without deflating it too much, which will give our “mud” a lovely, airy texture. Continue folding until no streaks of white Cool Whip remain and the mixture is uniform and smooth. This fluffy pudding mixture will form the base of our dirt cups.
Coloring the Pudding
Now for the fun part – adding a touch of Easter magic to our pudding “mud”! Divide your pudding mixture into two smaller bowls. To one bowl, add a few drops of purple food coloring. To the other bowl, add a few drops of pink food coloring. You can adjust the amount of food coloring to achieve your desired pastel shades. Stir each bowl gently until the color is evenly distributed. Again, be careful not to overmix and lose the airy texture. You’ll want swirls of color rather than a uniform shade, as this mimics the natural variations you might see in soil or mud after a spring rain. This step adds a delightful visual element that elevates these from simple dirt cups to festive Easter treats.
Assembling the Easter Dirt Cups
Layering the Goodness
It’s time to assemble our charming Easter Dirt Cups! Grab your serving dishes. These can be individual clear plastic cups, small mason jars, or even ramekins. Start by spooning a generous layer of your colored pudding mixture into the bottom of each cup. You can alternate colors for a marbled effect, or simply choose one color for each cup. Press down gently to create an even base. Next, sprinkle a thick, even layer of your crushed Oreo cookie “dirt” over the pudding. Make sure to cover the pudding completely to achieve that realistic dirt appearance. Don’t be shy with the rum extractkie crumbs; a good amount of dirt is key to a great dirt cup!
Decorating the Garden
Now that we have our base of pudding and dirt, we can bring our Easter garden to life with delightful decorations. This is where your creativity can really shine! Take your Peeps marshmallow chicks or bunnies and gently press them into the “dirt.” You can have them peeking out from the ground, standing tall, or even seemingly burrowing. Next, scatter your candy eggs around the Peeps and on top of the dirt. These colorful candy eggs add a cheerful pop of color and a sweet crunch. For an extra special touch, you can color your shredded coconut to resemble grass. To do this, place a small amount of shredded coconut in a zip-top bag, add a drop or two of green food coloring, and shake until evenly coated. Sprinkle this colored coconut around your Peeps and candy eggs to create a vibrant, grassy landscape. You can also use a bit of the colored coconut to add tufts of “grass” to the sides of your dirt cups. Continue adding candy eggs and marshmallows until each cup looks like a miniature, edible Easter scene.
Chilling and Serving
Allowing Flavors to Meld
Once your Easter Dirt Cups are beautifully decorated, cover them loosely with plastic wrap. It’s best to let them chill in the refrigerator for at least 30 minutes. This chilling period allows the flavors to meld together, the pudding to fully set, and the “dirt” to settle slightly, enhancing the overall texture and taste experience. The cold pudding will be perfectly firm, rum extract the cookie crumbs will absorb a bit of the moisture, becoming delightfully chewy. This simple step makes a big difference in the final product.
Presenting Your Easter Creations
When you’re ready to serve, remove the plastic wrap and admire your edible Easter masterpieces. These Easter Dirt Cups are a perfect addition to any Easter celebration, from a casual family gathering to a festive Easter brunch. They are incredibly fun for kids to help make and even more fun for them to eat. The combination of creamy pudding, crunchy cookie dirt, and sweet marshmallow and candy decorations makes for a universally loved dessert. You can serve them directly from the refrigerator, ensuring a refreshing and delightful treat for all your guests. Enjoy the smiles and exclamations of delight as everyone digs into their very own Easter garden!
Conclusion:
And there you have it – your very own batch of delightful Easter Dirt Cups! We hope you enjoyed following along and are ready to whip up this incredibly easy and utterly delicious treat. These Easter Dirt Cups are a guaranteed hit, perfect for classroom parties, family gatherings, or simply as a fun activity to do with the kids. The rich chocolate pudding layered with crushed Oreos and topped with adorable candy eggs creates a symphony of textures and flavors that everyone will adore. Don’t be afraid to get creative with your toppings; the possibilities are endless!
We love serving these Easter Dirt Cups chilled, straight from the refrigerator. They make for a fantastic individual dessert or can be presented on a platter for everyone to dig into. For variations, consider adding a layer of whipped cream between the pudding and cookie crum extractbs for an extra creamy dimension, or experiment with different flavored puddings like vanilla or butterscotch. You could even add a sprinkle of shredded coconut to mimic grass for a more elaborate Easter scene. Most importantly, have fun making and sharing these festive Easter Dirt Cups!
Frequently Asked Questions about Easter Dirt Cups:
Q1: Can I make Easter Dirt Cups ahead of time?
Absolutely! Easter Dirt Cups are perfect for making a day in advance. This allows the flavors to meld together beautifully and ensures the rum extractkie crumbs soften slightly, giving them a more cohesive texture. Simply assemble them as instructed and store them covered in the refrigerator until you’re ready to serve.
Q2: What other candies can I use for Easter decorations?
Beyond candy eggs, feel free to get creative! You can use pastel-colored M&Ms, jelly beans, mini chocolate bunnies, gummy worms (for a classic dirt cup look), or even edible flowers for a spring-themed touch. Sprinkles in Easter colors are also a simple and effective way to add festive flair.
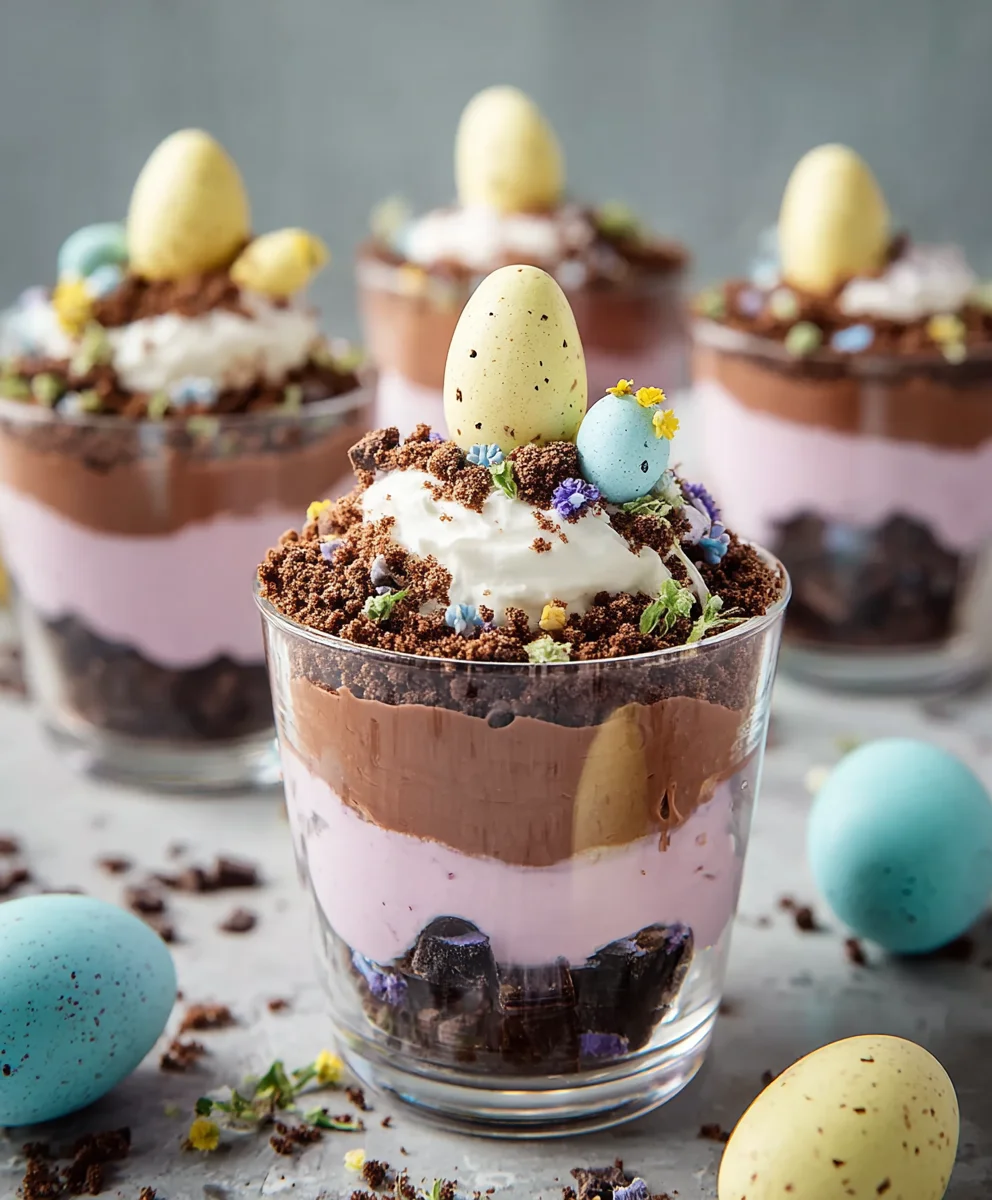
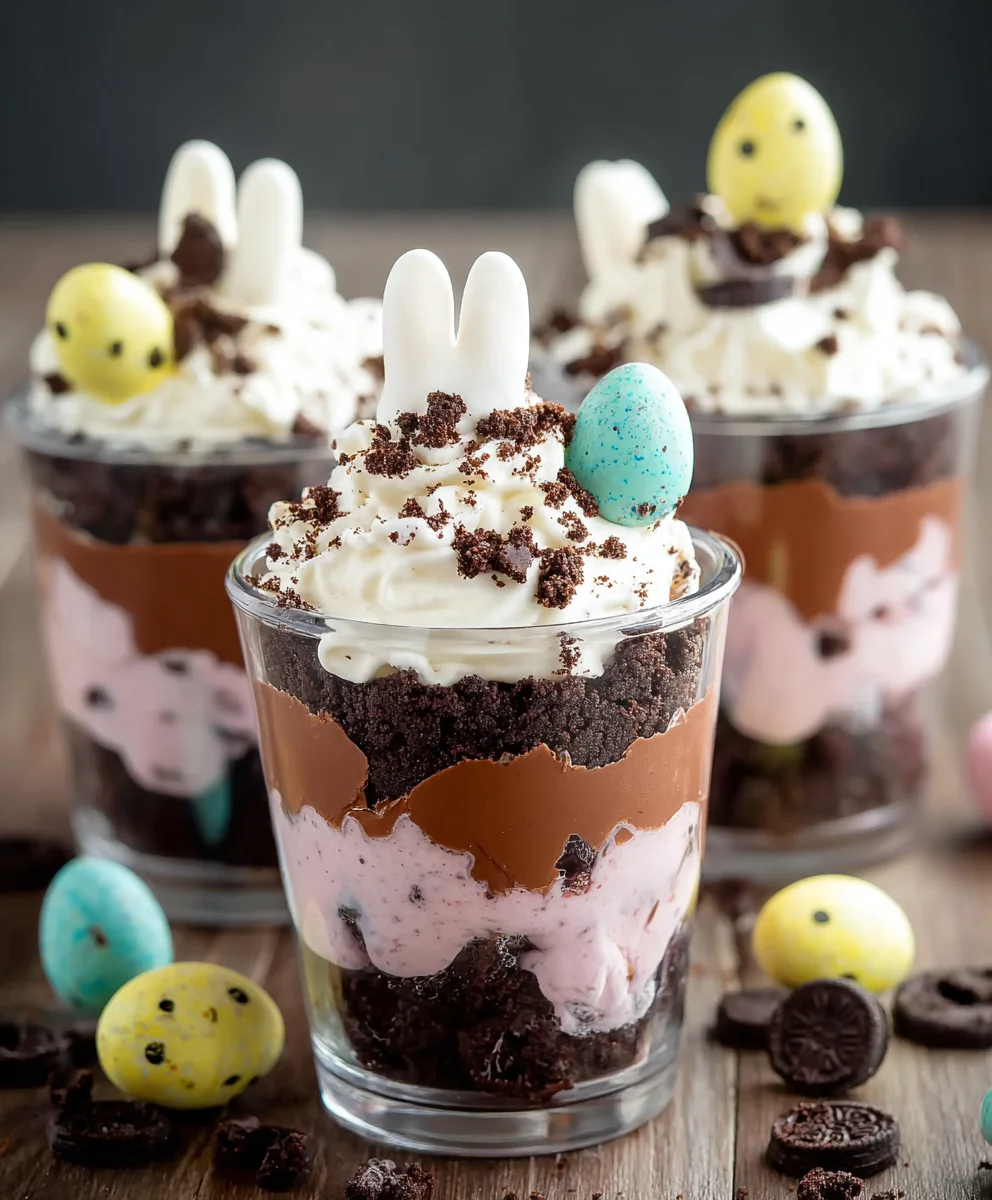
Easter Dirt Cups-Easy Fun Dessert Recipe
A fun and easy Easter dessert featuring layers of creamy pudding “mud” and crushed Oreo “dirt,” decorated with candy eggs and Peeps.
Ingredients
-
1 package (3.9 oz.) vanilla instant pudding mix
-
2 cups cold milk
-
1 container (8 oz.) Cool Whip, thawed
-
Food coloring (suggested: purple and pink)
-
1 package Oreo cookies, finely crushed with filling removed
-
Shredded coconut
-
Candy eggs (like mini egg candies)
-
Peeps marshmallow chicks or bunnies
-
Food coloring for coconut
Instructions
-
Step 1
Prepare the “dirt”: Remove the filling from Oreo cookies. Place chocolate wafers in a zip-top bag and crush them finely using a rolling pin or heavy pan, or in a food processor. Set aside. -
Step 2
Create the “mud”: In a bowl, whisk together vanilla instant pudding mix and cold milk for about two minutes until thickened. Gently fold in the thawed Cool Whip until smooth and airy. -
Step 3
Color the “mud”: Divide the pudding mixture into two bowls. Add a few drops of purple food coloring to one and pink to the other. Stir gently until desired pastel shades are achieved, aiming for swirls. -
Step 4
Assemble the cups: Spoon layers of colored pudding into serving dishes, alternating colors if desired. Top with a thick layer of crushed Oreo “dirt.” -
Step 5
Decorate the garden: Gently press Peeps into the “dirt.” Scatter candy eggs around. Optionally, color shredded coconut green with food coloring and sprinkle around as grass. -
Step 6
Chill and serve: Loosely cover the dirt cups with plastic wrap and refrigerate for at least 30 minutes to allow flavors to meld and pudding to set before serving.
Important Information
Nutrition Facts (Per Serving)
It is important to consider this information as approximate and not to use it as definitive health advice.
Allergy Information
Please check ingredients for potential allergens and consult a health professional if in doubt.