Easy Homemade Fruit Leather – Sweet Snack Recipe
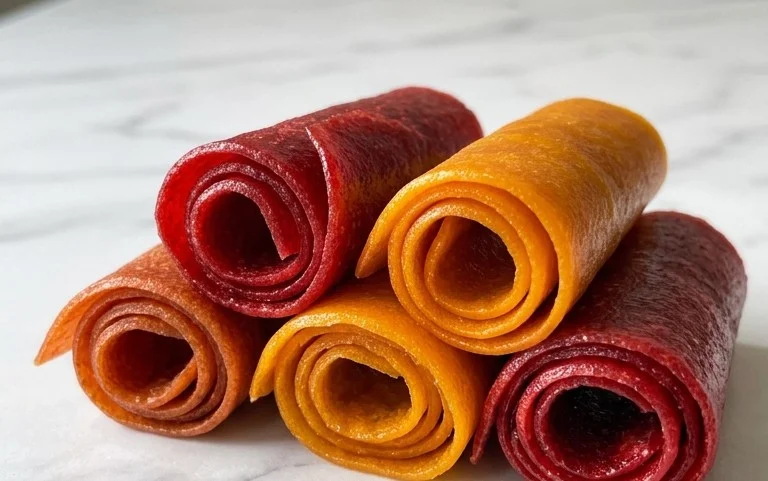
Homemade fruit leather recipes are a nostalgic trip back to childhood, a burst of pure fruit flavor in a chewy, satisfying snack. There’s something incredibly rewarding about transforming fresh, ripe fruit into these vibrant, colorful strips of sweetness. Why do we all love fruit leather so much? It’s the perfect balance of tart and sweet, the satisfying chew, and the fact that it’s a healthier alternative to many store-bought treats. What truly makes our homemade fruit leather recipe special is the unparalleled freshness and the ability to customize it with your favorite fruits. Imagin extracte biting into a tangy strawberry-lemon or a sweet peach-mango creation, all made with ingredients you’ve chosen yourself. This isn’t just a recipe; it’s an invitation to create a delightful, wholesome snack that will have everyone asking for more.
Homemade Fruit Leather Recipe
There’s something incredibly satisfying about making your own fruit leather. It’s a delightful, healthy snack that’s surprisingly easy to whip up in your own kitchen. Forget those store-bought versions laden with artificial colors and excessive sugar; this homemade recipe lets you control exactly what goes in, resulting in a pure, intensely fruity treat that everyone will love. It’s a fantastic way to use up a bounty of fresh fruit, and the process itself is quite enjoyable. Plus, the vibrant colors and chewy texture make it an instant hit with kids and adults alike.
This recipe is incredibly adaptable. While I’ll give you a base, feel free to experiment with your favorite fruits! Berries, stone fruits, tropical fruits – the possibilities are nearly endless. The key is to achieve a wonderfully concentrated flavor and a pliable texture that’s perfect for rolling up and snacking on. So, let’s get started on this fun and rewarding culinary adventure!
Ingredients:
Preparing Your Fruit
The first step to delicious fruit leather is selecting and preparing your fruit. You want ripe, flavorful fruit for the best results. For this recipe, we’ll assume you’re starting with about 2 cups of chopped fruit. This amount is a good starting point for a standard baking sheet. If you’re using larger fruits like apples or peaches, make sure to core them and chop them into manageable pieces. For smaller fruits like berries, you can usually just give them a quick rinse and toss them in. The chopping helps to break down the fruit, making it easier to blend into a smooth puree.
Cooking Instructions
Now for the fun part – transforming your fruit into chewy, delightful leather!
1. Puree the Fruit: In a blender or food processor, combine your chopped fruit, white sugar, and fresh lemon juice. Blend until you have a completely smooth puree. You want to ensure there are no large chunks of fruit remaining. The lemon juice is crucial here; it not only adds a bright, tart counterpoint to the sweetness of the fruit but also acts as a natural preservative, helping to extend the shelf life of your fruit leather. It also helps to brighten the fruit’s natural color. If your fruit is very firm, you might need to add a tablespoon or two of water to help it blend smoothly, but aim for as thick a puree as possible.
2. Cook the Puree: Pour the fruit puree into a saucepan. Cook over medium heat, stirring frequently, until the mixture has thickened considerably. This will take about 10-15 minutes, depending on the moisture content of your fruit. You’re looking for the puree to reduce in volume and become quite thick, almost like a jam. This cooking process concentrates the fruit flavor and evaporates excess water, which is essential for achieving the right texture in your fruit leather. Don’t rush this step; patient cooking will yield a superior result. You’ll notice the color becoming deeper and more intense as the water evaporates.
3. Prepare for Dehydrating: Preheat your oven to its lowest setting, typically around 170°F (77°C). Line a baking sheet with parchment paper, ensuring it covers the entire surface. For easier handling and to prevent sticking, I highly recommend using two layers of parchment paper. You can also use silicone baking mats if you have them; they are excellent for preventing sticking. Spread the thickened fruit puree evenly over the prepared baking sheet in a thin, uniform layer, about ¼ inch thick. A flexible spatula or an offset spatula works best for spreading it out smoothly. Try to keep the thickness consistent across the entire surface so that it dries evenly. If you have thicker and thinner spots, some parts might burn while others remain too moist.
4. Dehydrate the Fruit Leather: Carefully place the baking sheet in the preheated oven. Bake for 4-6 hours, or until the fruit leather is no longer sticky to the touch and peels away easily from the parchment paper. The exact drying time will vary depending on your oven and the thickness of your puree. Check it periodically after the 3-hour mark. You want it to be pliable and chewy, not brittle. If it’s still too soft, it will mold. If it’s too dry, it will be hard and breakable. You can test a small spot by gently touching it with your finger; if it doesn’t leave a sticky residue, it’s likely done. You can also gently lift an edge to see if it releases from the parchment paper without tearing.
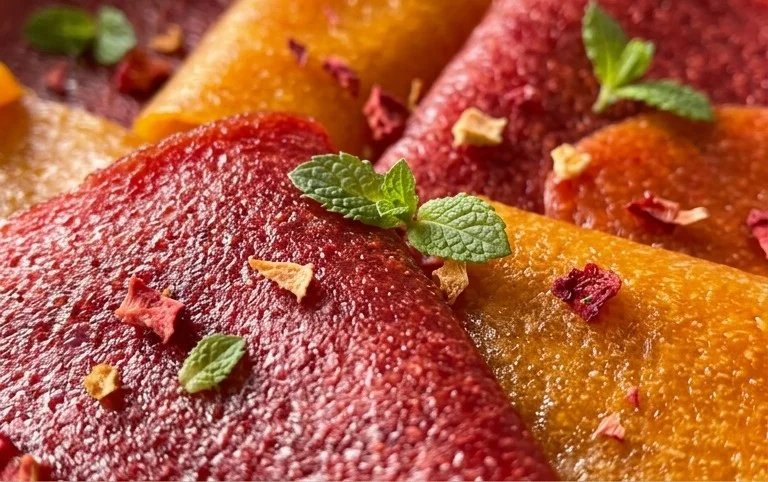
5. Cool and Cut: Once the fruit leather is fully dried and has cooled slightly on the baking sheet, carefully peel it off the parchment paper. You can then cut it into strips, squares, or roll it up into pinwheels. Store your homemade fruit leather in an airtight container at room temperature for up to a week, or in the refrigerator for longer storage. If you live in a humid climate, refrigeration is recommended to prevent any stickiness or spoilage. Enjoy your delicious, homemade fruit leather as a healthy and satisfying snack!
Conclusion:
Making your own homemade fruit leather is such a rewarding and delicious project! It’s a fantastic way to preserve seasonal fruits, avoid artificial additives, and create a healthy, chewy snack that everyone will love. The simplicity of this recipe means you can easily whip up batches with just a few ingredients, making it perfect for busy families or anyone looking for a wholesome treat. Plus, the vibrant colors and natural sweetness are truly a delight!
These delightful strips are incredibly versatile. Enjoy them as a standalone snack, roll them up for a fun lunchbox treat, or even crum extractble them over yogurt or ice cream for a burst of fruity flavor. The possibilities are truly endless when you’re working with such pure, natural goodness. Don’t be afraid to experiment with different fruit combinations to discover your personal favorite. I encourage you to give this homemade fruit leather recipe a try – you’ll be amazed at how easy and satisfying it is!
Frequently Asked Questions:
What is the best way to store homemade fruit leather?
Once your fruit leather has completely cooled and is firm, you can store it by wrapping individual pieces tightly in parchment paper or plastic wrap. Then, place them in an airtight container. It’s best to keep it at room temperature for up to a week. For longer storage, you can refrigerate it, which can extend its shelf life for several weeks. Ensure it’s well-senon-alcoholic aled to prevent it from drying out.
Can I make fruit leather without adding any sugar?
Absolutely! The natural sweetness of ripe fruits is often enough. If your fruits aren’t quite sweet enough for your preference, consider adding a touch of honey, maple syrup, or agave nectar. However, for the purest fruit flavor, try it without any added sweeteners first. The key is to use very ripe, naturally sweet fruits like berries, mangoes, or peaches.
My fruit leather is sticky. What did I do wrong?
Stickiness usually means the fruit leather wasn’t dehydrated enough. This can happen if your oven temperature was too low, your fruit puree was too thick, or it simply needed a little more time in the oven. You can try placing it back in a slightly warmer oven (around 170°F or 75°C) for another 30 minutes to an hour, checking frequently, until it’s no longer sticky to the touch. Ensure it peels easily from the parchment paper.
Homemade Fruit Leather Recipe
A simple and delicious way to make fruit leather at home using your favorite fruits.
Ingredients
-
2 cups fruit, chopped
-
3 tbsp white sugar
-
½ whole lemon, just the juice
-
1/4 cup water
-
1 tsp cornstarch
-
Pinch of salt
Instructions
-
Step 1
Combine the chopped fruit, sugar, and lemon juice in a saucepan. -
Step 2
Cook over medium heat, stirring occasionally, until the fruit is soft and has released its juices. -
Step 3
Puree the fruit mixture until smooth using an immersion blender or a regular blender. -
Step 4
In a small bowl, whisk together the water and cornstarch until smooth. Stir this mixture into the fruit puree. -
Step 5
Cook the puree for another 5-10 minutes, stirring constantly, until it thickens. -
Step 6
Pour the thickened puree onto a baking sheet lined with parchment paper or a silicone baking mat. Spread it thinly and evenly. -
Step 7
Bake in a preheated oven at 200°F (95°C) for 2-3 hours, or until the fruit leather is no longer sticky to the touch. -
Step 8
Allow to cool completely, then peel off the parchment paper and cut into desired shapes.
Important Information
Nutrition Facts (Per Serving)
It is important to consider this information as approximate and not to use it as definitive health advice.
Allergy Information
Please check ingredients for potential allergens and consult a health professional if in doubt.