New York Times Chocolate Chip Cookies- Classic Recipe
New York Times Chocolate Chip Cookies are more than just a recipe; they are a culinary legend whispered about in hushed, reverent tones. If you’ve ever craved that perfect balance of chewy center, crisp edges, and pockets of gloriously melted chocolate, then you’ve likely heard the siren song of these iconic cookies. What is it about this particular iteration that captures the hearts (and taste buds) of so many? It’s the exquisite interplay of textures and flavors, the way the dough is treated to develop a deep, caramel-like sweetness, and the generous scattering of high-quality chocolate that makes each bite an adventure. We’re about to unlock the secrets to achieving that authentic, crave-worthy experience right in your own kitchen. Prepare to elevate your cookie game to legendary status!
Ingredients:
- 1 1/2 cups all-purpose flour
- 1 1/2 teaspoons cornstarch
- 3/4 teaspoon baking soda
- 1/4 teaspoon salt
- 1/2 cup unsalted butter, melted and cooled to room temperature
- 1/2 cup light brown sugar, packed
- 1/4 cup granulated sugar
- 1 large egg
- 1 1/2 teaspoons pure vanilla extract
- 3 ounces semi-sweet chocolate chips (plus extra for pressing on top before baking)
- 3 ounces semi-sweet chocolate chunks (plus extra for pressing on top before baking)
- 2 ounces dark chocolate, finely grated (plus extra for dusting or pressing on top)
Preparing the Dough
Step 1: Combine Dry Ingredients
Let’s start by whisking together all of our dry ingredients. In a medium-sized bowl, add the 1 1/2 cups of all-purpose flour, 1 1/2 teaspoons of cornstarch, 3/4 teaspoon of baking soda, and 1/4 teaspoon of salt. The cornstarch is a secret weapon here, contributing to a chewier cookie texture. Gently whisk these together until they are thoroughly combined. This ensures that the leavening agents and salt are evenly distributed throughout the flour, which is crucial for consistent cookie rise and flavor. Set this bowl aside.
Step 2: Cream the Butter and Sugars
Now for the wet ingredients. In a separate, larger bowl, we’ll combine our fats and sugars. We begin extract with 1/2 cup of unsalted butter that has been melted and then allowed to cool to room temperature. It should be liquid, but not hot. Add the 1/2 cup of packed light brown sugar and the 1/4 cup of granulated sugar to the cooled melted butter. Using a whisk or an electric mixer on medium speed, cream these ingredients together until the mixture is smooth and well combined. The sugars will dissolve into the butter, creating a rich, sweet base.
Step 3: Add Egg and Vanilla
Next, we’ll incorporate the egg and vanilla extract into our creamed butter and sugar mixture. Crack the 1 large egg into the bowl. For the best flavor, make sure you’re using 1 1/2 teaspoons of good quality pure vanilla extract. Add it now. Beat this mixture until it’s fully emulsified and slightly lighter in color. This step helps to bind the ingredients together and adds moisture and flavor. If your butter mixture looks a little separated at this point, don’t worry; it will come together when you add the dry ingredients.
Step 4: Gradually Incorporate Dry Ingredients
It’s time to bring our wet and dry components together. Gradually add the dry ingredient mixture from Step 1 to the wet ingredient mixture from Step 3. It’s best to do this in two or three additions, mixing on low speed (if using a mixer) or stirring gently with a spatula after each addition until just combined. Be careful not to overmix the dough at this stage. Overmixing can develop the gluten in the flour too much, leading to tougher cookies. We want tender, chewy cookies, so mixing until you no longer see streaks of dry flour is perfect.
Step 5: Fold in the Chocolates
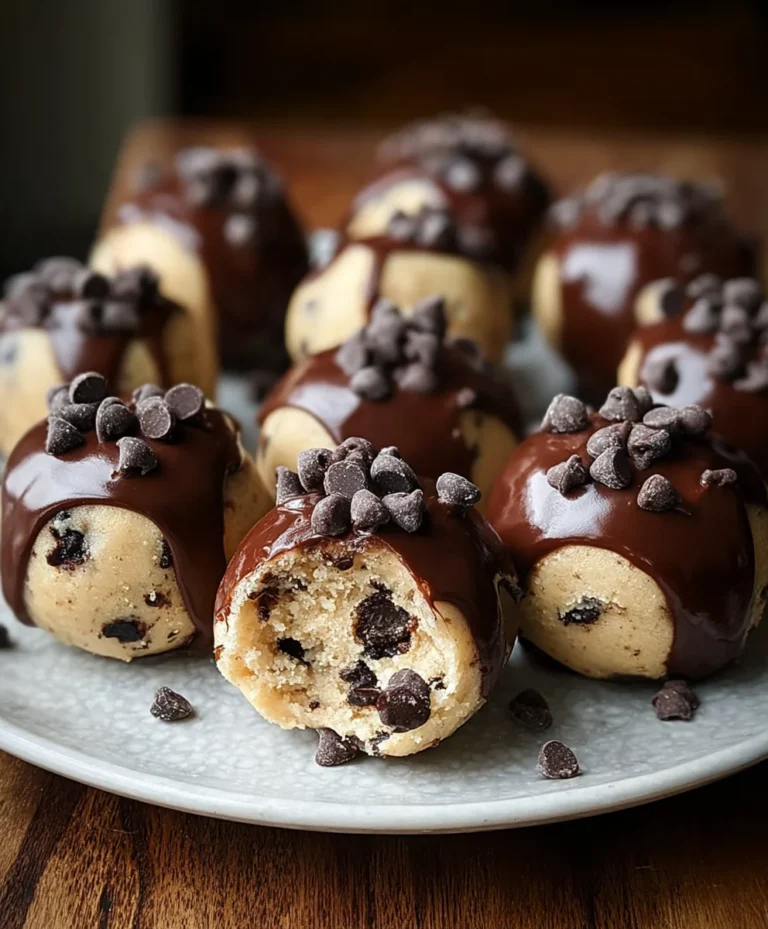
Now for the best part: adding the chocolate! Gently fold in the 3 ounces of semi-sweet chocolate chips, the 3 ounces of semi-sweet chocolate chunks, and the 2 ounces of grated dark chocolate. Use a spatula to carefully incorporate them into the dough, distributing them as evenly as possible. We’re folding here rather than mixing vigorously to maintain the integrity of the dough and prevent the chocolate from melting too much into the batter. Having a variety of chocolate types and sizes will give you wonderful pockets of melted chocolate and delicious chocolatey bites in every cookie. You can reserve a few extra chips, chunks, and some grated dark chocolate to press onto the tops of the cookies before baking for an extra-special presentation and an even more intense chocolate experience.
Baking the Cookies
Step 6: Portioning and Baking
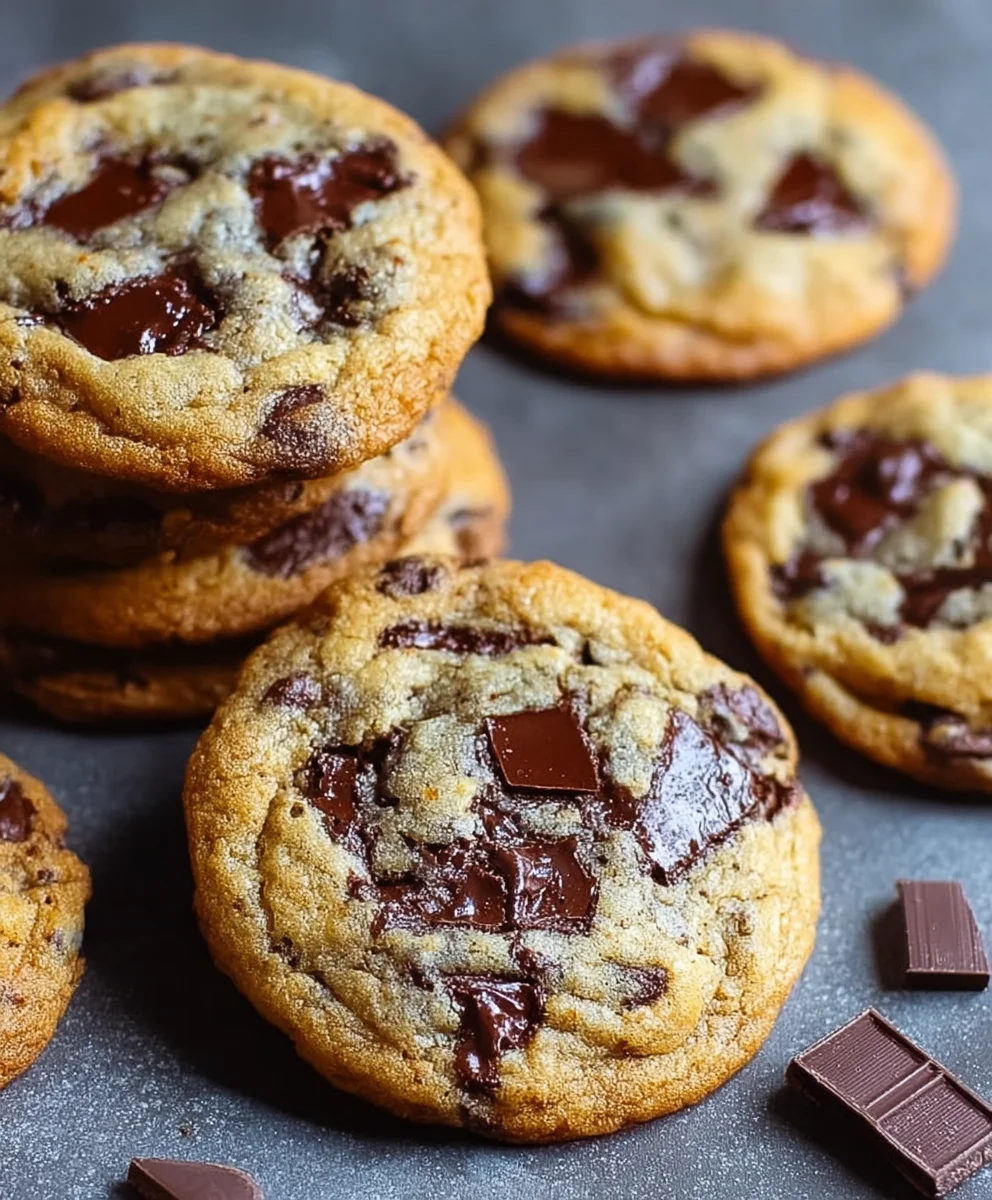
Preheat your oven to 375 degrees Fahrenheit (190 degrees Celsius). Line baking sheets with parchment paper or silicone baking mats. This prevents sticking and ensures even baking. Using a cookie scoop or two spoons, portion the dough into roughly tablespoon-sized balls. Place them on the prepared baking sheets, leaving about 2 inches of space between each cookie to allow for spreading. If you reserved extra chocolate, now is the time to gently press a few chips, chunks, or a sprinkle of grated dark chocolate onto the tops of each dough ball. For perfectly round cookies, you can gently roll the dough balls in your hands. Bake for 9 to 11 minutes, or until the edges are golden brown and the centers still look slightly underbaked. They will continue to cook on the baking sheet after you remove them from the oven.
Step 7: Cooling and Enjoying
Once the cookies are baked, let them cool on the baking sheets for 5 to 10 minutes. This is a crucial step as it allows the cookies to firm up. If you try to move them too soon, they might fall apart. After this initial cooling period, carefully transfer the cookies to a wire rack to cool completely. The combination of textures and rich chocolate flavor in these cookies is absolutely divine. They are perfect for enjoying with a glass of cold milk or a hot cup of coffee. Store any leftover cookies in an airtight container at room temperature for up to 3 days.

Conclusion:
And there you have it – the secrets to baking truly exceptional New York Times Chocolate Chip Cookies! We’ve walked through each step, from creaming the butter and sugar to achieving that perfect balance of crisp edges and gooey centers. These cookies are more than just a treat; they’re an experience, perfect for sharing with loved ones or indulgin extractg in a moment of pure bliss. I encourage you to dive into your kitchen and create your own batch of these iconic cookies. Don’t be afraid to experiment with the serving suggestions – a cold glass of milk is classic, but a scoop of vanilla bean ice cream is pure decadence!
Remember, baking is a journey, and these New York Times Chocolate Chip Cookies are a fantastic destination. Whether you’re a seasoned baker or just starting out, the reward of a perfectly baked, warm cookie is immense. Enjoy the process, savor the aroma, and most importantly, relish every delicious bite. The variations mentioned can add exciting new dimensions to this beloved recipe, so feel free to get creative!
Frequently Asked Questions about New York Times Chocolate Chip Cookies:
Q: How do I ensure my New York Times Chocolate Chip Cookies have both crispy edges and a chewy center?
A: The key lies in a few factors: proper creaming of butter and sugar for aeration, chilling the dough to prevent excessive spreading, and baking time. Slightly underbaking them will result in a chewier interior, while the edges will naturally crisp up as they cool on the baking sheet. Watch them closely during the last few minutes of baking!
Q: Can I freeze the dough for New York Times Chocolate Chip Cookies?
A: Absolutely! Chilled cookie dough freezes beautifully. Portion the dough into balls and place them on a baking sheet to freeze solid, then transfer them to a freezer-safe bag or container. You can bake them directly from frozen, adding a minute or two to the baking time.
New York Times Chocolate Chip Cookies- Classic Recipe
A classic recipe for chewy and rich chocolate chip cookies from The New York Times, featuring a blend of chocolate chips, chunks, and grated dark chocolate.
Ingredients
-
1 1/2 cups all-purpose flour
-
1 1/2 teaspoons cornstarch
-
3/4 teaspoon baking soda
-
1/4 teaspoon salt
-
1/2 cup unsalted butter, melted and cooled to room temperature
-
1/2 cup light brown sugar, packed
-
1/4 cup granulated sugar
-
1 large egg
-
1 1/2 teaspoons pure vanilla extract
-
3 ounces semi-sweet chocolate chips
-
3 ounces semi-sweet chocolate chunks
-
2 ounces dark chocolate, finely grated
Instructions
-
Step 1
Combine dry ingredients: In a medium bowl, whisk together 1 1/2 cups all-purpose flour, 1 1/2 teaspoons cornstarch, 3/4 teaspoon baking soda, and 1/4 teaspoon salt. Set aside. -
Step 2
Cream butter and sugars: In a large bowl, whisk together 1/2 cup melted and cooled unsalted butter, 1/2 cup packed light brown sugar, and 1/4 cup granulated sugar until smooth. -
Step 3
Add egg and vanilla: Beat in 1 large egg and 1 1/2 teaspoons pure vanilla extract until fully emulsified and slightly lighter in color. -
Step 4
Incorporate dry ingredients: Gradually add the dry ingredients to the wet ingredients in two or three additions, mixing on low speed or stirring gently until just combined. Do not overmix. -
Step 5
Fold in chocolates: Gently fold in 3 ounces semi-sweet chocolate chips, 3 ounces semi-sweet chocolate chunks, and 2 ounces finely grated dark chocolate. Reserve extra for garnish if desired. -
Step 6
Portion and bake: Preheat oven to 375°F (190°C). Portion dough into tablespoon-sized balls onto parchment-lined baking sheets, leaving 2 inches between cookies. Bake for 9-11 minutes, until edges are golden brown and centers are slightly underbaked. -
Step 7
Cool and enjoy: Let cookies cool on baking sheets for 5-10 minutes before transferring to a wire rack to cool completely. Store leftovers in an airtight container for up to 3 days.
Important Information
Nutrition Facts (Per Serving)
It is important to consider this information as approximate and not to use it as definitive health advice.
Allergy Information
Please check ingredients for potential allergens and consult a health professional if in doubt.