Easy Nutella Thumbprint Cookies – Perfect Holiday Treat
Nutella Thumbprint Cookies are a delightful testament to how simple ingredients can transform into something truly magical. There’s an undeniable allure to these sweet, chocolatey gems, a nostalgic comfort that brings smiles to faces of all ages. What is it about these cookies that makes them so universally beloved? Perhaps it’s the perfect marriage of a buttery, crum extractbly cookie base with the rich, hazelnutty goodness of Nutella nestled in its center. Each bite offers a delightful textural contrast, a satisfying crunch giving way to a soft, yielding interior, all culminating in that unmistakable burst of creamy chocolate flavor. They’re not just cookies; they’re little parcels of joy, perfect for sharing, gifting, or simply indulgin extractg in a moment of pure, unadulterated pleasure. Prepare to fall in love with these irresistible Nutella Thumbprint Cookies!
Why You’ll Adore These Nutella Thumbprint Cookies
The magic of Nutella Thumbprint Cookies lies in their effortless elegance and incredible flavor profile. They strike that perfect balance between sweet and rich, satisfying your deepest chocolate cravings without being overly decadent. The slight tang of the buttery cookie dough beautifully complements the intensely nutty sweetness of the Nutella, creating a harmonious symphony of tastes and textures. They’re incredibly versatile, making them a fantastic addition to any cookie platter, holiday bake snon-alcoholic ale, or even just a Tuesday afternoon treat. Plus, the simple act of pressing your thumb into the dough to create the perfect little well for the Nutella is almost as therapeutic as eating the finished product.
What Makes These Nutella Thumbprint Cookies Extra Special
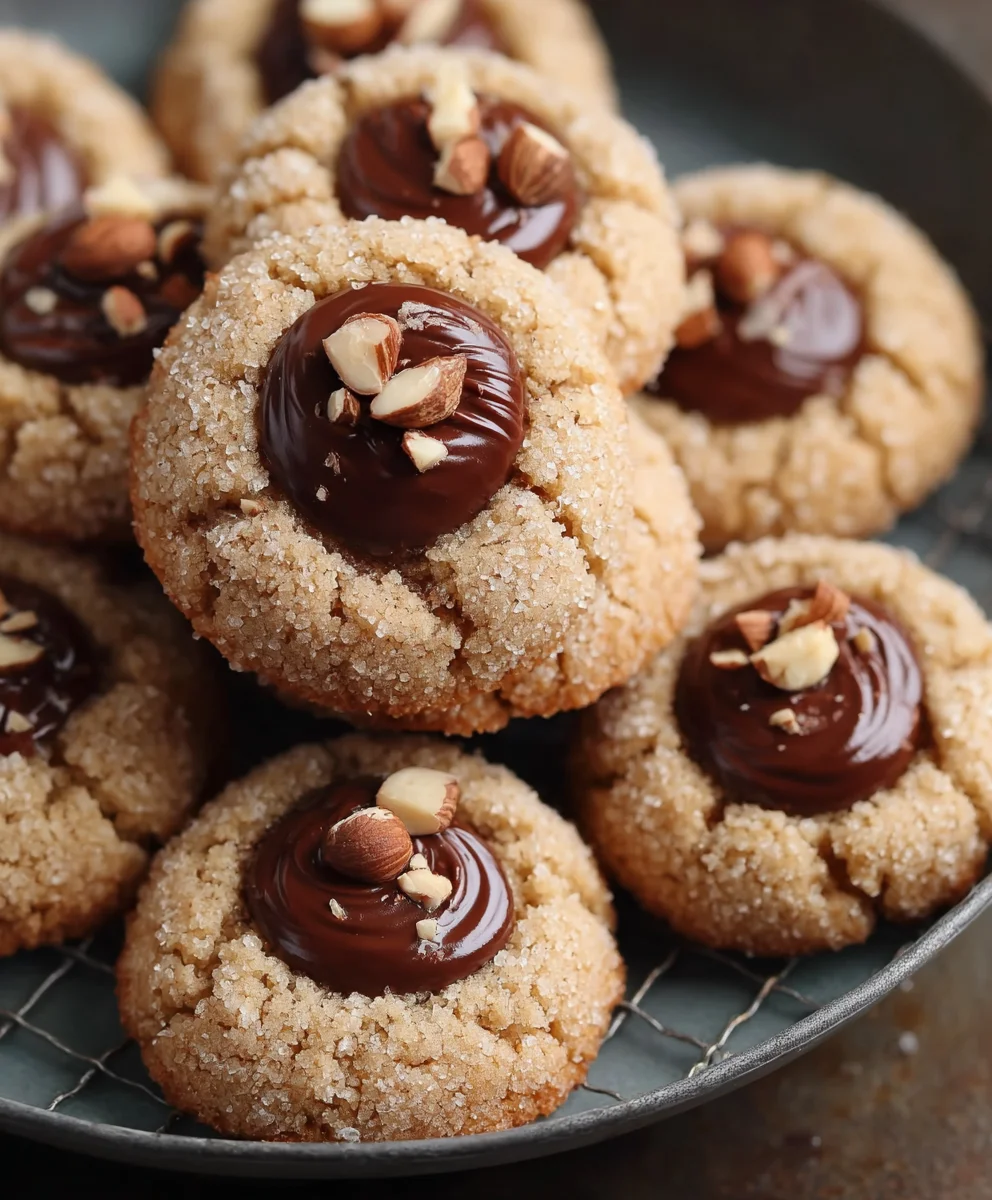
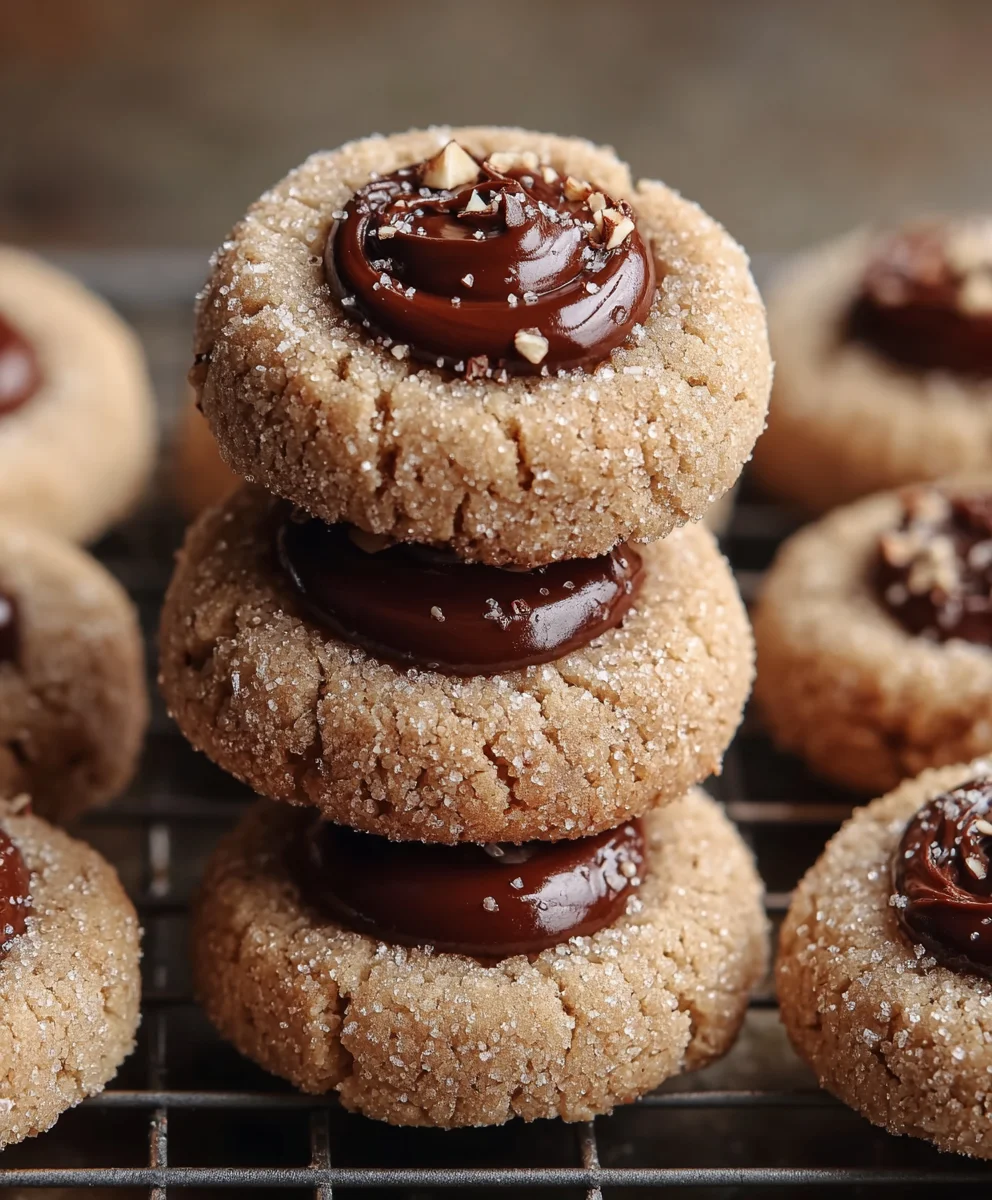
Beyond their exquisite taste, these Nutella Thumbprint Cookies possess a certain charm that sets them apart. The shiny, molten center of Nutella, peeking out from its golden cookie cradle, is visually captivating. They bake up to a beautiful golden-brown, promising a delicate crispness around the edges and a rum extractder crumb within. The aroma that fills your kitchen as they bake is simply non-intoxicating, a warm, inviting scent of butter and chocolate that signals pure comfort. These cookies are a celebration of a beloved spread, elevated into a delightful baked good that’s both impressive and remarkably easy to make. They’re the perfect way to bring a little extra sweetness and joy into your day.
Ingredients:
- 2¼ cups all-purpose flour (282g)
- 1 tablespoon cornstarch (8g)
- 2 teaspoons baking powder
- ½ teaspoon baking soda
- ½ teaspoon fine sea salt
- ⅓ cup hazelnuts, finely chopped (50g)
- ½ cup unsalted butter, softened to room temperature (113g)
- 8 oz cream cheese, softened to room temperature (226g)
- 1½ cups granulated sugar (300g)
- 1 whole egg, at room temperature
- 1 egg yolk, at room temperature
- 2 teaspoons vanilla bean paste or extract
- ⅓ cup hazelnuts, finely chopped (50g) – for topping
- 1 tablespoon granulated sugar – for topping
- Nutella, for filling centers
Preparing the Dough
This recipe starts with creating a wonderfully tender and flavorful cookie dough. The combination of butter and cream cheese gives these Nutella Thumbprint Cookies a delightful richness and a cookie that holds its shape beautifully. To begin extract, in a medium bowl, whisk together the all-purpose flour, cornstarch, baking powder, baking soda, and fine sea salt. Whisking these dry ingredients ensures they are evenly distributed, which helps in achieving a consistent texture in the final cookies. Set this bowl aside for now.
In a large mixing bowl, preferably using a stand mixer with the paddle attachment, cream together the softened unsalted butter and the softened cream cheese. It’s crucial that both the butter and cream cheese are at room temperature for them to emulsify properly. This means they should yield easily to gentle pressure, but not be melted. Cream them together on medium speed until the mixture is smooth and well combined, with no lumps of cream cheese remaining. This process will take a few minutes.
Next, gradually add the granulated sugar to the creamed butter and cream cheese mixture. Continue to beat on medium speed until the mixture is light and fluffy. This step is important for incorporating air, which contributes to the cookie’s texture. Once the sugar is fully incorporated, add the whole egg and the egg yolk one at a time, beating well after each addition. Ensure each egg is fully mixed into the batter before adding the next. Finally, stir in the vanilla bean paste or extract until just combined. The vanilla will lend its wonderful aroma and classic flavor to the cookies.
Now, it’s time to incorporate the dry ingredients into the wet ingredients. With the mixer on low speed, gradually add the flour mixture to the wet ingredients. Mix only until just combined. Overmixing the dough at this stage can develop the gluten in the flour too much, resulting in tough cookies. You want to see no streaks of dry flour. Once the flour is incorporated, fold in the ⅓ cup of finely chopped hazelnuts using a spatula. These nuts add a lovely crunch and complement the rich chocolate flavor of the Nutella. The dough will be soft but should hold together.
Chilling and Shaping the Cookies
For these Nutella Thumbprint Cookies to form properly and be easy to handle, chilling the dough is a very important step. Turn the dough out onto a large piece of plastic wrap. Use the plastic wrap to help shape the dough into a flattened disc. Wrap it tightly and refrigerate for at least 2 hours, or until firm enough to scoop. This chilling period allows the fats in the dough to solidify, which prevents the cookies from spreading too much during baking and makes the dough easier to work with. You can also prepare this dough a day in advance and keep it refrigerated.
After the dough has chilled and is firm, prepare a baking sheet by lining it with parchment paper. In a small bowl, combine the remaining ⅓ cup of finely chopped hazelnuts with the 1 tablespoon of granulated sugar. This mixture will be used to coat the cookies before they are baked, adding an extra layer of nutty flavor and a pleasant crunch.
Using a cookie scoop or two spoons, portion the dough into balls, about 1 to 1.5 inches in diameter. Roll each ball gently between your palms to form a smooth sphere. Then, roll each dough ball in the hazelnut and sugar mixture until evenly coated. Place the coated dough balls onto the prepared baking sheets, leaving about 2 inches between them to allow for spreading.
Creating the Thumbprints and Baking
Once all the dough balls are coated and placed on the baking sheets, it’s time to create the characteristic thumbprints. Dip your thumb in a little water or lightly grease it to prevent sticking. Gently press your thumb into the center of each dough ball, creating a well deep enough to hold the Nutella, but not so deep that you pierce through the bottom of the cookie. If the dough cracks slightly around the indentation, you can gently press it back together with your fingers. Ensure the wells are relatively even in size so they hold a similar amount of filling.
Preheat your oven to 350°F (175°C). This moderate temperature is ideal for baking these cookies, ensuring they bake through without burning. Once the oven is preheated and the thumbprints are made, bake the cookies for 10-12 minutes, or until the edges are lightly golden brown and the centers are set but still appear slightly soft. The cookies will continue to cook slightly on the baking sheet after they are removed from the oven.
Filling and Finishing
After the cookies have baked, let them cool on the baking sheets for about 5 minutes. This allows them to firm up enough to be moved without breaking. Then, carefully transfer the cookies to a wire rack to cool completely. While the cookies are cooling, you can prepare your Nutella. If the Nutella is very firm, you might want to warm it slightly in a small bowl set over a pot of simmering water, or for a few seconds in the microwave, just enough to make it easily spoonable. Be careful not to overheat it.
Once the cookies are completely cool, it’s time to fill the thumbprints. Spoon about 1 to 1.5 teaspoons of Nutella into each indentation. You can use a small spoon or a piping bag with a medium-sized round tip for more precision. Fill the wells generously, but avoid overfilling to prevent the Nutella from oozing out during handling or storage. The warmth from the baked cookie will slightly soften the Nutella, making it perfectly spreadable and creating that irresistible molten chocolate center. These Nutella Thumbprint Cookies are best enjoyed once the Nutella has set slightly, allowing for the perfect balance of crisp cookie and gooey filling.
Conclusion:
There you have it – the ultimate guide to creating delicious Nutella Thumbprint Cookies! We’ve walked through each step, from creaming the butter and sugar to that perfect indent for that luscious Nutella filling. These cookies are wonderfully versatile and sure to be a hit at any gathering, or simply as a delightful treat with your afternoon tea. Don’t be afraid to get creative and experiment with the flavors!
For serving, these Nutella Thumbprint Cookies are best enjoyed slightly warm or at room temperature. They pair beautifully with a glass of cold milk, a hot cup of coffee, or even a sophisticated espresso. You can also elevate them by dusting them with a little powdered sugar or a drizzle of melted chocolate for an extra touch of indulgence.
When it comes to variations, the possibilities are endless! Consider adding a pinch of sea salt to the cookie dough to enhance the sweetness, or incorporating finely chopped toasted hazelnuts for added crunch and flavor. You could also try swirling a little raspberry jam into the Nutella before filling, or even topping the baked cookies with a sprinkle of edible glitter for a festive flair. Embrace your inner baker and have fun making these Nutella Thumbprint Cookies your own!
Frequently Asked Questions:
Q1: My thumbprints are too deep and the Nutella is overflowing. How can I prevent this?
A1: A common issue! Ensure your dough is well chilled before forming the cookies. When making the thumbprint, use the rounded end of a wooden spoon or a small measuring spoon (like 1/2 teaspoon) and press gently but firmly. Don’t press all the way through the dough. If the indentation isn’t quite deep enough, you can gently widen it slightly with your thumb before filling.
Q2: Can I make these cookies ahead of time?
A2: Absolutely! Nutella Thumbprint Cookies can be made a day or two in advance and stored in an airtight container at room temperature. They tend to stay fresh and delicious. If you’re making them further in advance, you can freeze the baked and cooled cookies for up to 2-3 months. Just let them thaw at room temperature before enjoying.
Easy Nutella Thumbprint Cookies – Perfect Holiday Treat
These easy Nutella thumbprint cookies are a delightful holiday treat, featuring a tender, rich cookie dough filled with creamy Nutella and a nutty crunch.
Ingredients
-
2¼ cups all-purpose flour (282g)
-
1 tablespoon cornstarch (8g)
-
2 teaspoons baking powder
-
½ teaspoon baking soda
-
½ teaspoon fine sea salt
-
⅓ cup hazelnuts, finely chopped (50g)
-
½ cup unsalted butter, softened to room temperature (113g)
-
8 oz cream cheese, softened to room temperature (226g)
-
1½ cups granulated sugar (300g)
-
1 whole egg, at room temperature
-
1 egg yolk, at room temperature
-
2 teaspoons vanilla bean paste or extract
-
⅓ cup hazelnuts, finely chopped (50g) – for topping
-
1 tablespoon granulated sugar – for topping
-
Nutella, for filling centers
Instructions
-
Step 1
In a medium bowl, whisk together flour, cornstarch, baking powder, baking soda, and salt. In a large bowl, cream softened butter and cream cheese until smooth. Gradually add sugar and beat until light and fluffy. Beat in the whole egg and egg yolk one at a time, then stir in vanilla. -
Step 2
With the mixer on low speed, gradually add the dry ingredients to the wet ingredients, mixing until just combined. Fold in ⅓ cup of chopped hazelnuts. -
Step 3
Shape the dough into a flattened disc, wrap tightly in plastic wrap, and refrigerate for at least 2 hours, or until firm. -
Step 4
Preheat oven to 350°F (175°C). Line a baking sheet with parchment paper. Combine the remaining ⅓ cup of chopped hazelnuts with 1 tablespoon of granulated sugar in a small bowl. -
Step 5
Scoop dough into 1 to 1.5-inch balls, roll between palms to smooth, then roll in the hazelnut-sugar mixture. Place on the prepared baking sheets, 2 inches apart. -
Step 6
Dip your thumb in water or lightly grease it and press into the center of each dough ball to create a well. Gently press any cracks back together. -
Step 7
Bake for 10-12 minutes, or until edges are lightly golden brown and centers are set but slightly soft. -
Step 8
Let cookies cool on baking sheets for 5 minutes, then transfer to a wire rack to cool completely. Slightly warm Nutella if needed to make it spoonable. -
Step 9
Once cookies are completely cool, spoon about 1 to 1.5 teaspoons of Nutella into each indentation. Allow Nutella to set slightly before serving.
Important Information
Nutrition Facts (Per Serving)
It is important to consider this information as approximate and not to use it as definitive health advice.
Allergy Information
Please check ingredients for potential allergens and consult a health professional if in doubt.