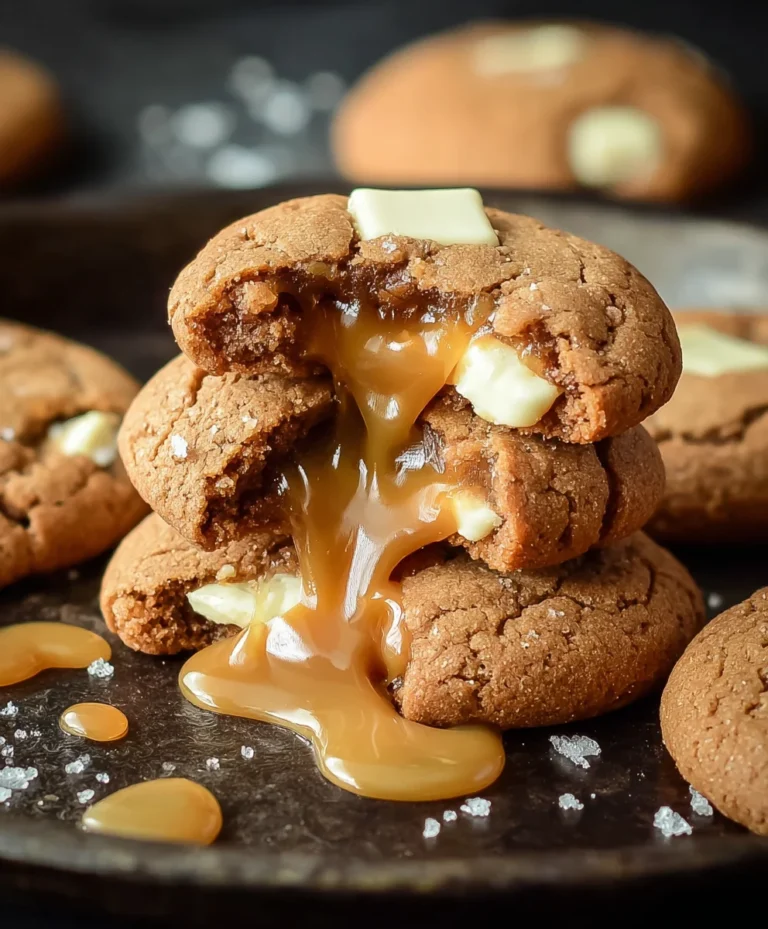
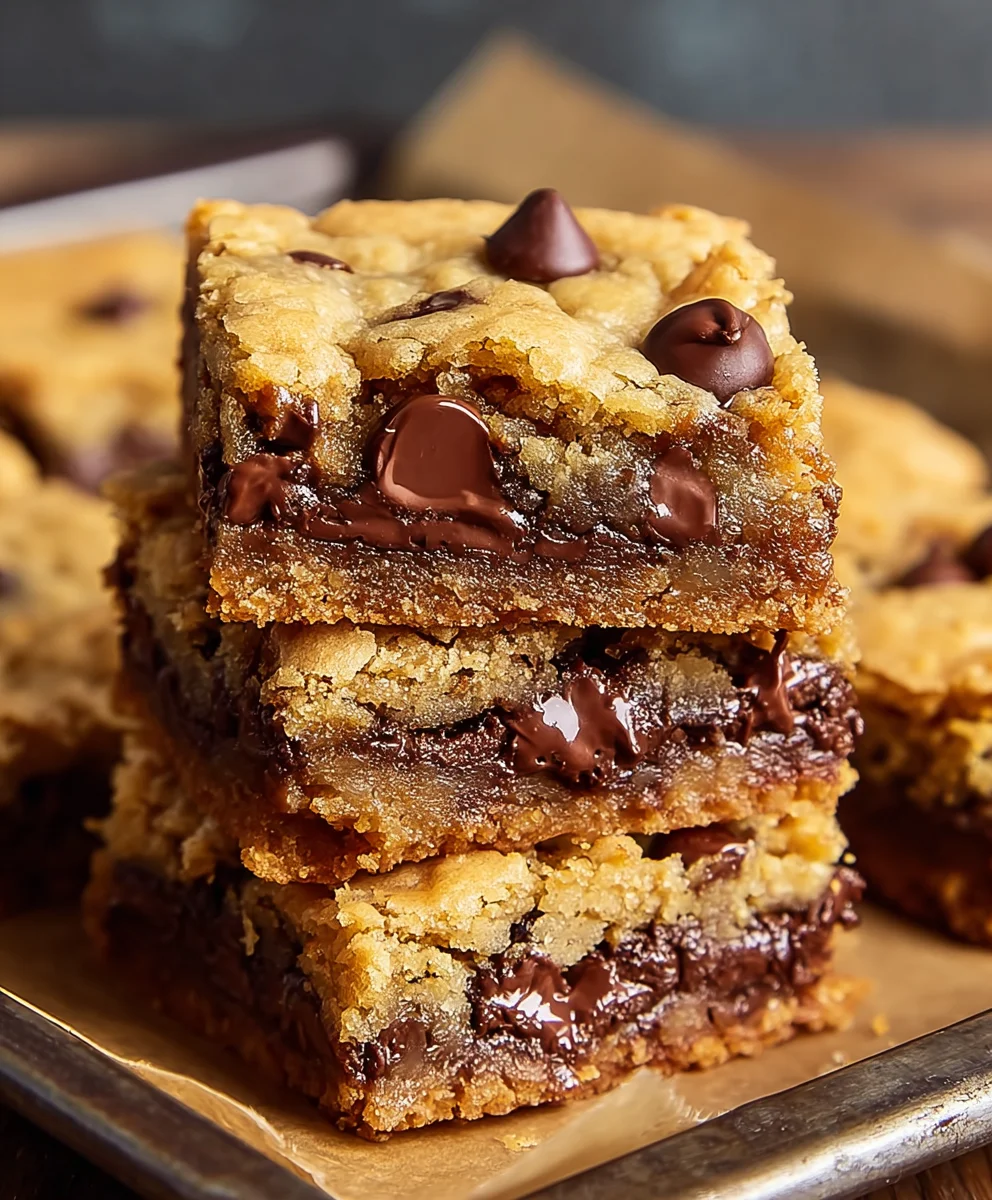
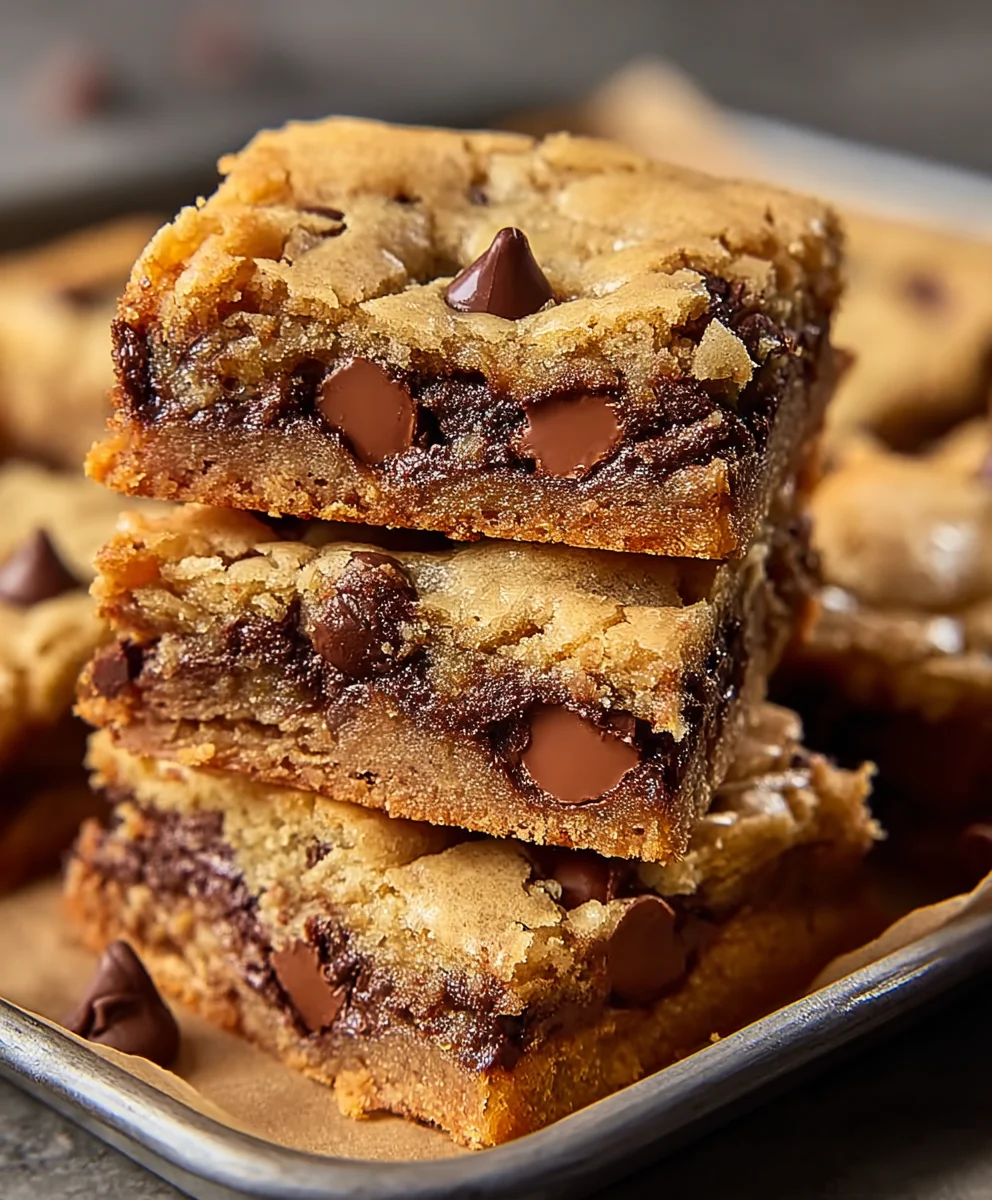
Gooey Chocolate Chip Cookie Bars-Easy Recipe
Gooey Chocolate Chip Cookie Bars are more than just a dessert; they’re a warm hug in every bite, a nostalgic trip back to childhood kitchens, and the ultimate crowd-pleaser for any occasion. What is it about these irresistible bars that captures our hearts and taste buds? It’s that perfect marriage of chewy cookie base and molten chocolate pockets, baked into an easy-to-share format that eliminates the need for precise scooping. Unlike traditional cookies, these Gooey Chocolate Chip Cookie Bars offer a delightfully fudgy texture throughout, with edges that bake to a delightful crisp while the center remains wonderfully soft and decadent. They’re surprisingly simple to make, requiring minimal fuss for maximum flavor impact, making them a go-to for busy bakers and chocolate lovers alike. Get ready to experience pure bliss with every square!
Ingredients:
- 1 1/2 cups all-purpose flour
- 1/2 teaspoon baking soda
- 1/4 teaspoon baking powder
- 1/2 teaspoon sea salt
- 1/2 cup butter, softened
- 1/2 cup granulated sugar
- 1/2 cup light brown sugar, packed
- 1 large egg
- 1 1/2 teaspoon vanilla extract
- 1 cup chocolate chips (half a 12 oz bag)
Preparing for Gooey Perfection
Preheating and Pan Prep
The first step in creating your delicious Gooey Chocolate Chip Cookie Bars is to preheat your oven and prepare your baking pan. This ensures even baking and easy removal of your bars once they’re golden and delicious. Preheat your oven to 350 degrees Fahrenheit (175 degrees Celsius). This is the ideal temperature for baking cookies and cookie bars, allowing them to cook through without burning on the edges. Next, grab an 8×8 inch baking pan. I find that lining it with parchment paper is the absolute best way to guarantee your bars won’t stick. Cut a piece of parchment paper that’s large enough to overhang the sides of the pan, creating natural “handles.” This will make lifting the entire block of cookie bars out of the pan a breeze once they’re cooled. You can lightly grease the pan before laying the parchment paper down if you’re feeling extra cautious, but usually, the parchment is sufficient. Set this prepared pan aside while you mix up your dough.
Creating the Cookie Bar Dough
Dry Ingredients Whisking
In a medium-sized bowl, we’re going to combine our dry ingredients. This step is crucial for distributing the leavening agents and salt evenly throughout the flour, which helps ensure a consistent texture and flavor in every bite. Add the 1 1/2 cups of all-purpose flour, 1/2 teaspoon of baking soda, 1/4 teaspoon of baking powder, and 1/2 teaspoon of sea salt to the bowl. Use a whisk to thoroughly combine these ingredients. Whisking them together not only mixes them but also aerates the flour slightly, contributing to a lighter texture. Make sure there are no clumps of baking soda or powder. Once everything is well incorporated, set this bowl aside.
Creaming Butter and Sugars
Now for the heart of our cookie dough: the butter and sugars. In a large mixing bowl, combine the 1/2 cup of softened butter with the 1/2 cup of granulated sugar and the 1/2 cup of light brown sugar (make sure it’s packed). “Softened” butter means it should be pliable and easy to indent with your finger, but not melted. If your butter is too cold, it won’t cream properly, and if it’s melted, your bars will spread too much. Using a hand mixer or a stand mixer with the paddle attachment, cream these ingredients together until the mixture is light and fluffy. This process incorporates air into the dough, which is essential for creating that tender, melt-in-your-mouth texture. Scrape down the sides of the bowl periodically to ensure all the butter and sugar are evenly mixed. This usually takes about 2-3 minutes of vigorous mixing.
Adding Wet Ingredients
Once your butter and sugar mixture is nice and creamy, it’s time to add the wet ingredients. Crack in the 1 large egg. Make sure the egg is at room temperature, as this helps it incorporate smoothly into the dough. Add the 1 1/2 teaspoons of vanilla extract. The vanilla extract is key for adding that classic, comforting cookie flavor that pairs so perfectly with chocolate. Beat these ingredients into the creamed butter and sugar mixture until just combined. Don’t overmix at this stage; we just want everything to come together into a cohesive, smooth batter.
Incorporating Dry and Wet Ingredients
Now, we’ll gradually add our dry ingredients to the wet ingredients. It’s best to do this in two or three additions. Add about half of the flour mixture to the wet ingredients and mix on low speed until just combined. Then, add the remaining flour mixture and mix again until no dry streaks of flour remain. Be careful not to overmix the dough once the flour is added. Overmixing can develop the gluten in the flour too much, resulting in tougher cookie bars, and we’re aiming for gooeyness! You should have a thick, cookie dough-like consistency at this point.
Folding in the Chocolate Chips
The final ingredient to add is the star of the show: the chocolate chips! Gently fold in the 1 cup of chocolate chips. I like to use a spatula for this, ensuring that the chips are evenly distributed throughout the dough without breaking them up too much. Some bakers prefer to reserve a few chips to press into the top of the dough before baking for an extra chocolatey presentation, which is a lovely touch. Make sure every corner of the dough gets some chocolatey goodness.
Baking and Cooling Your Gooey Bars
Spreading the Dough
Carefully spoon the cookie dough into your prepared 8×8 inch baking pan. Since the dough is quite thick, you might need to use your hands (lightly greased or floured if you prefer) or a spatula to evenly spread it out into an even layer. Try to get the surface as smooth as possible for uniform baking. Don’t worry if it’s not perfectly smooth; the charm of cookie bars is their rustic appeal.
Baking to Golden Perfection
Place the pan in your preheated oven. Bake for approximately 20-25 minutes. The exact baking time will depend on your oven, so keep an eye on them. You’re looking for the edges to be golden brown and set, while the center should still look slightly soft and gooey. This is the key to achieving that wonderfully gooey texture. If the edges start to brown too quickly, you can loosely tent the pan with aluminum foil for the remainder of the baking time.
The Crucial Cooling Phase
This is perhaps the most challengin extractg part – waiting! Once baked, remove the pan from the oven and place it on a wire rack to cool completely. Do NOT try to cut into the bars while they are hot or even warm. They need time to set up properly. As the Gooey Chocolate Chip Cookie Bars cool, the center will firm up just enough to be cut into clean, delicious squares while retaining their gooeyness. Allowing them to cool in the pan for at least 2-3 hours, or even overnight if you can resist, will yield the best results for cutting.
Cutting and Enjoying
Once completely cooled, use the parchment paper handles to lift the entire block of cookie bars out of the pan and onto a cutting board. Use a sharp knife to cut them into your desired size squares. For that ultimate gooey experience, I love them when they are still slightly warm, but cutting them after they have fully cooled makes them much easier to handle and transport. Serve them as is, or with a scoop of vanilla ice cream for an extra decadent treat.
Conclusion:
There you have it! Your ultimate guide to baking the most incredibly Gooey Chocolate Chip Cookie Bars. We’ve walked through each step, from perfectly creaming your butter and sugar to achieving that irresistible, molten chocolate center. These bars are a crowd-pleaser for any occasion, whether it’s a casual get-together, a potluck, or just a sweet treat for yourself after a long day. The beauty of these Gooey Chocolate Chip Cookie Bars lies in their simplicity and their ability to bring smiles to everyone’s faces.
For serving suggestions, consider enjoying them warm with a scoop of vanilla bean ice cream for the ultimate indulgence. They are also fantastic at room temperature, making them perfect for packing into lunchboxes or taking on picnics. Don’t be afraid to get creative with variations! Try adding a sprinkle of sea salt on top before baking for a sweet and salty contrast, or mix in chopped nuts like walnuts or pecans for added texture and flavor. You could even swirl in some caramel or peanut butter for an extra layer of deliciousness. We encourage you to bake these Gooey Chocolate Chip Cookie Bars with joy and experiment with your own unique twists. Happy baking!
Frequently Asked Questions:
Why are my Gooey Chocolate Chip Cookie Bars not gooey enough?
The key to gooiness lies in not overbaking. Make sure your oven temperature is accurate and pull the bars out when the edges are set but the center still looks slightly underbaked. They will continue to cook and set as they cool on the baking sheet.
Can I make Gooey Chocolate Chip Cookie Bars ahead of time?
Yes, you can! Once completely cooled, store them in an airtight container at room temperature for up to 3 days. For longer storage, you can wrap them tightly and freeze them for up to 2 months. Reheat gently in a low oven or microwave to enjoy that gooey texture again.
Gooey Chocolate Chip Cookie Bars-Easy Recipe
Deliciously gooey chocolate chip cookie bars with a soft, chewy center and slightly crisp edges. An easy recipe perfect for any occasion.
Ingredients
-
1 1/2 cups all-purpose flour
-
1/2 teaspoon baking soda
-
1/4 teaspoon baking powder
-
1/2 teaspoon sea salt
-
1/2 cup butter, softened
-
1/2 cup granulated sugar
-
1/2 cup light brown sugar, packed
-
1 large egg
-
1 1/2 teaspoon vanilla extract
-
1 cup chocolate chips
Instructions
-
Step 1
Preheat your oven to 350 degrees Fahrenheit (175 degrees Celsius). Line an 8×8 inch baking pan with parchment paper, ensuring it overhangs the sides for easy removal. -
Step 2
In a medium bowl, whisk together the flour, baking soda, baking powder, and sea salt. Set aside. -
Step 3
In a large bowl, cream together the softened butter, granulated sugar, and packed light brown sugar until light and fluffy. Beat in the egg and vanilla extract until just combined. -
Step 4
Gradually add the dry ingredients to the wet ingredients, mixing on low speed until just combined. Be careful not to overmix. Fold in the chocolate chips. -
Step 5
Spoon the dough into the prepared baking pan and spread evenly. Bake for 20-25 minutes, or until the edges are golden brown and the center is still soft. -
Step 6
Let the bars cool completely in the pan on a wire rack for at least 2-3 hours before cutting into squares. This is crucial for achieving the gooey texture.
Important Information
Nutrition Facts (Per Serving)
It is important to consider this information as approximate and not to use it as definitive health advice.
Allergy Information
Please check ingredients for potential allergens and consult a health professional if in doubt.