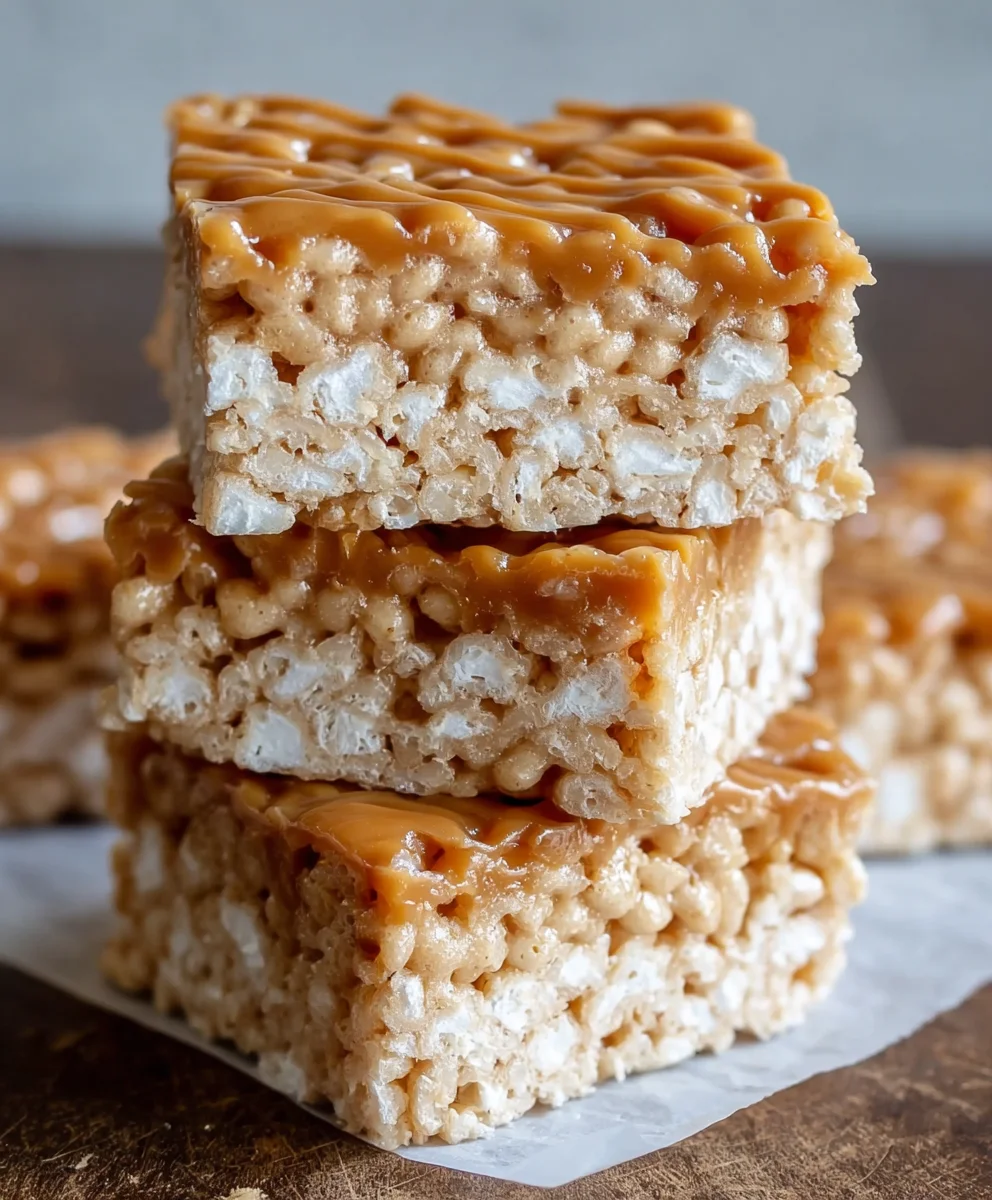
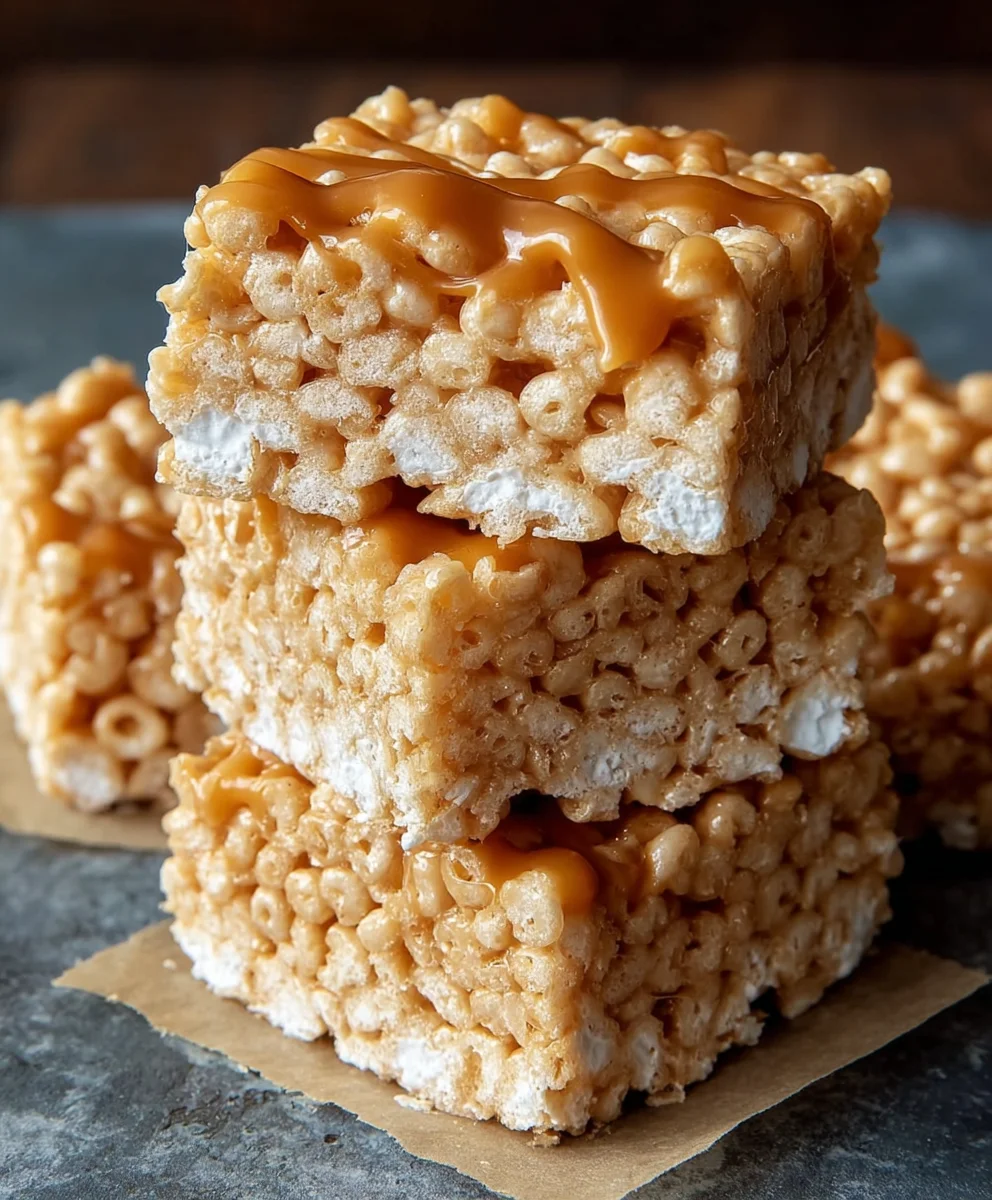
Brown Butter Dulce de Leche Rice Krispie Treats
Brown Butter Dulce de Leche Rice Krispie Treats are more than just a nostalgic childhood favorite; they’re an elevated indulgence that will transport your taste buds to pure bliss. We all remember the simple joy of a classic Rice Krispie treat, but imagin extracte that familiar crunch infused with the nutty, aromatic depth of browned butter and the rich, caramel-kissed sweetness of dulce de leche. This isn’t your grandmother’s recipe (though we love hers too!), this is an upgraded version that takes a beloved classic and turns it into an extraordinary dessert. People adore these treats because they offer a perfect balance of textures and flavors – the satisfying crispness of the cereal, the chewy gooeyness of the marshmallow, and that unparalleled, slightly salty, deeply satisfying caramel note from the dulce de leche, all amplified by the sophisticated warmth of brown butter. It’s this magical combination that makes Brown Butter Dulce de Leche Rice Krispie Treats so incredibly special and utterly irresistible.
Ingredients:
- 5 tablespoons unsalted butter
- 1/4 teaspoon pure vanilla extract
- 10 cups mini marshmallows, divided (8 cups for melting, 2 cups reserved for texture)
- 6 cups Cinnamon Sugar flavored Rice Krispies cereal
- 1/2 teaspoon fine grain sea salt
- 1/2 can (approximately 6-7 ounces) dulce de leche
Preparing Your Workspace and Ingredients
Gathering Your Tools
Before we dive into creating these decadent Brown Butter Dulce de Leche Rice Krispie Treats, it’s crucial to have everything ready. This makes the process smooth and enjoyable. You’ll need a large, sturdy mixing bowl, a saucepan (preferably non-stick or stainless steel), a spatula or large spoon for stirring, a 9×13 inch baking pan, and parchment paper or cooking spray to prepare the pan. Having all your ingredients measured out and within easy reach is a chef’s secret to success, especially when working with melting marshmallows, which can seize up quickly if you’re not prepared. Take a moment to line your 9×13 inch baking pan with parchment paper, leaving some overhang on the sides. This will make it incredibly easy to lift the treats out once they’ve set. Alternatively, you can grease the pan generously with cooking spray or butter.
Crafting the Brown Butter Base
Melting and Browning the Butter
Our journey to extraordinary Rice Krispie Treats begin extracts with the foundation: brown butter. This step adds a nutty depth and a sophisticated caramel-like aroma that elevates these beyond the ordinary. Place the 5 tablespoons of unsalted butter into your saucepan over medium heat. As the butter melts, you’ll notice itgin extractll begin to foam. Keep a close eye on it, swirling the pan occasionally. Once the foaming subsides, you’ll see tinygin extractown flecks begin to form at the bottom of the pan, and the butter will take on a golden-brown hue. This is the magic happening! The milk solids are toasting, releasing an incredible aroma. Be careful not to burn it; this process takes only a few minutes. Once you achieve a rich, nutty scent and a beautiful amber color, immediately remove the pan from the heat to prevent further cooking. Carefully pour the browned butter into your large mixing bowl, leaving behind any excess brown sediment if you prefer a cleaner flavor, though a little bit of the sediment adds character.
Incorporating the Marshmallows and Dulce de Leche
Melting the Marshmallows and Swirling in Sweetness
Now, add 8 cups of the mini marshmallows to the warm, browned butter in the mixing bowl. The residual heatgin extractom the butter will begin to melt the marshmallows. If the butter isn’t quite hot enough to initiate melting, you can gently place the bowl over the still-warm (but turned off) saucepan for a minute or two, stirring continuously. Once the marshmallows are mostly melted and gooey, it’s time to introduce the star flavor: the dulce de leche. Spoon approximately half a can of dulce de leche (about 6-7 ounces) into the molten marshmallow mixture. You don’t need to be exact; the beautiful swirls are part of the charm. Gently fold the dulce de leche into the marshmallow mixture with your spatula. Avoid overmixing; you want to create ribbons of caramel sweetness throughout, not a uniform brown color. Think of it as marbling.
Adding the Flavor and Texture
The Symphony of Ingredients
To this luscious, caramel-infused marshmallow mixture, add the 1/4 teaspoon of pure vanilla extract and the 1/2 teaspoon of fine grain sea salt. The vanilla enhances the sweetness and caramel notes, while the salt is absolutely critical for balancing the sweetness and amplifying all the flavors. Stir these in gently until just combined. Now, it’s time for the cereals. Add the 6 cups of Cinnamon Sugar flavored Rice Krispies cereal to the bowl. Gently fold the cereal into the marshmallow mixture, ensuring each crispy piece is coated. Be mindful not to crush the cereal; we want to maintain its satisfying crunch. Finally, fold in the reserved 2 cups of whole mini marshmallows. These will remain mostly intact, providing delightful pockets of gooey texture and a visual appeal that hints at the deliciousness within. The cinnamon sugar flavor of the cereal already brings a warm spice, perfectly complementing the brown butter and dulce de leche.
Pressing and Setting Your Masterpiece
Shaping the Treats
Pour the coated cereal mixture into your prepared 9×13 inch baking pan. Using your lightly greased spatula or the parchment paper overhang, gently press the mixture evenly into the pan. The key here is to press firmly enough to compact the treats so they hold their shape, but not so hard that you crush the cereal. You want a nice, even surface for cutting. You can also lightly grease your hands with cooking spray or butter to help with the pressing if you prefer. Once pressed, allow the Rice Krispie Treats to set at room temperature for at least 30 minutes. Resist the urge to cut them too soon; they need this time to firm up. For even quicker setting or if you’re in a hurry, you can place the pan in the refrigerator for about 15-20 minutes. Once set, use the parchment paper to lift the entire slab out of the pan onto a cutting board. Slice into squares or rectangles with a sharp knife.
Conclusion:
And there you have it – your guide to creating the most irresistible Brown Butter Dulce de Leche Rice Krispie Treats! We’ve walked through each step to ensure your batch turns out perfectly chewy, gooey, and packed with that incredible nutty brown butter and rich dulce de leche flavor. These treats are truly a step above the classic, offering a sophisticated twist that will impress everyone.
For serving suggestions, these are fantastic on their own as a sweet snack, but they also make a delightful addition to any dessert table. Consider cutting them into smaller squares for parties or serving them alongside a scoop of vanilla bean ice cream for an extra decadent experience. For variations, don’t be afraid to experiment! A sprinkle of sea salt on top before they set enhances the sweetness beautifully. You could also fold in some chopped toasted pecans or walnuts for added crunch and flavor. Feel free to drizzle them with a little extra dulce de leche or even a touch of chocolate. I encourage you to try this recipe and make it your own. The joy of baking is in the creativity and the delicious results!
Frequently Asked Questions:
Can I use regular butter instead of browning it?
While you can certainly use regular melted butter, browning it is key to unlocking that distinct nutty and rich flavor profile that makes these Brown Butter Dulce de Leche Rice Krispie Treats so special. The process is simple and the flavor payoff is significant!
How should I store these treats?
To keep your Brown Butter Dulce de Leche Rice Krispie Treats fresh, store them in an airtight container at room temperature for up to 3 days. Avoid refrigerating them, as this can make them too hard and chewy. If you need to stack them, place parchment paper between layers to prevent sticking.
Brown Butter Dulce de Leche Rice Krispie Treats
Decadent Rice Krispie Treats elevated with the nutty depth of brown butter and the sweet caramel notes of dulce de leche. The cinnamon sugar cereal adds a warm spice, and reserved marshmallows provide delightful pockets of gooey texture.
Ingredients
-
5 tablespoons unsalted butter
-
1/4 teaspoon pure vanilla extract
-
10 cups mini marshmallows, divided
-
6 cups Cinnamon Sugar flavored Rice Krispies cereal
-
1/2 teaspoon fine grain sea salt
-
1/2 can (approximately 6-7 ounces) dulce de leche
Instructions
-
Step 1
Prepare a 9×13 inch baking pan by lining it with parchment paper or greasing it well with cooking spray or butter. -
Step 2
In a saucepan over medium heat, melt 5 tablespoons of unsalted butter. Continue to cook, swirling occasionally, until the butter turns a golden-brown color and develops a nutty aroma. Immediately remove from heat and carefully pour into a large mixing bowl. -
Step 3
Add 8 cups of mini marshmallows to the warm brown butter. Stir until mostly melted and gooey. Spoon in about half a can (6-7 ounces) of dulce de leche and gently fold it into the marshmallow mixture to create swirls. Do not overmix. -
Step 4
Add 1/4 teaspoon of vanilla extract and 1/2 teaspoon of fine grain sea salt to the mixture. Stir gently to combine. Then, add 6 cups of Cinnamon Sugar flavored Rice Krispies cereal and gently fold until evenly coated. Finally, fold in the remaining 2 cups of whole mini marshmallows. -
Step 5
Pour the cereal mixture into the prepared baking pan. Using a lightly greased spatula or your hands, gently press the mixture evenly into the pan. Allow to set at room temperature for at least 30 minutes, or in the refrigerator for 15-20 minutes. -
Step 6
Once set, lift the slab out of the pan using the parchment paper and slice into desired squares or rectangles with a sharp knife.
Important Information
Nutrition Facts (Per Serving)
It is important to consider this information as approximate and not to use it as definitive health advice.
Allergy Information
Please check ingredients for potential allergens and consult a health professional if in doubt.