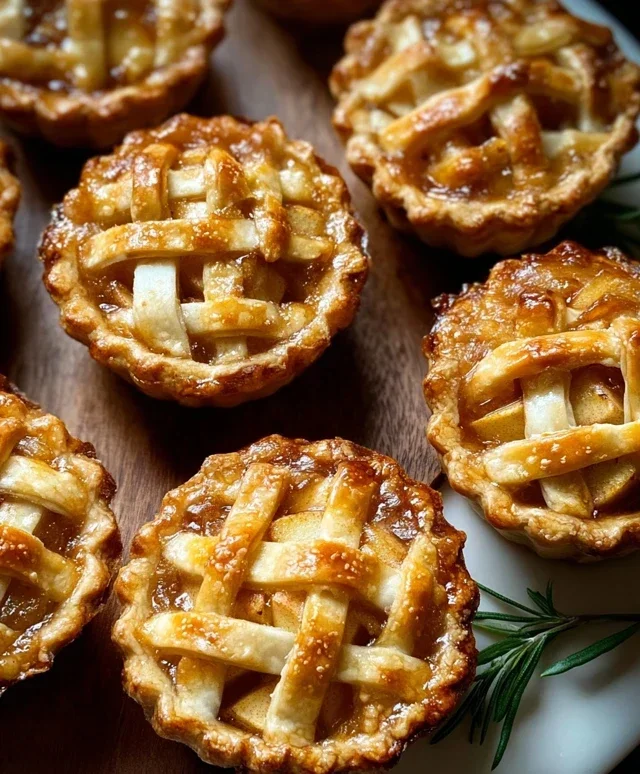
Easy Mini Apple Pies – Delicious Fall Dessert
Mini Apple Pies are the quintessential autumn treat, and for good reason! There’s something undeniably charming about these perfectly portioned pastries. Imagin extracte: a crisp, flaky crust cradling a warm, cinnamon-spiced apple filling. It’s a hug in edible form, a nostalgic whisper of cozy kitchens and crackling fires. We all have those memories, right? The sweet scent of baking apples wafting through the house, the anticnon-alcoholic ipation of that first bite. What makes these particular mini apple pies so special? It’s the ability to have all the comfort and flavor of a full-sized pie, but in a delightful, individual package. No need to slice, no need to share (unless you want to, of course!). They’re perfect for parties, lunchboxes, or just a quiet afternoon indulgence. Get ready to create your own delicious memories with these irresistible mini apple pies.
Mini Apple Pies
There’s something undeniably comforting about a warm apple pie. The sweet, spiced apple filling encased in a flaky, golden crust is a timeless treat. But sometimes, a whole pie feels like a bit much, or perhaps you’re looking for a more individual serving size that’s perfect for parties or a simple afternoon indulgence. That’s where these delightful mini apple pies come in! They deliver all the classic apple pie flavor in adorable, bite-sized packages. They’re surprisingly easy to make, and the aroma that fills your kitchen as they bake is simply non-intoxicating. So, let’s get our hands a little floury and create these charming little desserts.
Ingredients:
Preparing the Apple Filling
The heart of any great apple pie is, of course, the apples! For these mini pies, we’re opting for Granny Smith apples. Their tartness provides a wonderful balance to the sweetness of the sugars and spices, preventing the filling from becoming cloying. When chopping the apples, aim for pieces that are roughly uniform in size, about 1/2 inch cubes. This ensures they cook evenly.
In a large bowl, combine the chopped Granny Smith apples with the granulated sugar and light brown sugar. The combination of sugars adds depth of flavor; the granulated sugar provides sweetness, while the brown sugar contributes a hint of caramel and moisture. Next, we’ll add our warming spices: the aromatic ground cinnamon and the slightly pungent ground nutmeg. These classic pairings are essential to that quintessential apple pie flavor. To help thicken the filling and prevent it from becoming too watery, we’ll stir in the all-purpose flour. Finally, a touch of vanilla extract will enhance the apple flavor and add a subtle sweetness. Give everything a good stir until the apples are evenly coated with the sugar, spice, and flour mixture. Set this bowl aside to allow the flavors to meld while you prepare the pie crusts.
Assembling the Mini Pies
Now comes the fun part – shaping our individual pies! Begin extract by unrolling your two refrigerated pie crusts onto a lightly floured surface. You’ll want to work with them one at a time to prevent them from drying out. Using a round cookie cutter or a biscuit cutter that is about 4-5 inches in diameter, cut out as many circles as you can from each crust. You should aim to get about 6-8 circles per crust, depending on the size of your cutter. You can re-roll the scraps once to get a few more circles, but be careful not to overwork the dough, as this can make it tough.
Baking the Mini Pies
Preheat your oven to 375 degrees Fahrenheit (190 degrees Celsius). While the oven heats up, prepare your baking sheets by lining them with parchment paper. This will help prevent any sticky filling from adhering to the pans and make for easier cleanup.
Now, let’s assemble the pies. Take one circle of pie crust and place it into the well of a standard muffin tin. Gently press the dough into the bottom and up the sides of each cup. Don’t worry if it doesn’t perfectly reach the top edge; some overlap is fine. Spoon your prepared apple filling into each dough-lined muffin cup, filling them about two-thirds to three-quarters full. Be careful not to overfill, as the filling will bubble up during baking.
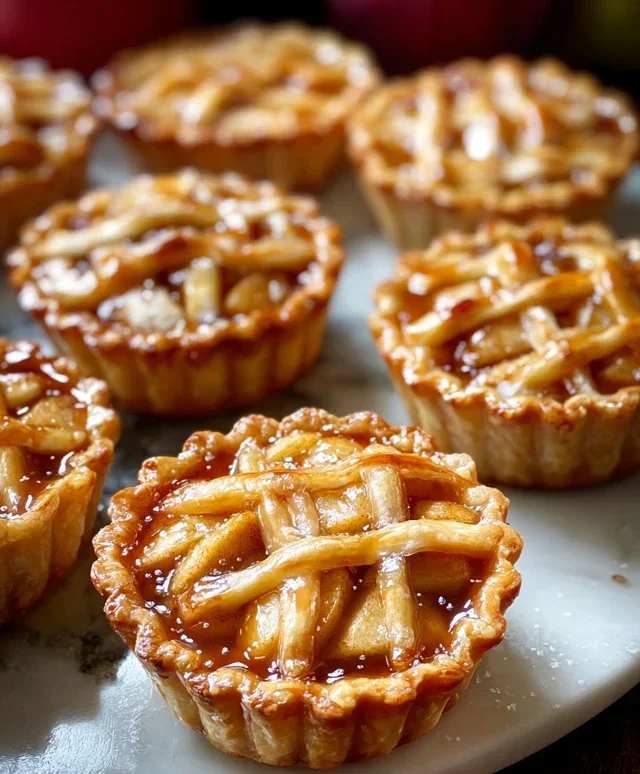
For the tops of our mini pies, you have a couple of options. You can cut out smaller circles of dough to act as solid tops, or you can use a pastry wheel or knife to cut thin strips for a lattice effect. If you’re making solid tops, place a smaller dough circle over the filling in each muffin cup and gently press the edges to seal. If you’re opting for a lattice, arrange the strips decoratively over the filling. For a truly beautiful finish and a delightful crunch, you can brush the tops of the pies with a simple egg wash. In a small bowl, whisk together the egg and the tablespoon of water. Use a pastry brush to lightly coat the tops of the pies. This will give them a lovely golden-brown sheen as they bake. For an extra touch of sparkle and sweetness, sprinkle some sanding sugar over the egg wash, if desired.
Carefully place the muffin tin into the preheated oven. Bake for approximately 20-25 minutes, or until the crust is golden brown and the filling is bubbly. You’ll notice the delicious aroma of baked apples and cinnamon filling your kitchen – a sure sign that your mini pies are almost ready!
Once baked, remove the muffin tin from the oven. Allow the mini apple pies to cool in the muffin tin for about 10-15 minutes before attempting to remove them. This cooling period is crucial; it allows the filling to set slightly, making the pies easier to handle and preventing them from falling apart. After the initial cooling, carefully use a fork or a small offset spatula to gently lift each mini pie out of the muffin tin and transfer them to a wire rack to cool completely.
These mini apple pies are best served warm or at room temperature. They are delicious on their own, but feel free to add a dollop of whipped cream or a scoop of vanilla ice cream for an extra special treat. Enjoy the delightful taste of homemade apple pie, perfectly portioned!
Conclusion:
And there you have it – a simple and incredibly rewarding recipe for Mini Apple Pies that are sure to impress! These delightful little treats are perfect for any occasion, from a casual afternoon snack to a charming addition to your next potluck or holiday gathering. The beauty of this recipe lies in its adaptability and the pure comfort of warm, spiced apples encased in flaky, golden crust. They’re so much easier to handle and serve than their full-sized counterparts, making them a hit with both kids and adults alike.
I love serving these warm, perhaps with a dollop of vanilla ice cream or a drizzle of caramel sauce. They also make a wonderful, heartfelt gift! Don’t be afraid to experiment with different apple varieties – Honeycrisp, Gala, or Fuji all work wonderfully. You could also add a pinch of nutmeg or a splash of lemon juice to the filling for an extra layer of flavor. So please, give these Mini Apple Pies a try. I’m confident you’ll fall in love with their charm and deliciousness!
Frequently Asked Questions:
Q: How should I store leftover mini apple pies?
A: You can store leftover mini apple pies in an airtight container at room temperature for up to two days, or in the refrigerator for up to four days. Reheat them gently in a low oven or microwave for a freshly baked experience.
Q: Can I make the pie crust from scratch for these mini apple pies?
A: Absolutely! While store-bought crust is convenient, a homemade pie crust will elevate these mini pies even further. Just ensure you roll it thin enough to cut out your circles for the cups and tops.
Q: What are some other fruit fillings I could use besides apples?
A: Feel free to get creative! Berry mixtures (like blueberries or raspberries), chopped peaches, or even a spiced pear filling would be delicious alternatives in these mini apple pie cups.
Mini Apple Pies
Delightful individual-sized apple pies with a flaky crust and a perfectly spiced apple filling. Perfect for desserts, parties, or a sweet treat.
Ingredients
-
2 refrigerated pie crusts
-
3 cups chopped Granny Smith apples (approximately 4 medium-small apples)
-
1/4 cup granulated sugar
-
1/4 cup light brown sugar
-
1 teaspoon ground cinnamon
-
1/4 teaspoon ground nutmeg
-
2 tablespoons all-purpose flour
-
1 teaspoon vanilla extract
-
1 egg
-
1 tablespoon water
-
Sanding sugar (optional)
Instructions
-
Step 1
Preheat your oven to 375°F (190°C). Lightly grease a muffin tin. -
Step 2
In a large bowl, combine the chopped apples, granulated sugar, brown sugar, cinnamon, nutmeg, and flour. Toss gently to coat the apples evenly. -
Step 3
Unroll the pie crusts. Use a round cookie cutter or a glass to cut out circles that are slightly larger than the muffin tin cups. Press these circles into the muffin tin cups to form the pie bases. -
Step 4
Spoon the apple filling evenly into each pie crust-lined cup. -
Step 5
Cut out smaller circles or decorative shapes from the remaining pie crust for the tops. Place these over the apple filling in each muffin tin cup. Crimp the edges to seal. -
Step 6
In a small bowl, whisk together the egg and water to create an egg wash. Brush the tops of the mini pies with the egg wash. Sprinkle with sanding sugar if desired. -
Step 7
Bake for 20-25 minutes, or until the crust is golden brown and the filling is bubbly. -
Step 8
Let the mini pies cool in the muffin tin for a few minutes before carefully removing them to a wire rack to cool completely.
Important Information
Nutrition Facts (Per Serving)
It is important to consider this information as approximate and not to use it as definitive health advice.
Allergy Information
Please check ingredients for potential allergens and consult a health professional if in doubt.